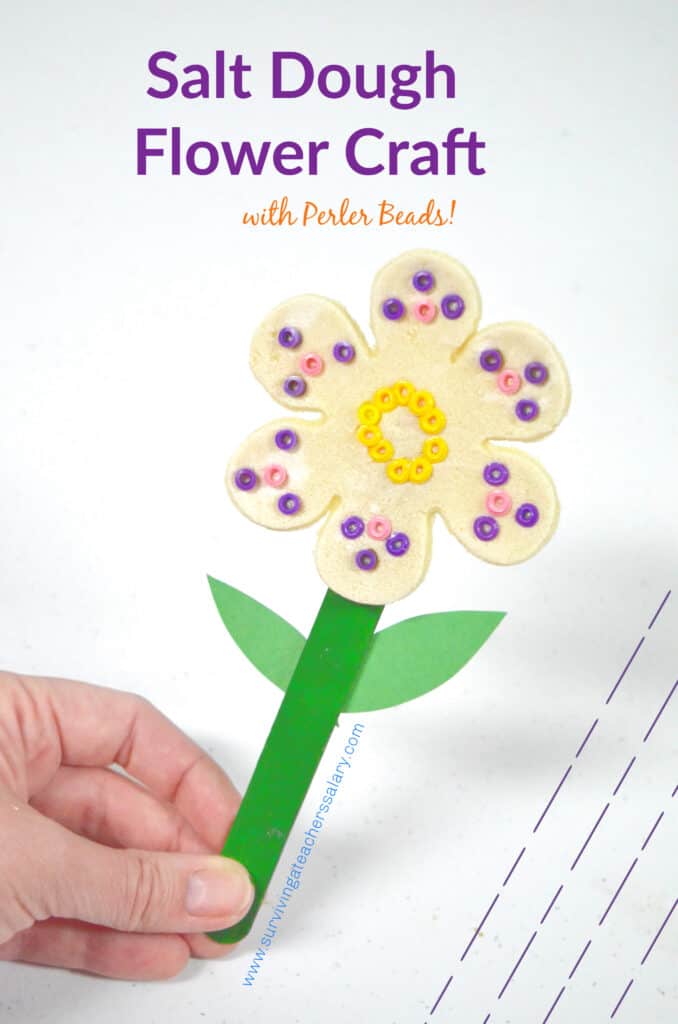
Salt Dough + Perler Bead Flower Sensory Spring Mother’s Day Craft
This post may contain affiliate links, view our disclosure policy for details.
We actually made salt dough and perler bead flowers as a spring craft but they work great for a Mother’s Day craft, placed in a terra cotta pot with black beans for pretend gardens, or glue onto a card! Below is a simple tutorial with salt dough recipe so you can make your own!
Quick Video Tutorial:
Materials Needed + Simple Salt Dough Recipe:
Perler Beads
green paint
craft stick
green construction paper
glue
Salt Dough Recipe:
1 cup of table salt
2 cups of flour
1 cup of water
Salt Dough Directions:
- Mix all dry ingredients together well. (salt and flour)
- Pour in up to 1 cup of water and mix well. You should be able to then pick it up and knead it as desired. If the mix is too sticky just grab a few small handfuls of flour and work it in.
- Flatten the salt dough mix (I used a rolling pin
 ) and use a flower cookie cutter to press out flowers.
 ) and use a
 to press out flowers.
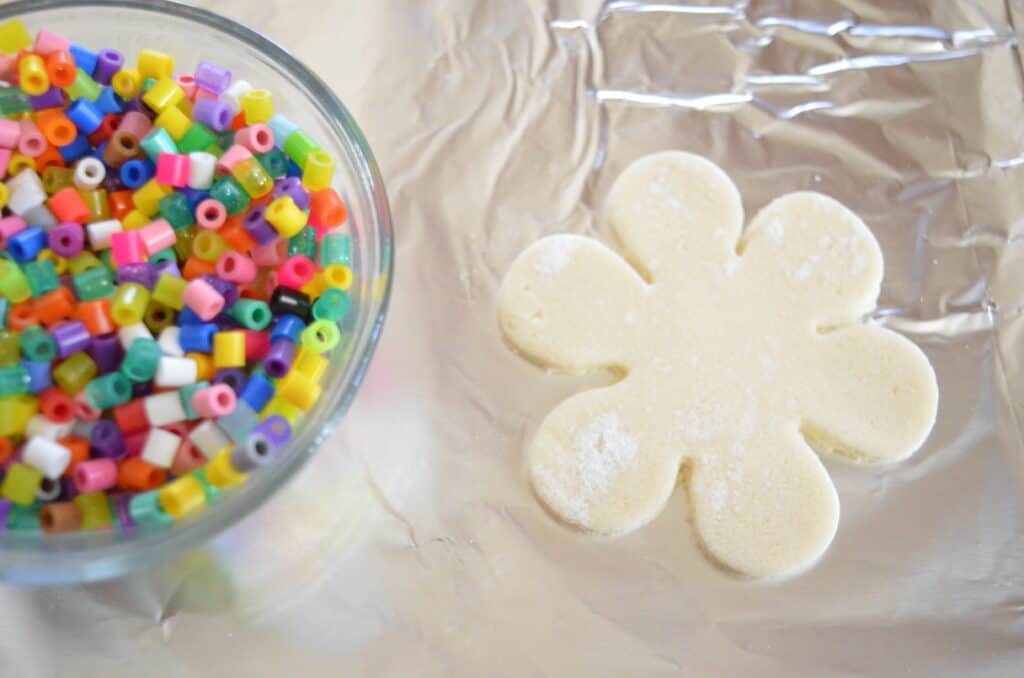
Unlike our other salt dough sensory projects, this flower salt dough project cannot be pre-baked! You’ll need fresh salt dough for this activity unless you want to skip using the perler beads  and just paint it instead. (which is OK too!) Once your flower is pressed out with your flower cookie cutter
 , grab your bowl of perler beads and choose what colors you want to use!
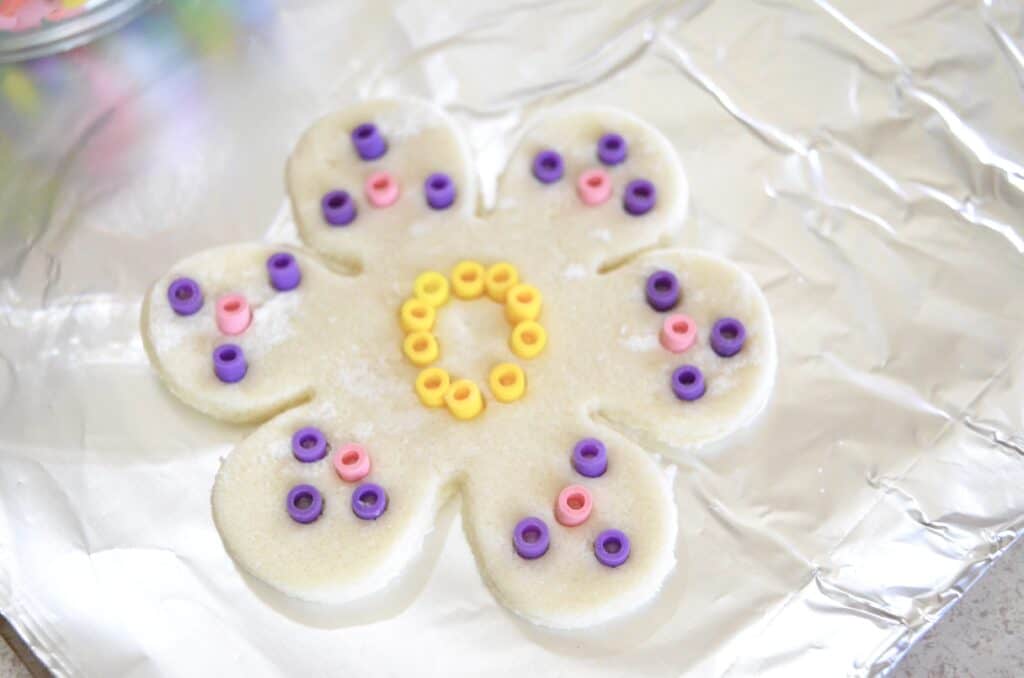
You can make your flower colors completely random or in a patter like I did above! I chose to use yellow perler beads for the middle of my flower, and outlined each petal with purple perler beads. Then I finished it off with a pink bead in the middle of the petal!
Once your flowers are designed as you want, place them in the oven at 200*F for 2 hours or longer. The perler beads will not melt completely but they will melt down enough to stay on your salt dough project without falling off!
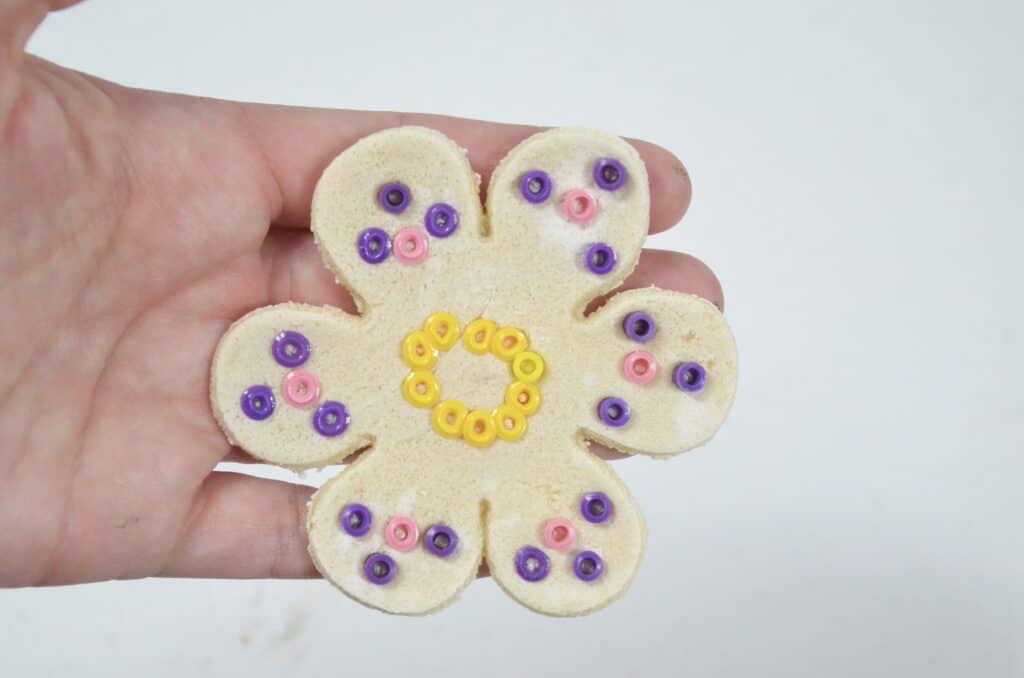
This is my finished flower after it cooled down. See how the perler beads are partially melted? It gives it a great POP and color definition! I thought that the perler beads would melt more and mesh together but they didn’t – and I actually like it better this way!
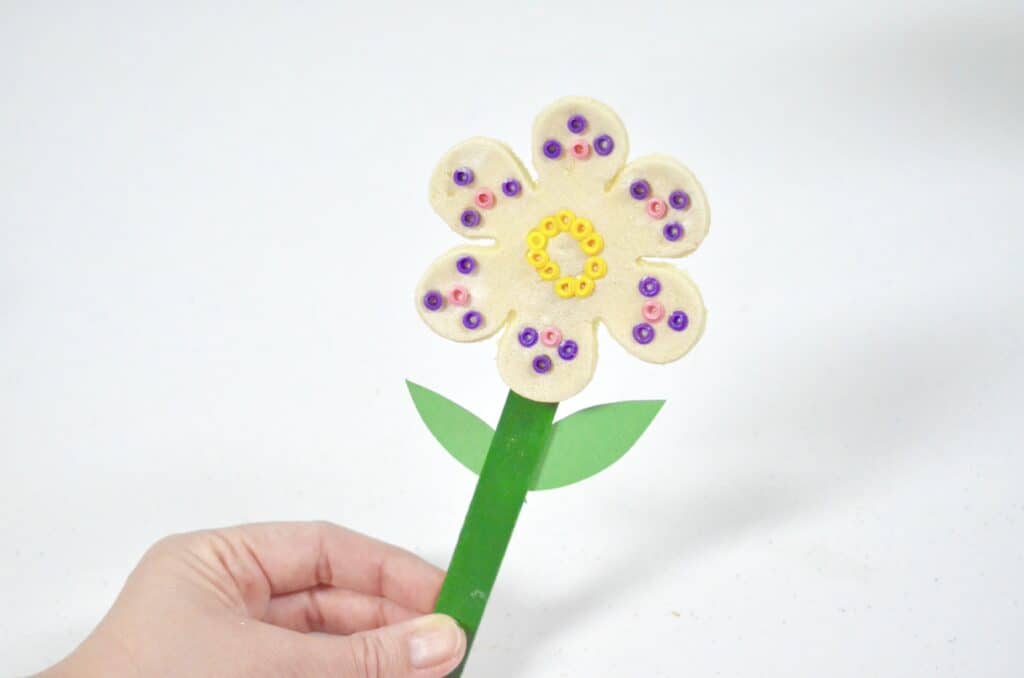
The last part is to finish prepping your flower! While your flowers are baking in the oven, paint (or use marker!) to color your craft stick green for the flower stem. Don’t forget to cut out two simple green leaves! Glue the leaves onto the “stem” and once your flower is cooler, glue that onto the stem too! That’s it!
You can modify this idea to create specific flowers, turn them into necklaces, etc.! If you’re working with a large group or classroom I recommend pre-making the salt dough before hand and cutting it out, then laying each flower onto a piece of aluminum foil with the child’s name written on the foil. Have the child decorate it, then take your cookie sheet or oven pan home to bake them all and bring them back the next day! Look for more sensory activities on our new site, Sensory Ideas for Kids!
AWESOME Posts You’ll LOVE:
Flower in my Pocket Salt Dough Project
How to Incorporate Nature into Sensory Play
Free Butterfly Flowerpot 3D Printing File
How to Make a Seed Bomb
Birds and Butterflies Sensory Bin
Dirt Pudding Recipe
Gift Ideas for BUG LOVERS
Bugs & Insects Birthday Cake Idea
FREE Backyard Birds & Hummingbirds Poster
Earth in my Pocket Salt Dough Project