

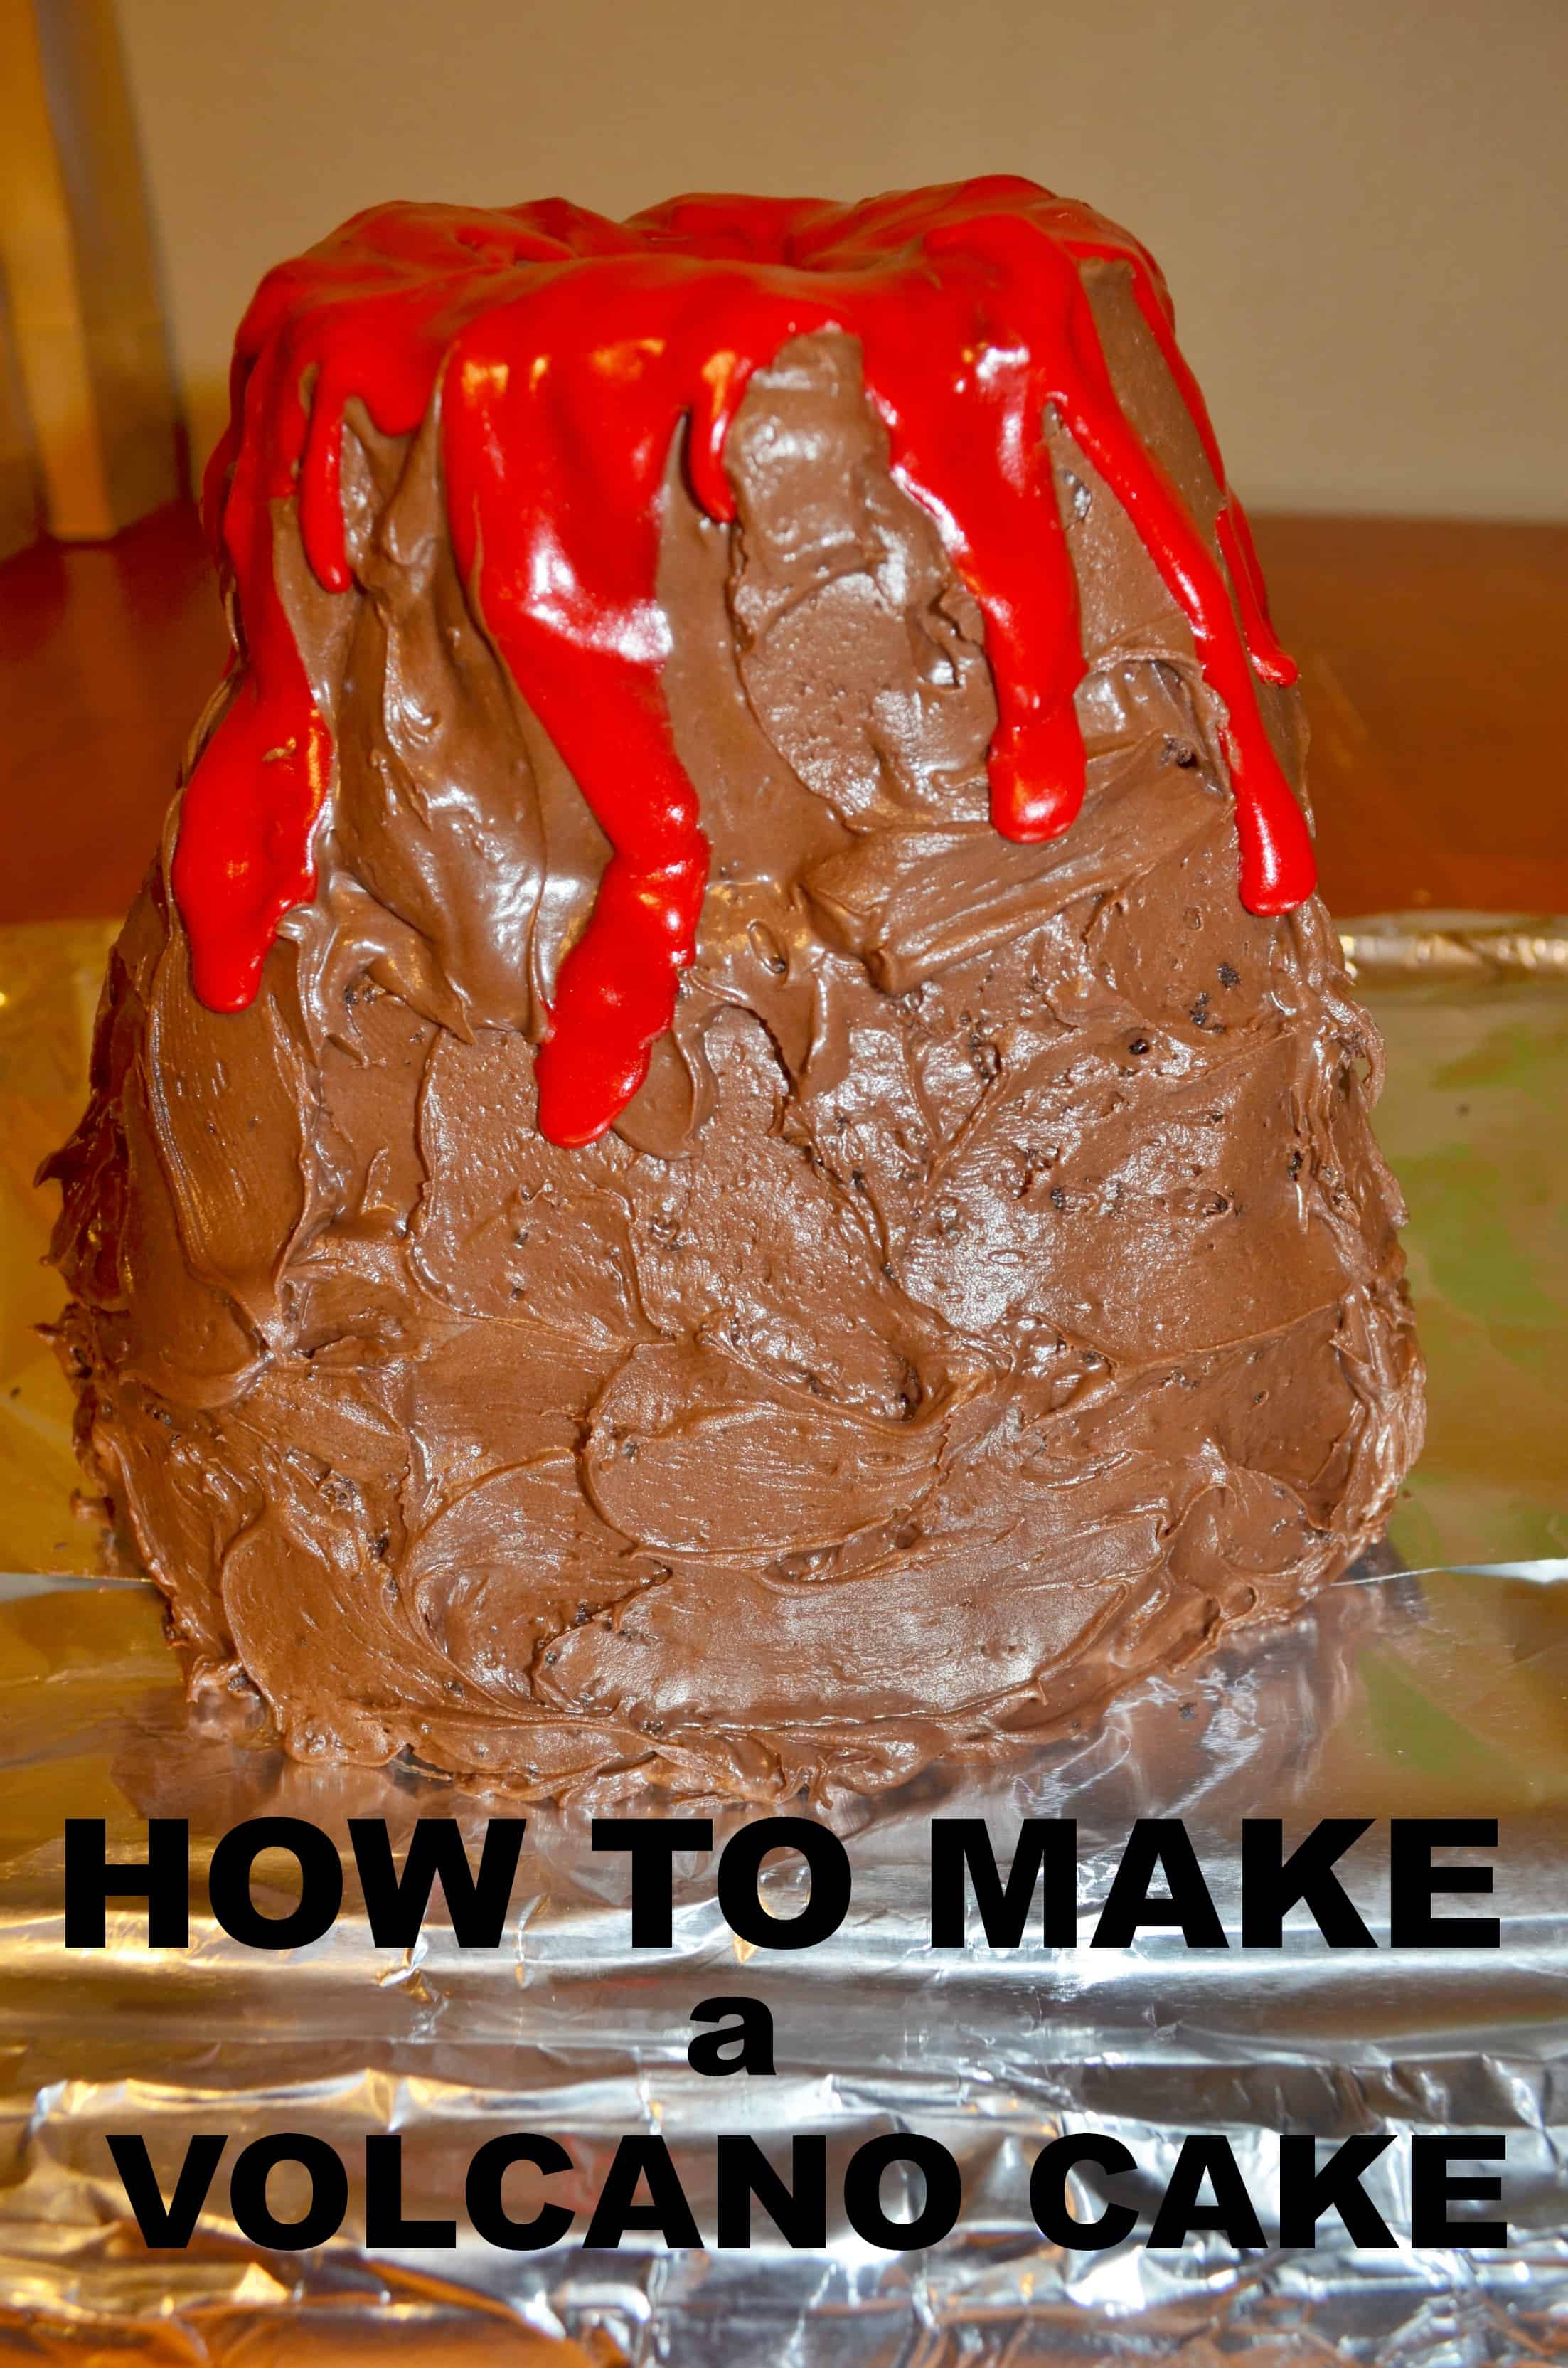
How to Make a Volcano Cake for a Dinosaur Party
This post may contain affiliate links, view our disclosure policy for details.

For my son’s 6 year old birthday party we celebrated fossils and dinosaurs and I needed an easy cake idea. (see our dinosaur & fossil party ideas here) So I decided to try out creating a volcano and dinosaur cake – it looked like a simple idea and it did turn out to be very easy to make!
Trust me – I’m no Cake Boss! Not to mention that the HUGE WOW reaction from my son and the kids totally made it worth it!
Volcano Cake Ingredients:
2 chocolate cake mixes
2 tubs chocolate frosting
1 package red frosting
2 Angel Food Cake pans

Volcano and Dinosaur Cake Instructions:
Make the cake batter as directed. I poured both of my cakes into angel food pans which made it VERY easy to remove. Follow baking directions as box indicates. When they are finished baking flip them upside down out of their baking pans and leave on a flat surface to cool off.
You can choose to freeze the cakes at this point if you are pre-making your cakes, otherwise wait for the cakes to be completely cool before continuing. Once they are completely cool stack them on top of each other.
If you used an angel food cake pan like I did you will have a hollow center.

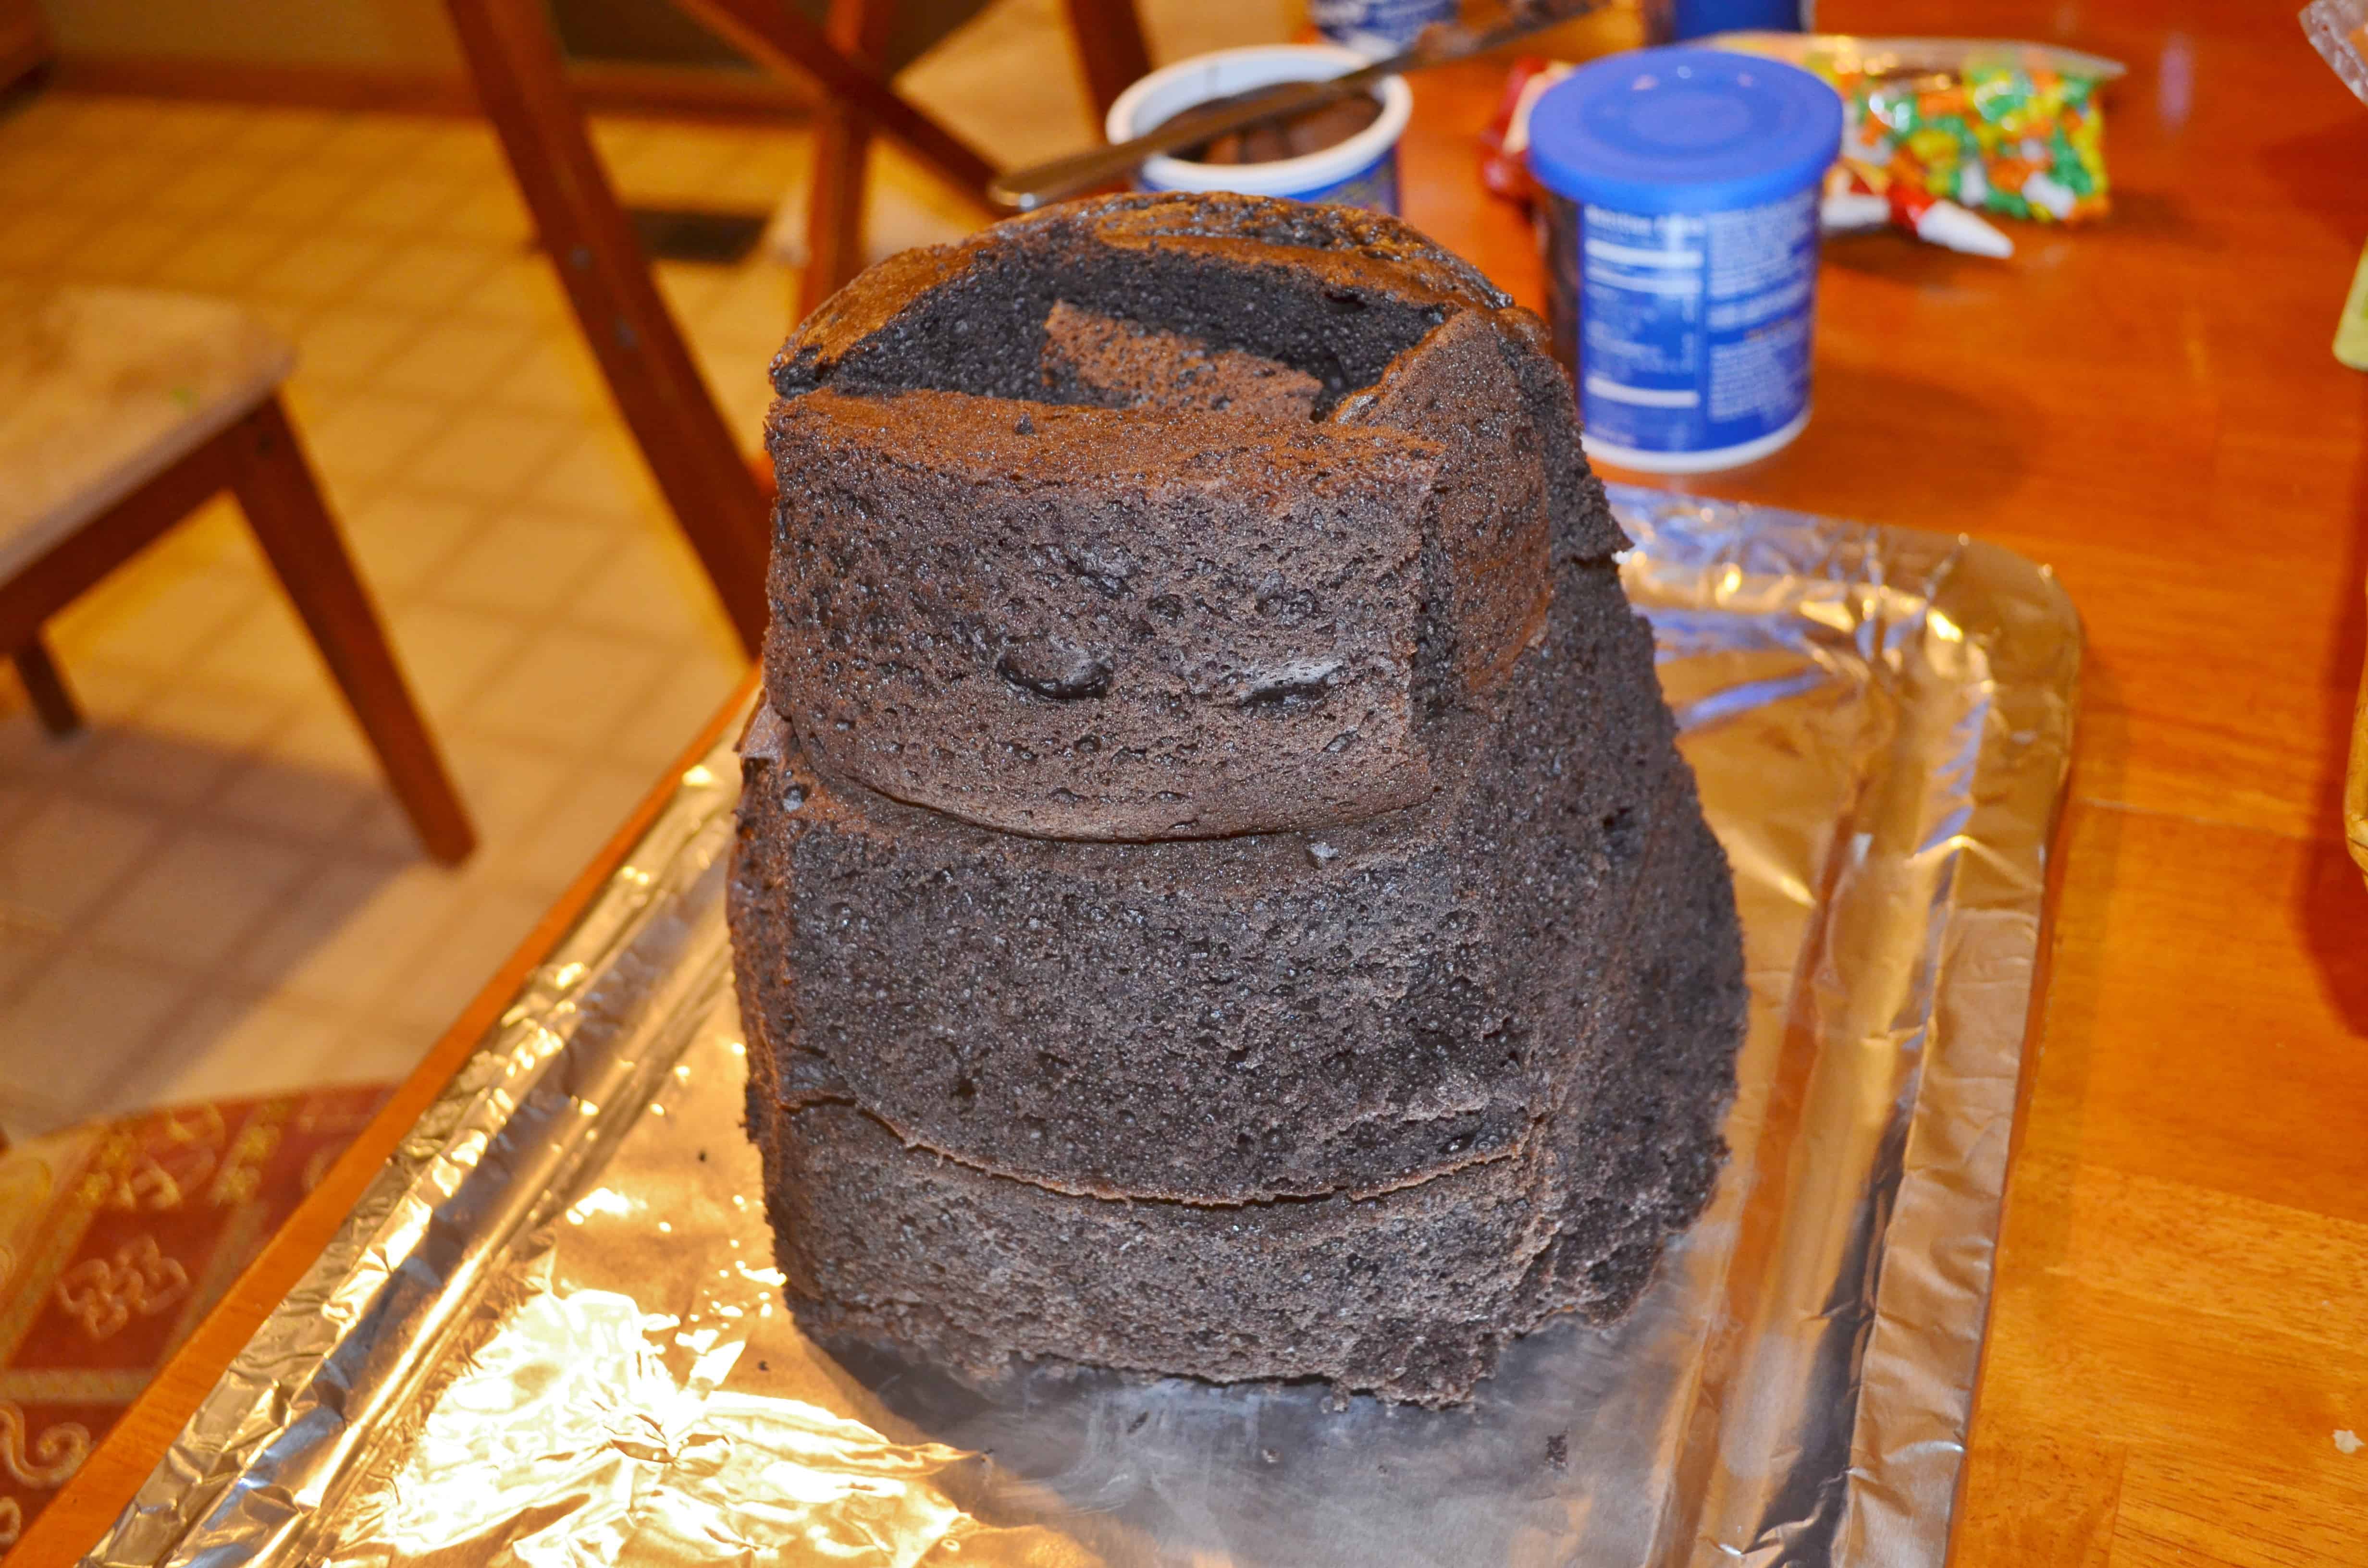
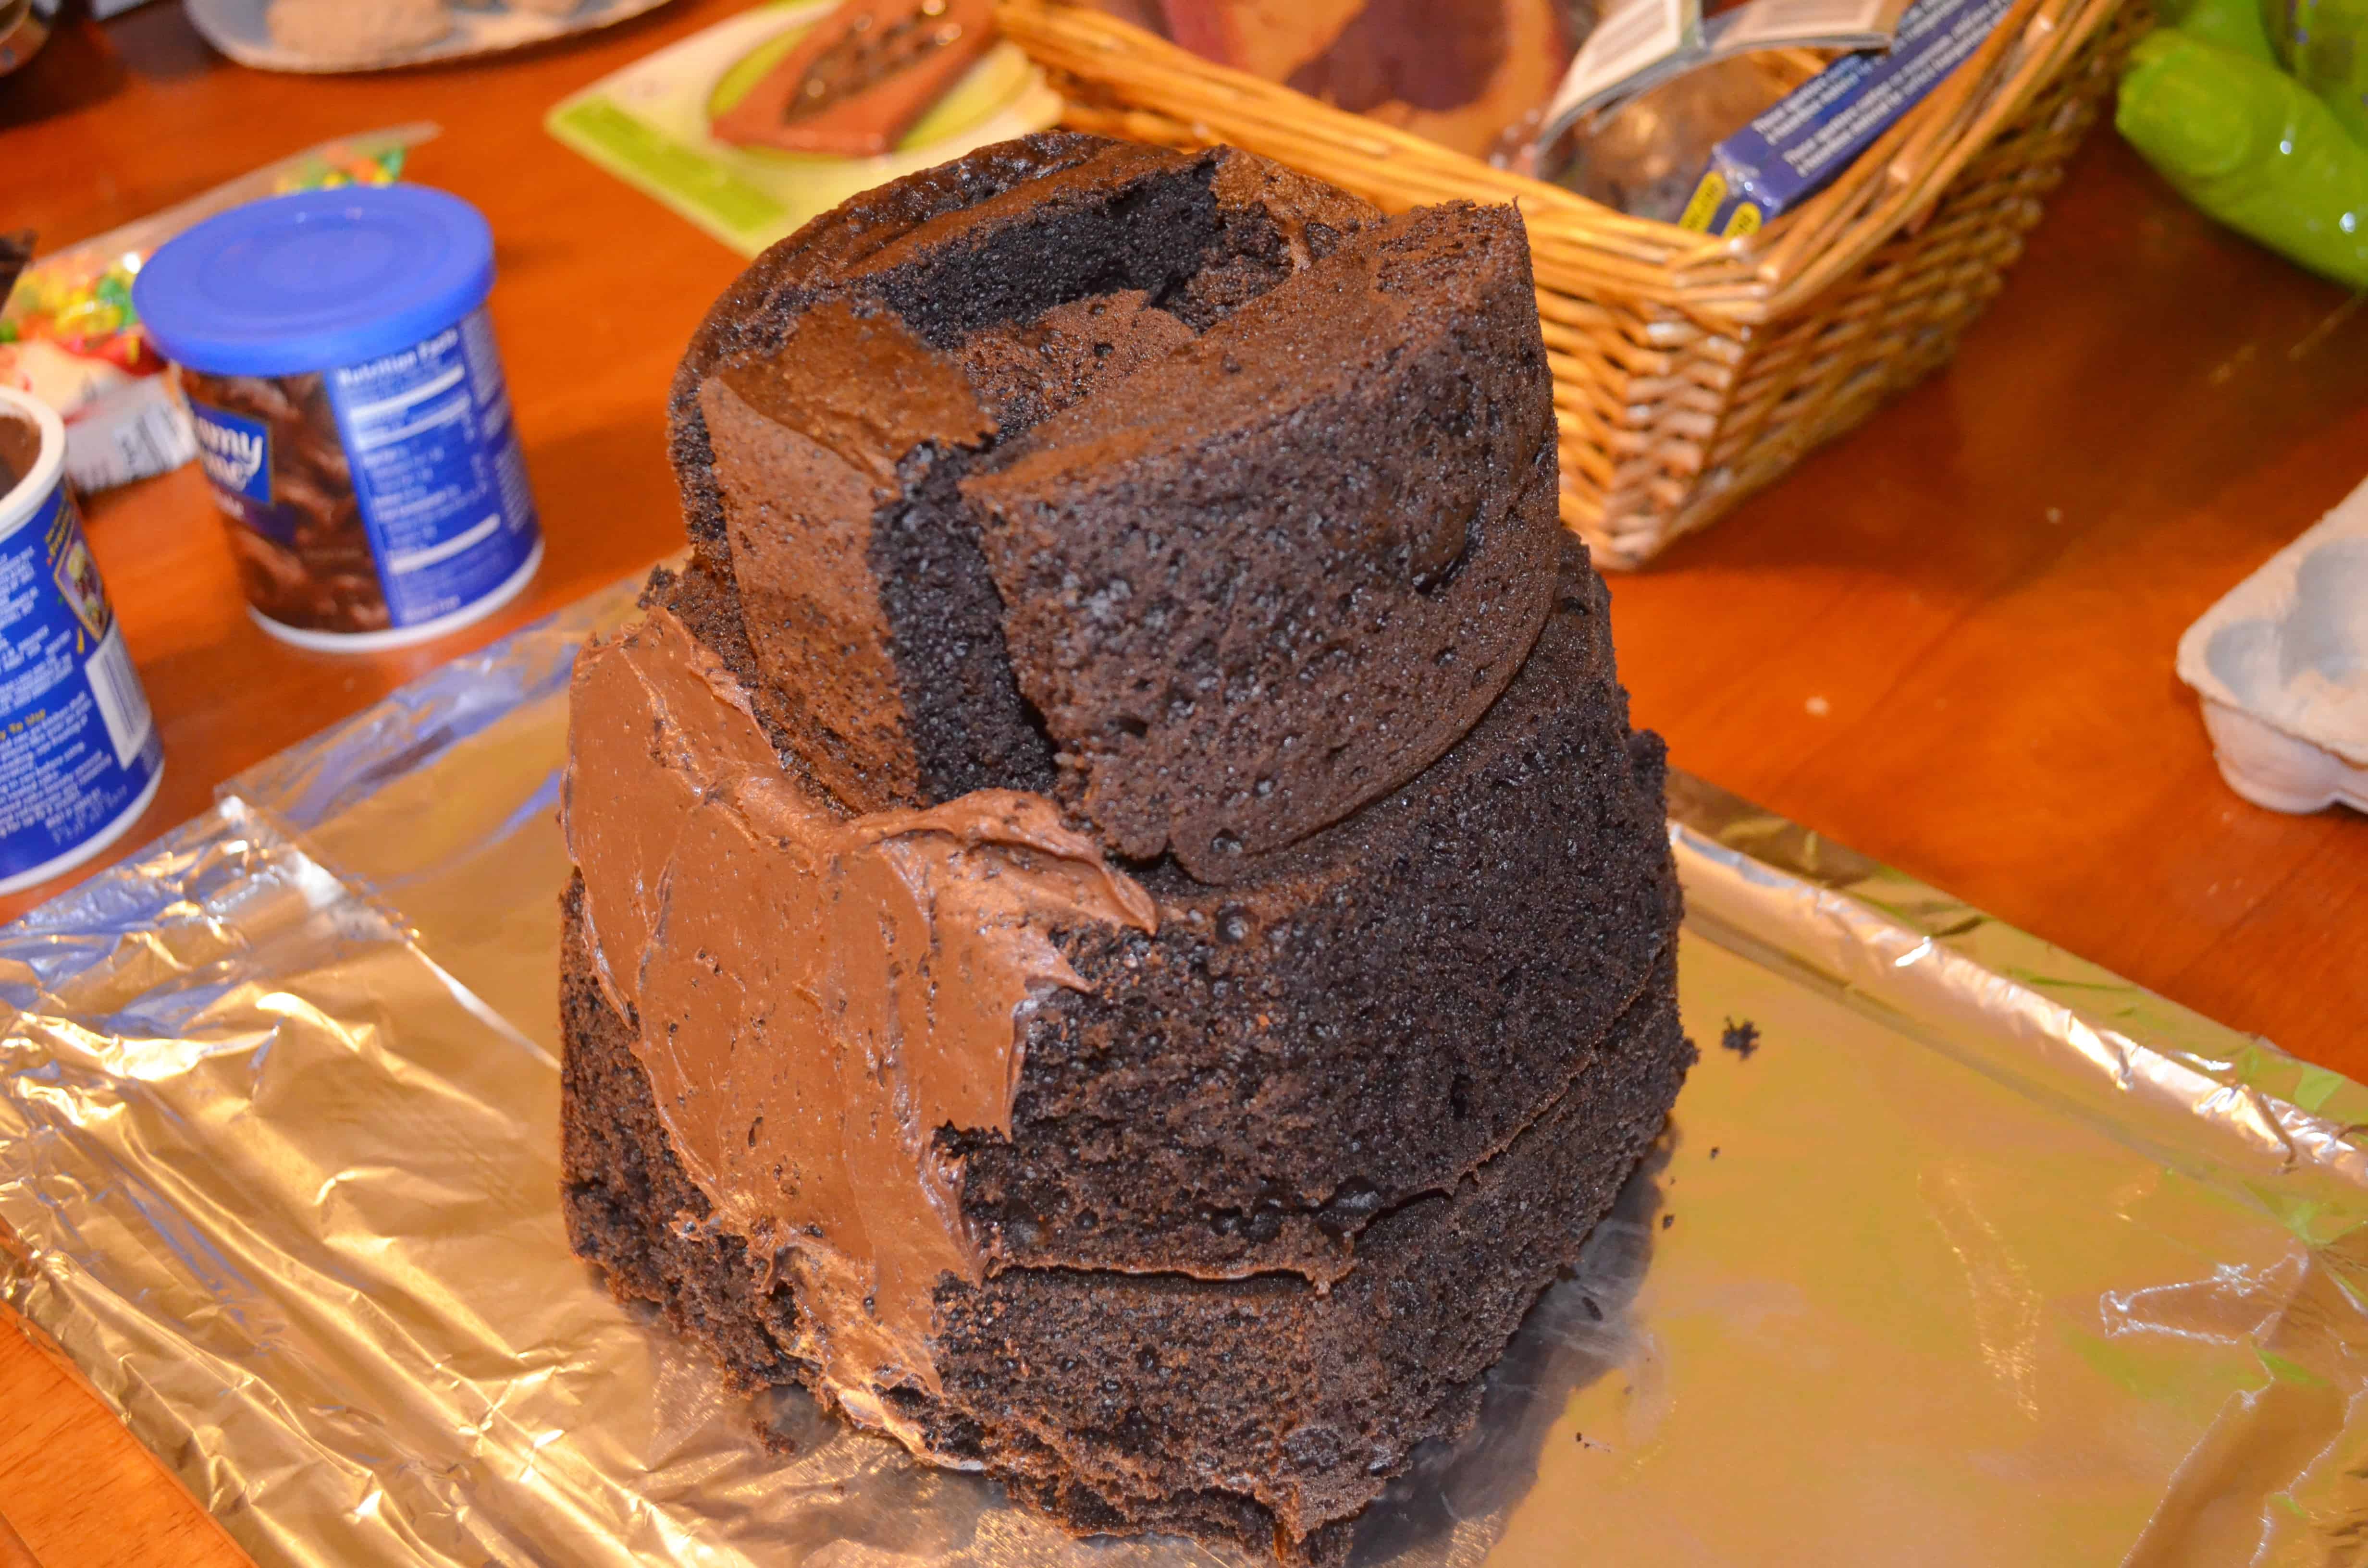
You may be wondering how I got that top layer. You’re going to need to shape your cake up just a little bit. Don’t freak out – it’s REALLY easy! Simply take a large bread knife and slice off each side of the cake in an angle downwards forming a mountain type shape.
With the extra pieces that you’ve just off you should be able to pile them on top to create the top of the volcano. I had no problems getting the pieces on the top layer to stay on, but you could always make a 3rd cake if you’re worried about it.
You can also use toothpicks to hold it together – just remember not to serve them! Now it’s time to start frosting the volcano! I suggest starting to frost from the base up.

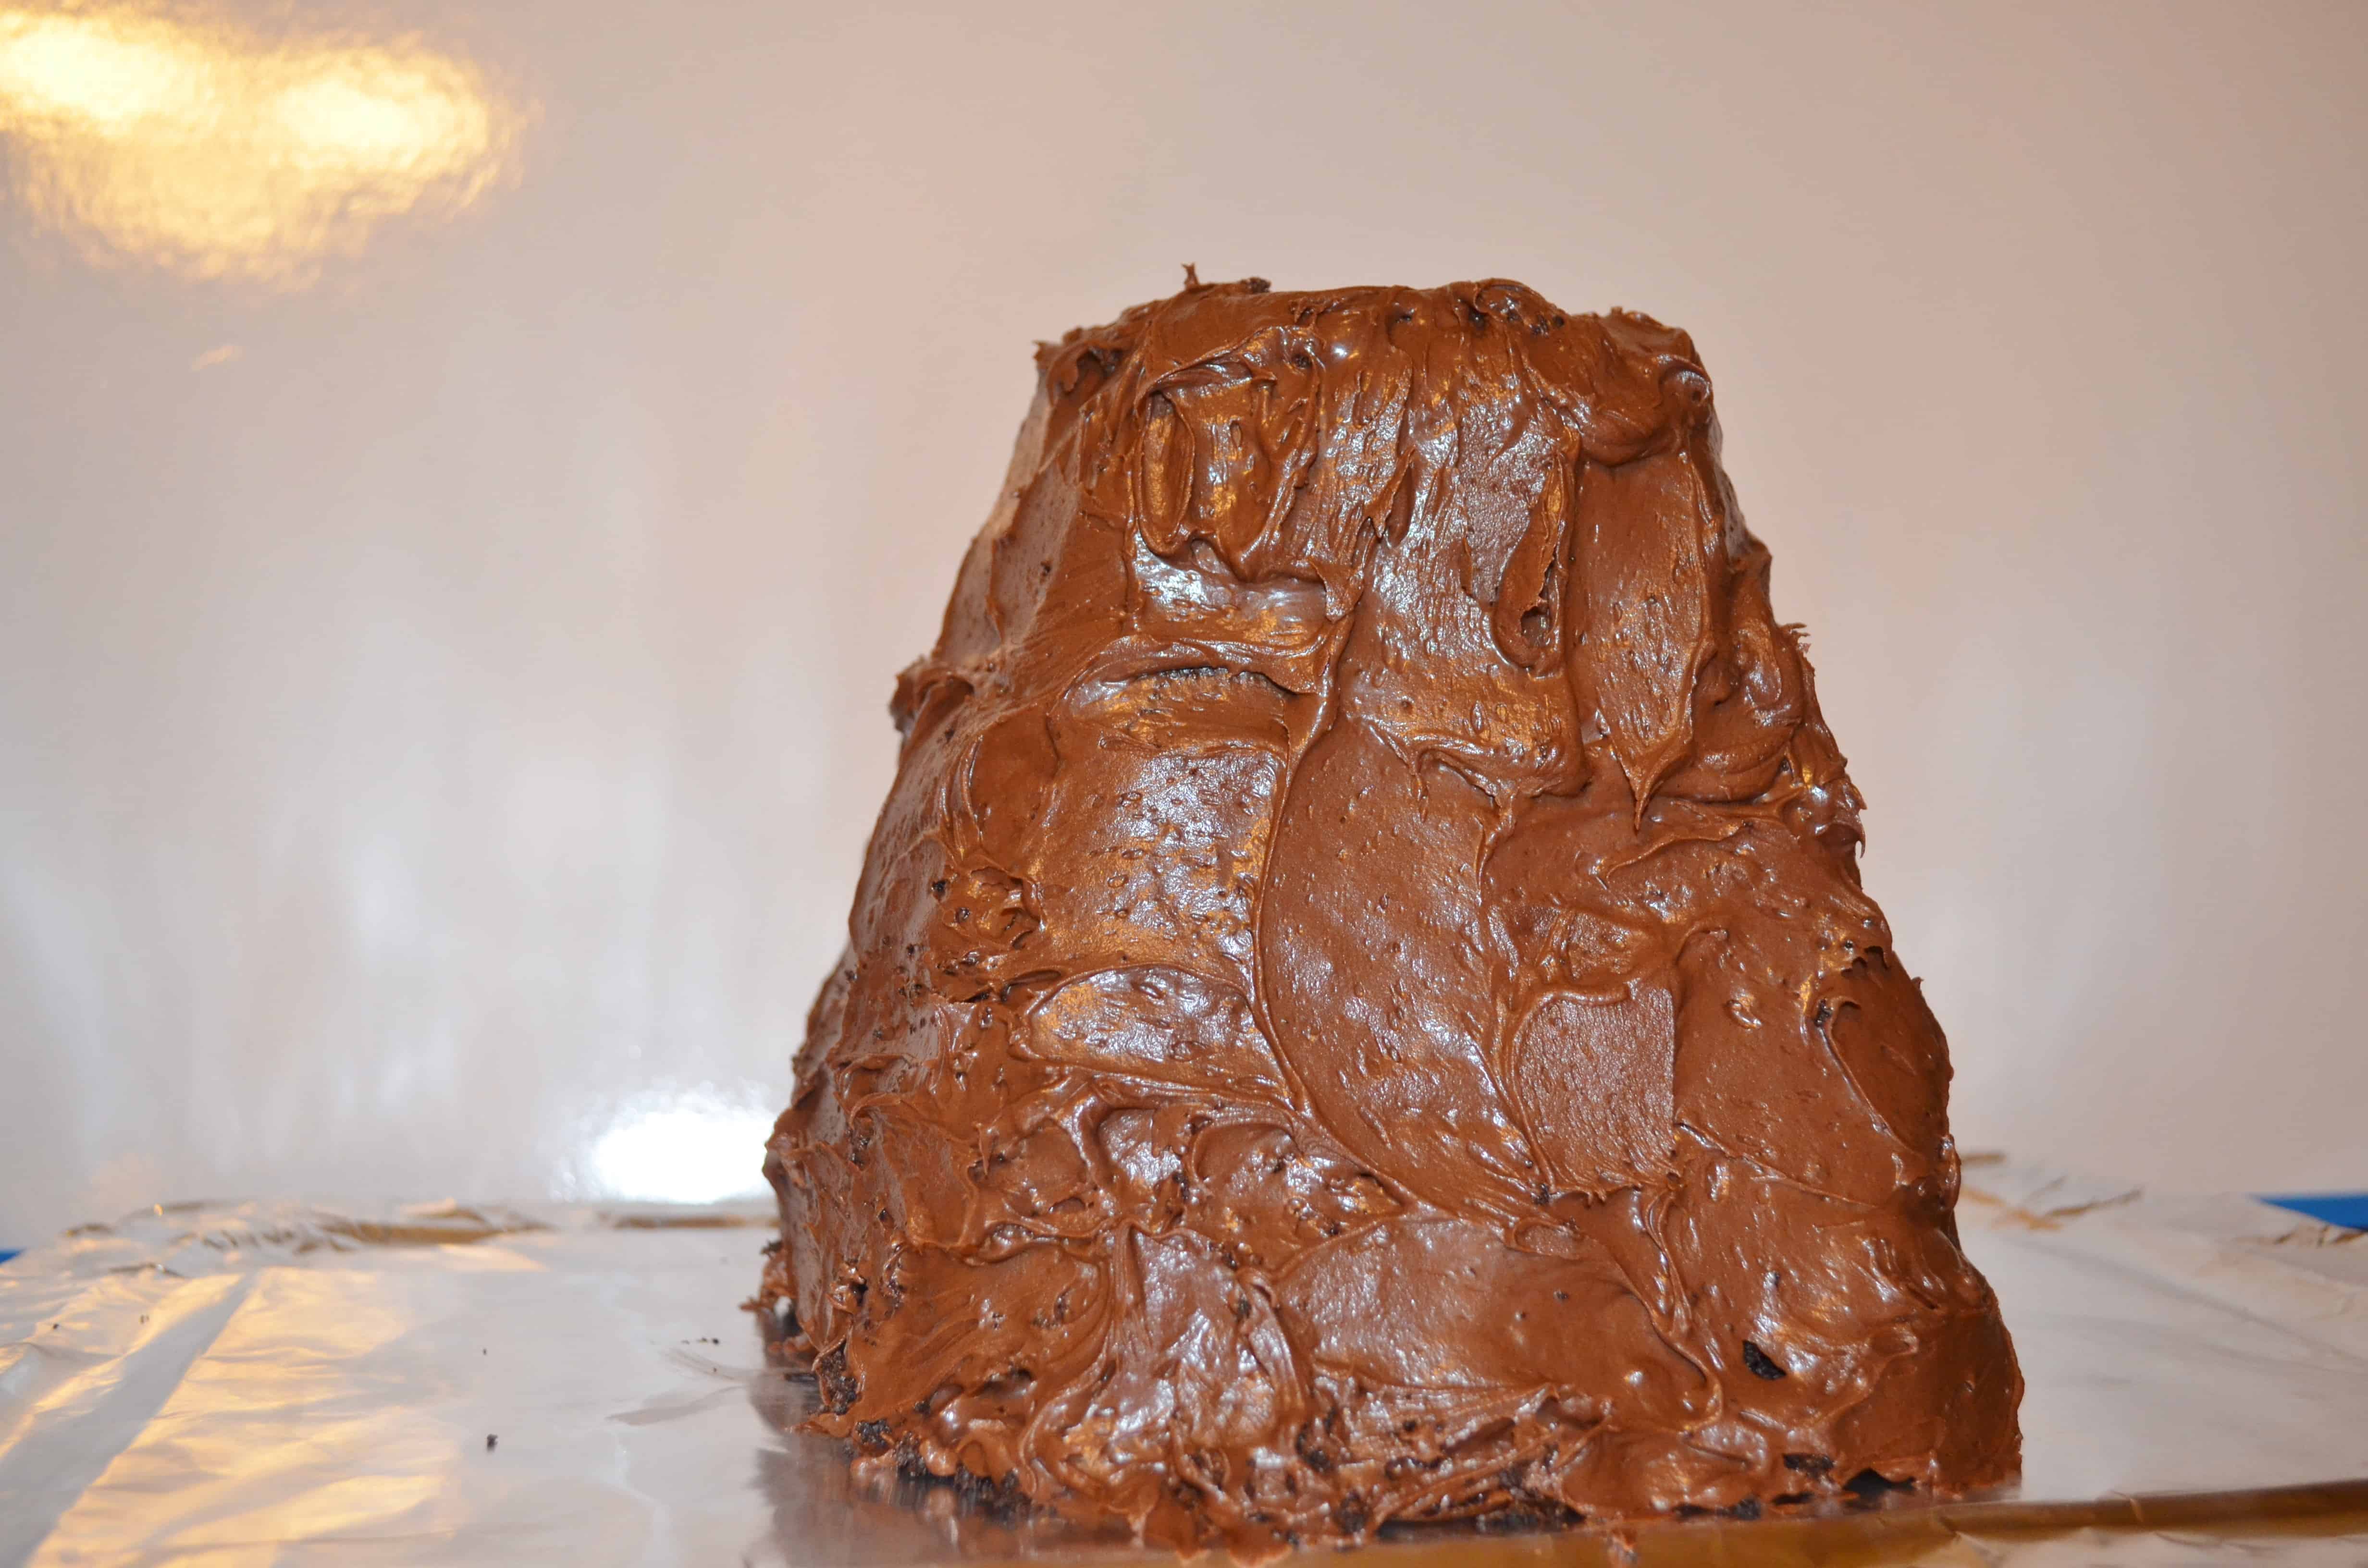
Keep frosting all the way up the volcano until you get to the top. The top of mine is hollow because I used angel food cake pans so I just frosted over the edge the best I could.

Your volcano should be looking something like this now! Pretty cool huh? But I really wanted to make mine stand out instead of a big pile of brown so I bought some Betty Crock pouch red frosting to use for the volcano. I knew that I wouldn’t be able to dye the color I wanted well and a pouch of colored frosting was about $3.

Squeeze the red frosting all over the very top of the volcano, and then squeeze some frosting down the side so that it looks like lava is pouring out. I got my lava to look smoother simply by taking the back of a spoon and smooshing the red frosting together.
It only took a second and as the frosting continued to dry it really helped the “lava” look that much better!


I had a few toy dinosaurs left over from the party favors that we made so I took globs of the chocolate frosting and splattered them all over the base around the volcano, and then plopped the dinosaurs in them. Not too hard for an EPIC volcano and dinosaur cake huh?!

Voila! It was SO easy! Now I definitely did not have room for this in my refrigerator so I just stored it in my oven (turned off of course!) overnight and pulled it out the morning of the party. If this volcano cake isn’t spectacular enough for your dinosaur party here are a few other ideas for you.


Use sparklers for candles. My son was turning 6 so the only way we could come up with lighting 6 sparklers quickly enough at the same time was by using a blow torch. Yes, we actually blow torched my son’s birthday “candles”.
Edible Rocks. These are just SO cool and realistic looking. Buy edible rocks and use them to line the base of your volcano, decorate islands of dinosaurs, create dinosaur nests, and anything else you can think of!
Dry Ice. I wanted to do this SO bad but since we live in a tiny town I would have had to drive an hour just for dry ice. Typically you can buy it at your local grocery store. Stick a piece of PVC pipe (capped on one end so that it can hold liquid) or a small thing cup of some sort down inside the middle of your volcano. Shortly before you serve the cake fill your container with warm water and drop a few pieces of dry ice in. It will create a stunning smoking fog out of the volcano that will guarantee you some OOHS and AAHS!
Bone Candy. Since the middle of my volcano was hollow I actually poured a bag of small dinosaur bone candy inside (you can buy it here) of it so that when I cut the cake all of the bones started falling out. The kids thought it was just the coolest and they all begged to eat pieces of bones.
Check out our frugal Fossil & Dinosaurs Birthday Party with photos and ideas!
 |  |  |
 |  |  |


So stinkin cute! I love it and I am sure it was a huge hit! Thanks for sharing at Monday Funday this week!
Take care,
Trish
What a great idea. I love the thought of using sparklers for candles. That is so absolutely fun. Wonderful work.
I’ll bet your son just loved that! I can remember all the fun birthday cakes when mine were little — good for you for taking on such a challenge. Thanks for sharing on Hearth & Soul Hop. 🙂
Visiting from Monday Funday. I’d like to invite you to my Friday Flash Blog, where you can share your best blog entry of the week! The party goes on ALL weekend at thejennyevolution.com. And who knows, you may just get featured next week.
Jennifer
thejennyevolution.com
Nice work! And I love the sparklers! What a fabulous idea!