DIY Potion Jars Witches Spooky Halloween Decor
This post may contain affiliate links, view our disclosure policy for details.
I found this amazing diy potion jars tutorial on Pinterest and I’ve been dying to try them! I had no idea how insanely EASY these would be to make! But instead of making cute tiny apothecary diy potion jars I wanted to make them large enough to actually hold snacks or craft supplies in them so they were more functional for both home decor and for classroom decor.
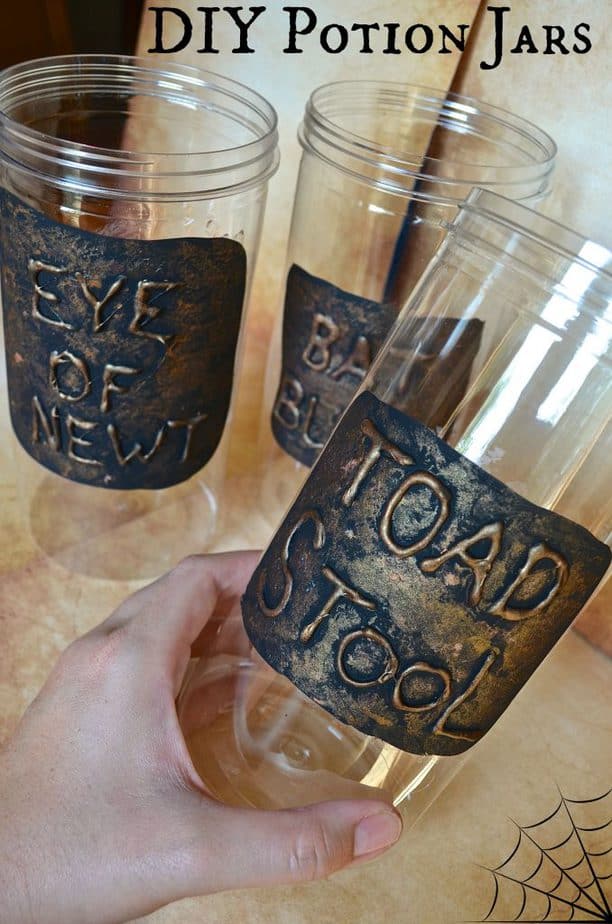
Oriental Trading sent us these tall plastic jars (a dozen for under $20!) to use for this project which are a thin plastic and come with lids. They are tall enough to hold colored pencils and markers…..or spooky eyeballs! I will actually be using them in my craft room after Halloween and just turn the jars around so the decor is in the back.
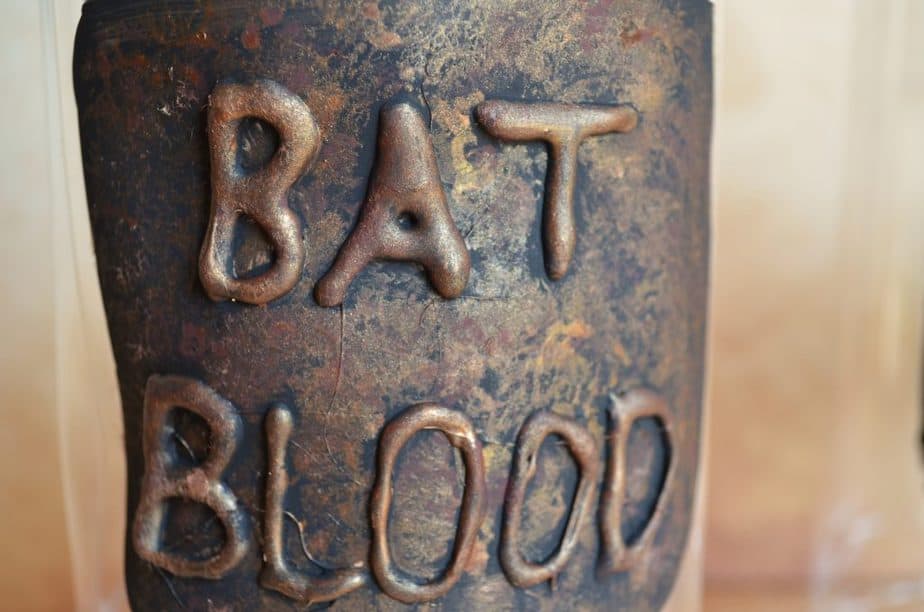
Start by figuring out how many you’ll need and what you want each jar to say. Some ideas for spooky witches potion label ingredients might be eye of newt, bat blood, toadstool, bone powder, snake venom, dragons fire, mice tails, ashes of vampires, etc. Set out one jar per ingredient you want to create a jar for.
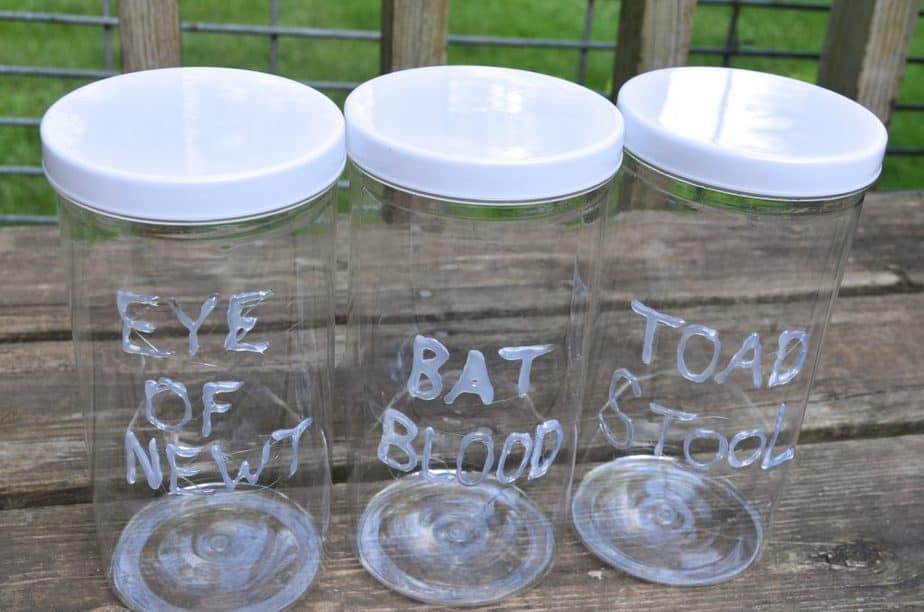
Using your hot glue gun “write” the ingredient name on the jar. Don’t worry about the hot glue “strings” – it just helps give the jar texture and an added spooky factor! You can “draw” an eye or wings on with your glue or simply “write” out the name of the ingredient on each diy potion jar.
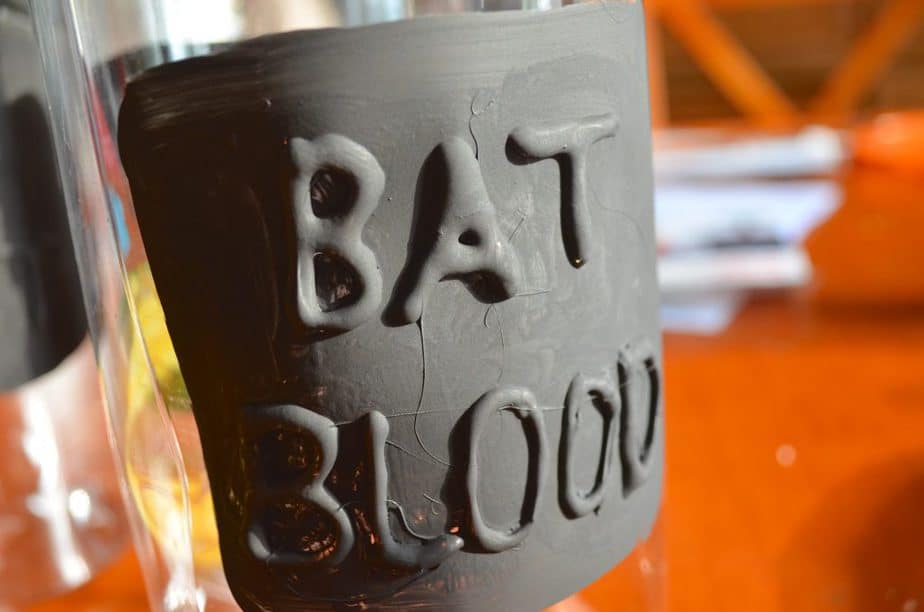
When the hot glue is completely dry grab your black acrylic paint and begin painting! Cover all of the letters in your potion jar. It’s extra spooky to have the entire jar painted but I wanted to see inside my jar for storage purposes so I just painted a black square or rectangle around each ingredient label. There’s no need to create a perfect shape – a little bit of crooked and wavy lines just gives it a more authentic look.
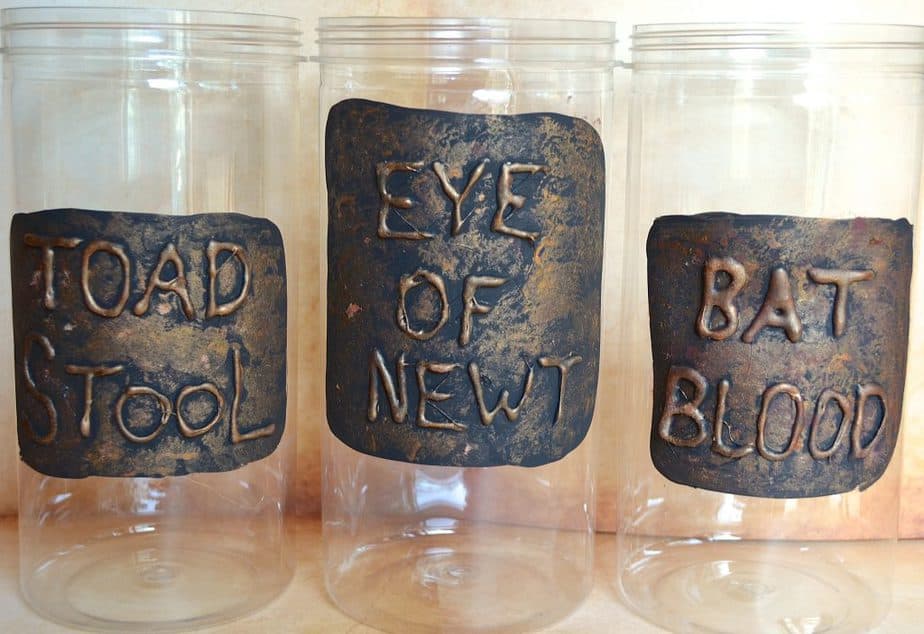
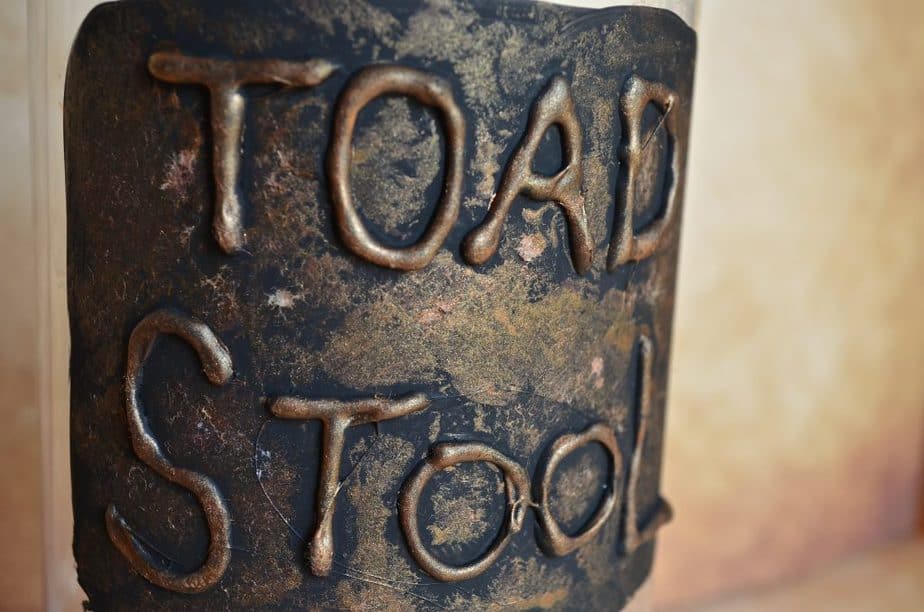
Once the black paint has dried you’re ready for the final touches! Using a metallic bronze (or bronze and gold mix) acrylic paint sponge lightly directly onto the potion jar over the black paint making sure to try and sponge inside the letters as well as outside the letters. Again it doesn’t need to be perfect, you just need to cover enough of the black paint to make it look authentic. You can see in my jars above that they look very different.
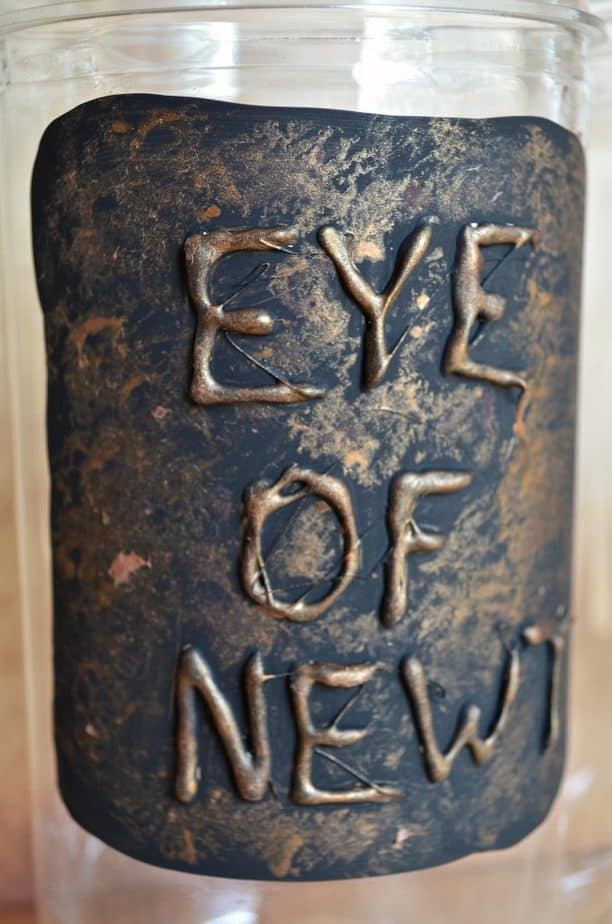
I used a metallic bronze and gold mixture on all of my jars. Once you’ve completed sponging the metallic acrylic paint onto all of the jars you’re ready to finish one final step! Take a thin paint brush and lightly run that metallic paint over the letters in your potion ingredients to make them stand out better!
That metallic shimmer REALLY makes these potion jars! I couldn’t believe not only how simple these were to make but how incredibly awesome they looked! I was pretty impressed!
If your kids are old enough to use a hot glue gun by themselves these diy potion jars are an awesome idea to let kids help decorate for Halloween with! Let them create their own jars to store things in for the holidays. Now go grab some jars, hot glue, and paint to make your own! You won’t be disappointed! No crafting expertise needed for these spooky potion jars!
 |  |
 |  |