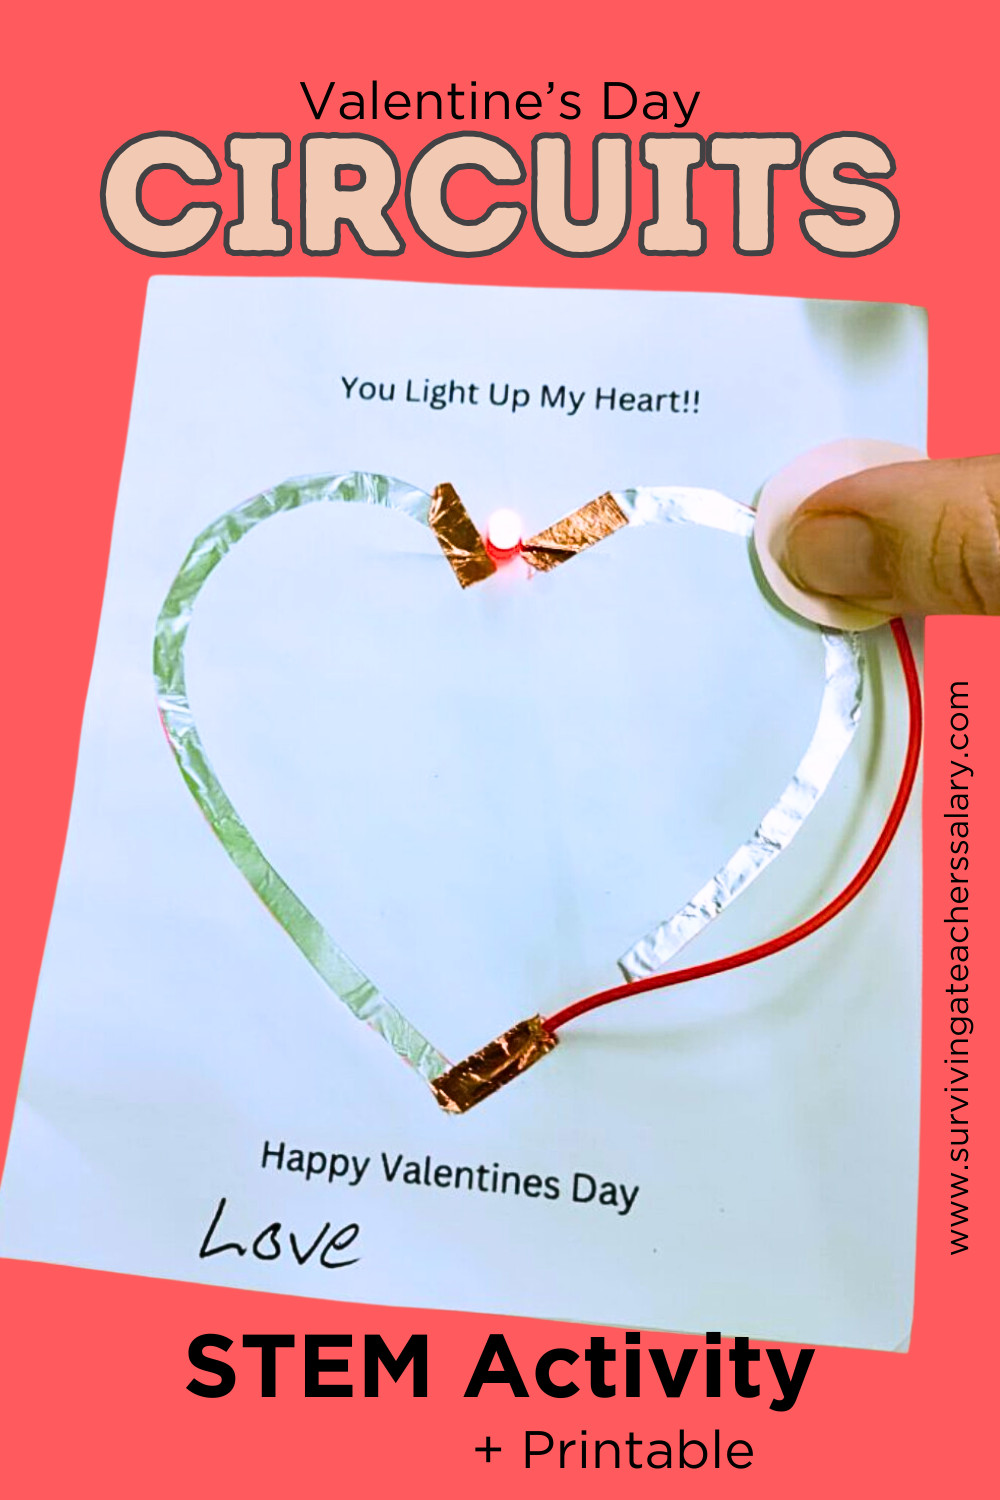
Valentine’s Day Circuits STEM Activity for Kids
This post may contain affiliate links, view our disclosure policy for details.
This hands-on circuits STEM activity teaches kids about simple circuits while creating a fun light-up Valentine’s card! It combines creativity with hands-on electronics! You can use the same concept for any holiday though and make your own card design.
Perfect for teaching basic circuits and conductivity, this circuits STEM activity makes science exciting while celebrating Valentine’s Day! Ideal for classrooms, homeschoolers, and STEM clubs. I have done this with small groups of ages 5+ and larger groups of ages 8+. Generally this activity takes about a half hour to complete if the materials are pre-prepped.
You will notice in this activity that all of the conductive elements are exposed as opposed to being neatly hidden from view. This makes it easier on your youngest kids to visualize the connection and requires less fine motor skills in taping.
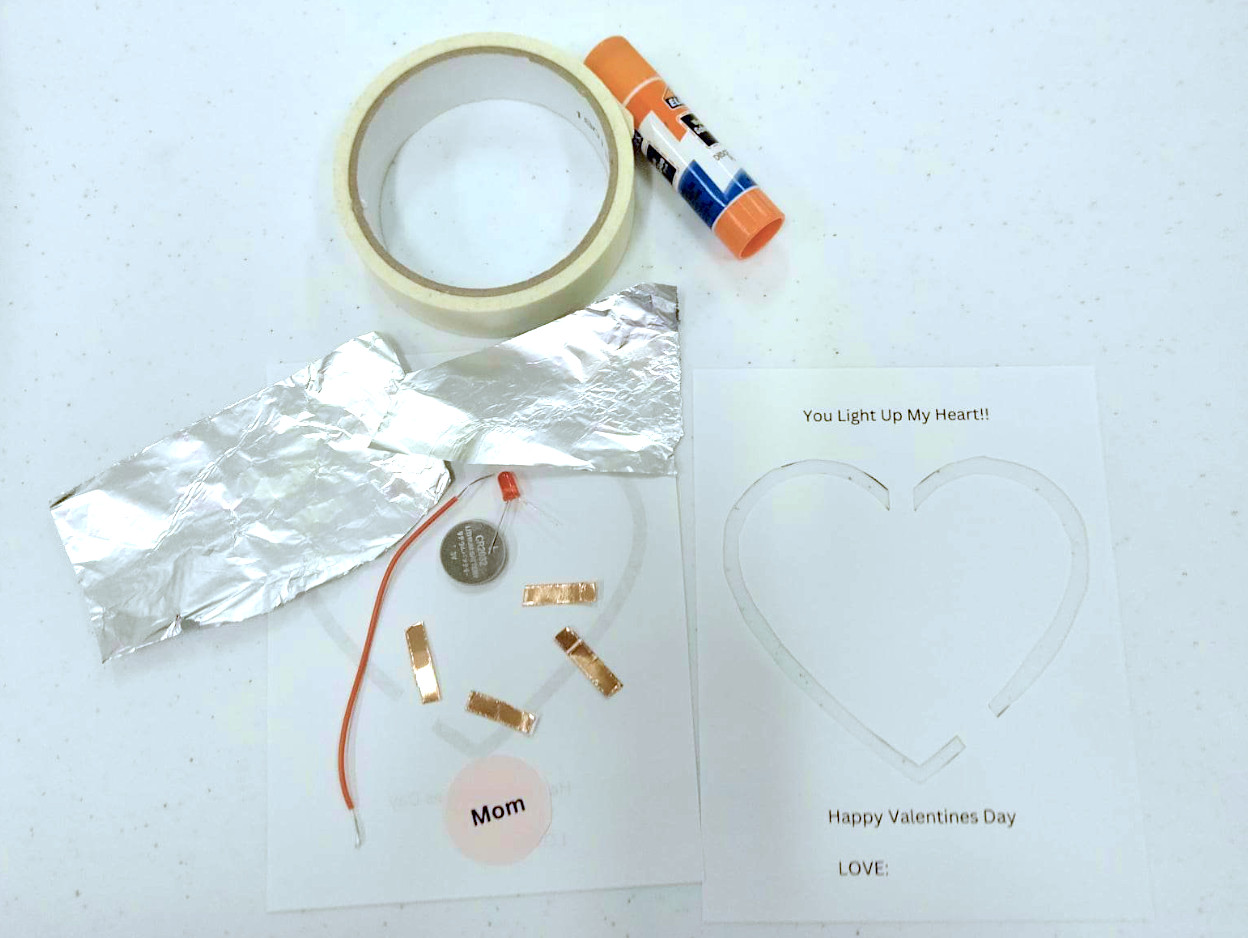
Materials Needed:
- Printable Card Template (at bottom of post)
- 1 LED light (any color – I let the kids choose!)
- copper tape (with conductive adhesive)
- aluminum foil
- Paper (cardstock recommended)
- tape or glue stick
- scissors
- 4-5 inches of bell wire – stripped at both ends
- markers or crayons or colored pencils or even stickers
- CR2032 coin battery (you can buy these at the Dollar Tree!)
Pre-Prep for Group Activities or for Working with Younger Kids:
If you’re working in a classroom setting or with group of kids, you will need to pre-prep this circuits STEM activity to make things go smoother. Especially if you’re working with younger kids. Below is a list of what I do to prepare for my groups.
- Print and cut out our Valentine’s day card or create your own. I do not fold them, I just cut the rectangle shape out. Usually I use printer paper because it’s cheaper, but card stock is nicer and more sturdy.
- Cut out the outline of the heart only where there is a black line. You will notice that the heart does NOT connect in one spot – it IS supposed to look like that! Only cut where the black line is. (I usually use an Xacto knife for this but you could use scissors if you want.)
- Cut out a piece of aluminum foil the size of your Valentine’s Day card, then cut that piece in half. Trim some of the long side down a bit so you have two total pieces of foil that are slightly slimmer than the size of your valentine’s day card. The kids will eventually need these two foil pieces to glue onto the BACK of the card – one piece of foil for each side of the heart and the foil should NOT touch each other! This is VERY important. If the foil pieces are touching each other this will cross your circuits and your LED diode will not work.
- Cut your bell wire into strips about 4-5 inches long, and strip about 3/4 of an inch off of each end for easy access.
- Cut small pieces of of copper tape – each child will need 4. (Technically you could use scotch tape instead but I find copper tape works best to ensure good connection. You could also use conductive fabric tape but it is pricier.)
NOTE: If you have never worked with circuits before, on the back of the card you will essentially have two pieces of foil on the back that do NOT touch. They should only be connected on the FRONT side where the light diode connects, or when you manually press the battery against the opposite side. A complete circuit will make a “loop” when connected.
Step 1: Design Your Valentine Card
- Have the kids use markers, colored pencils and/or stickers to decorate the front of their card with a Valentine’s theme while you are passing out supplies. Don’t forget to have them sign their name!

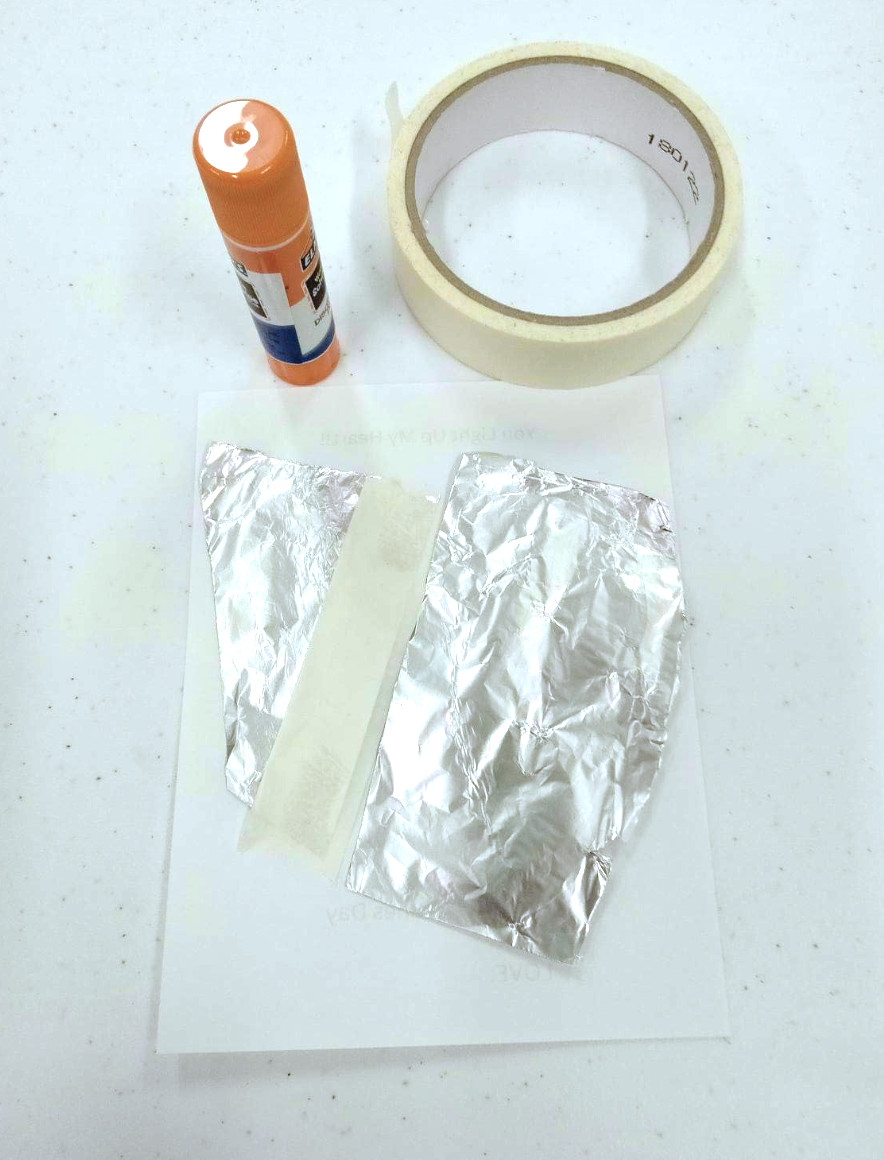
2. On the BACK of the Valentine’s Day card, have the kids glue (or tape) their foil pieces side by side but NOT TOUCHING each other. This is VERY important as their light will NOT work if the foil is overlapping. They will need to glue each piece of foil on the back to “cover” each side of the heart on the front.
I tell them a piece of foil for behind the left side of the heart and a piece of foil for behind the right side of the heart. (not the top and bottom of the heart!) This is easy for kids to get confused! Once the foil is securely in place they can flip their card right side up on the table.
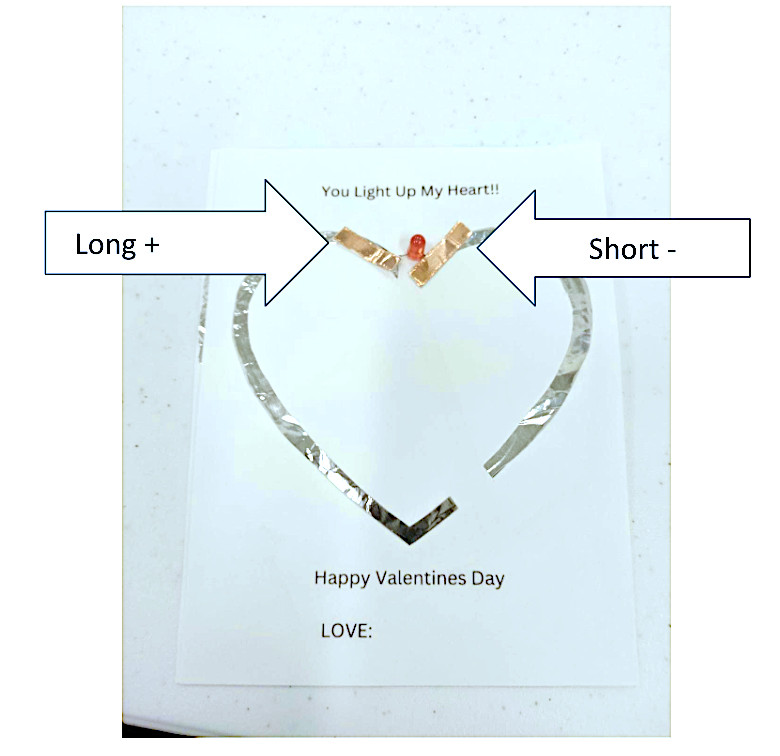
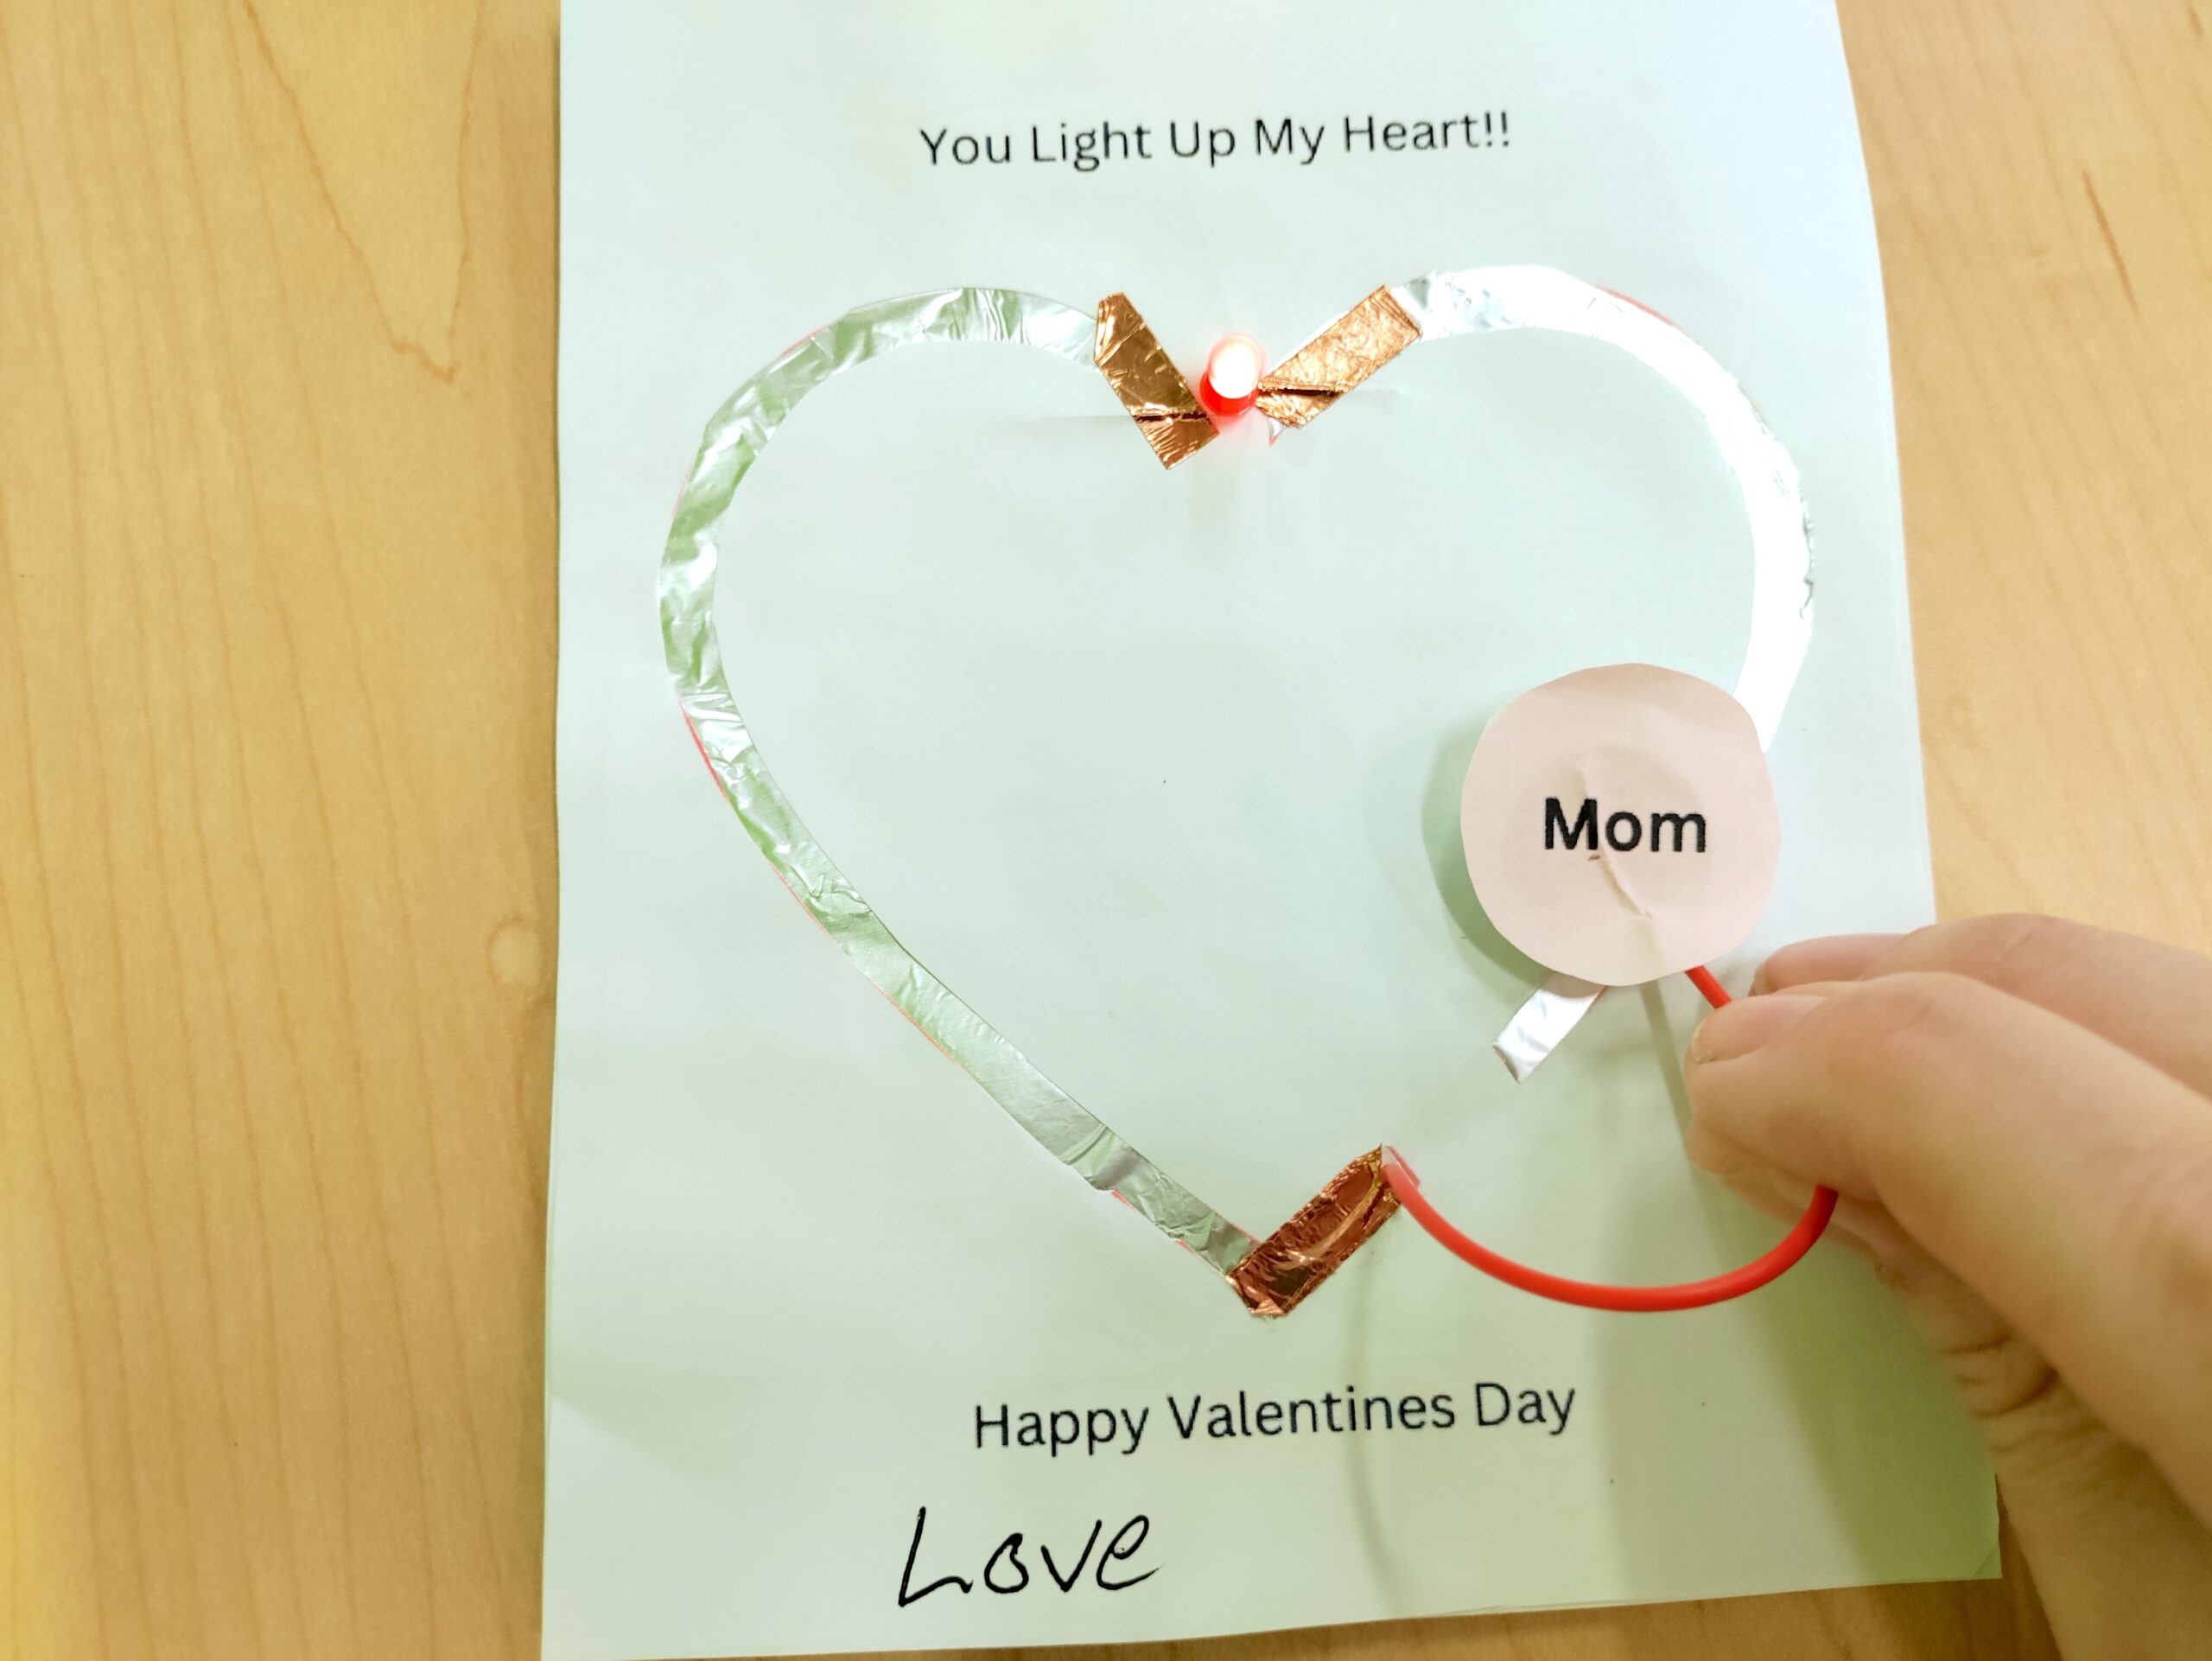
3. For this specific activity, we placed our light at the top of the heart where both sides meet like you see above. Have them spread the legs of their LED diode out flat like they are doing the splits, and lay their light diode legs down flat onto the paper with the light in the middle of the gap between their two foil pieces.
IMPORTANT – the LONGER leg of the LED diode is the positive + leg (anode), which should be touching the LEFT side of the foil the heart. The SHORTER leg of the LED diode is the negative – leg (cathode) and should be touching the RIGHT side of the foil in the heart. Ultimately, we will be connecting the positive side of the LED diode to the positive side of a battery, and the negative side of the LED diode to the negative side of a battery completing the circuit.
The kids will need to use a piece of copper tape on each side of their diode to tape down their LED legs making sure that they tape them down onto the foil for a good connection. Again, make sure that the copper tape on the legs do NOT cross over and touch each other! Tell the kids they have cooties and they can’t touch!
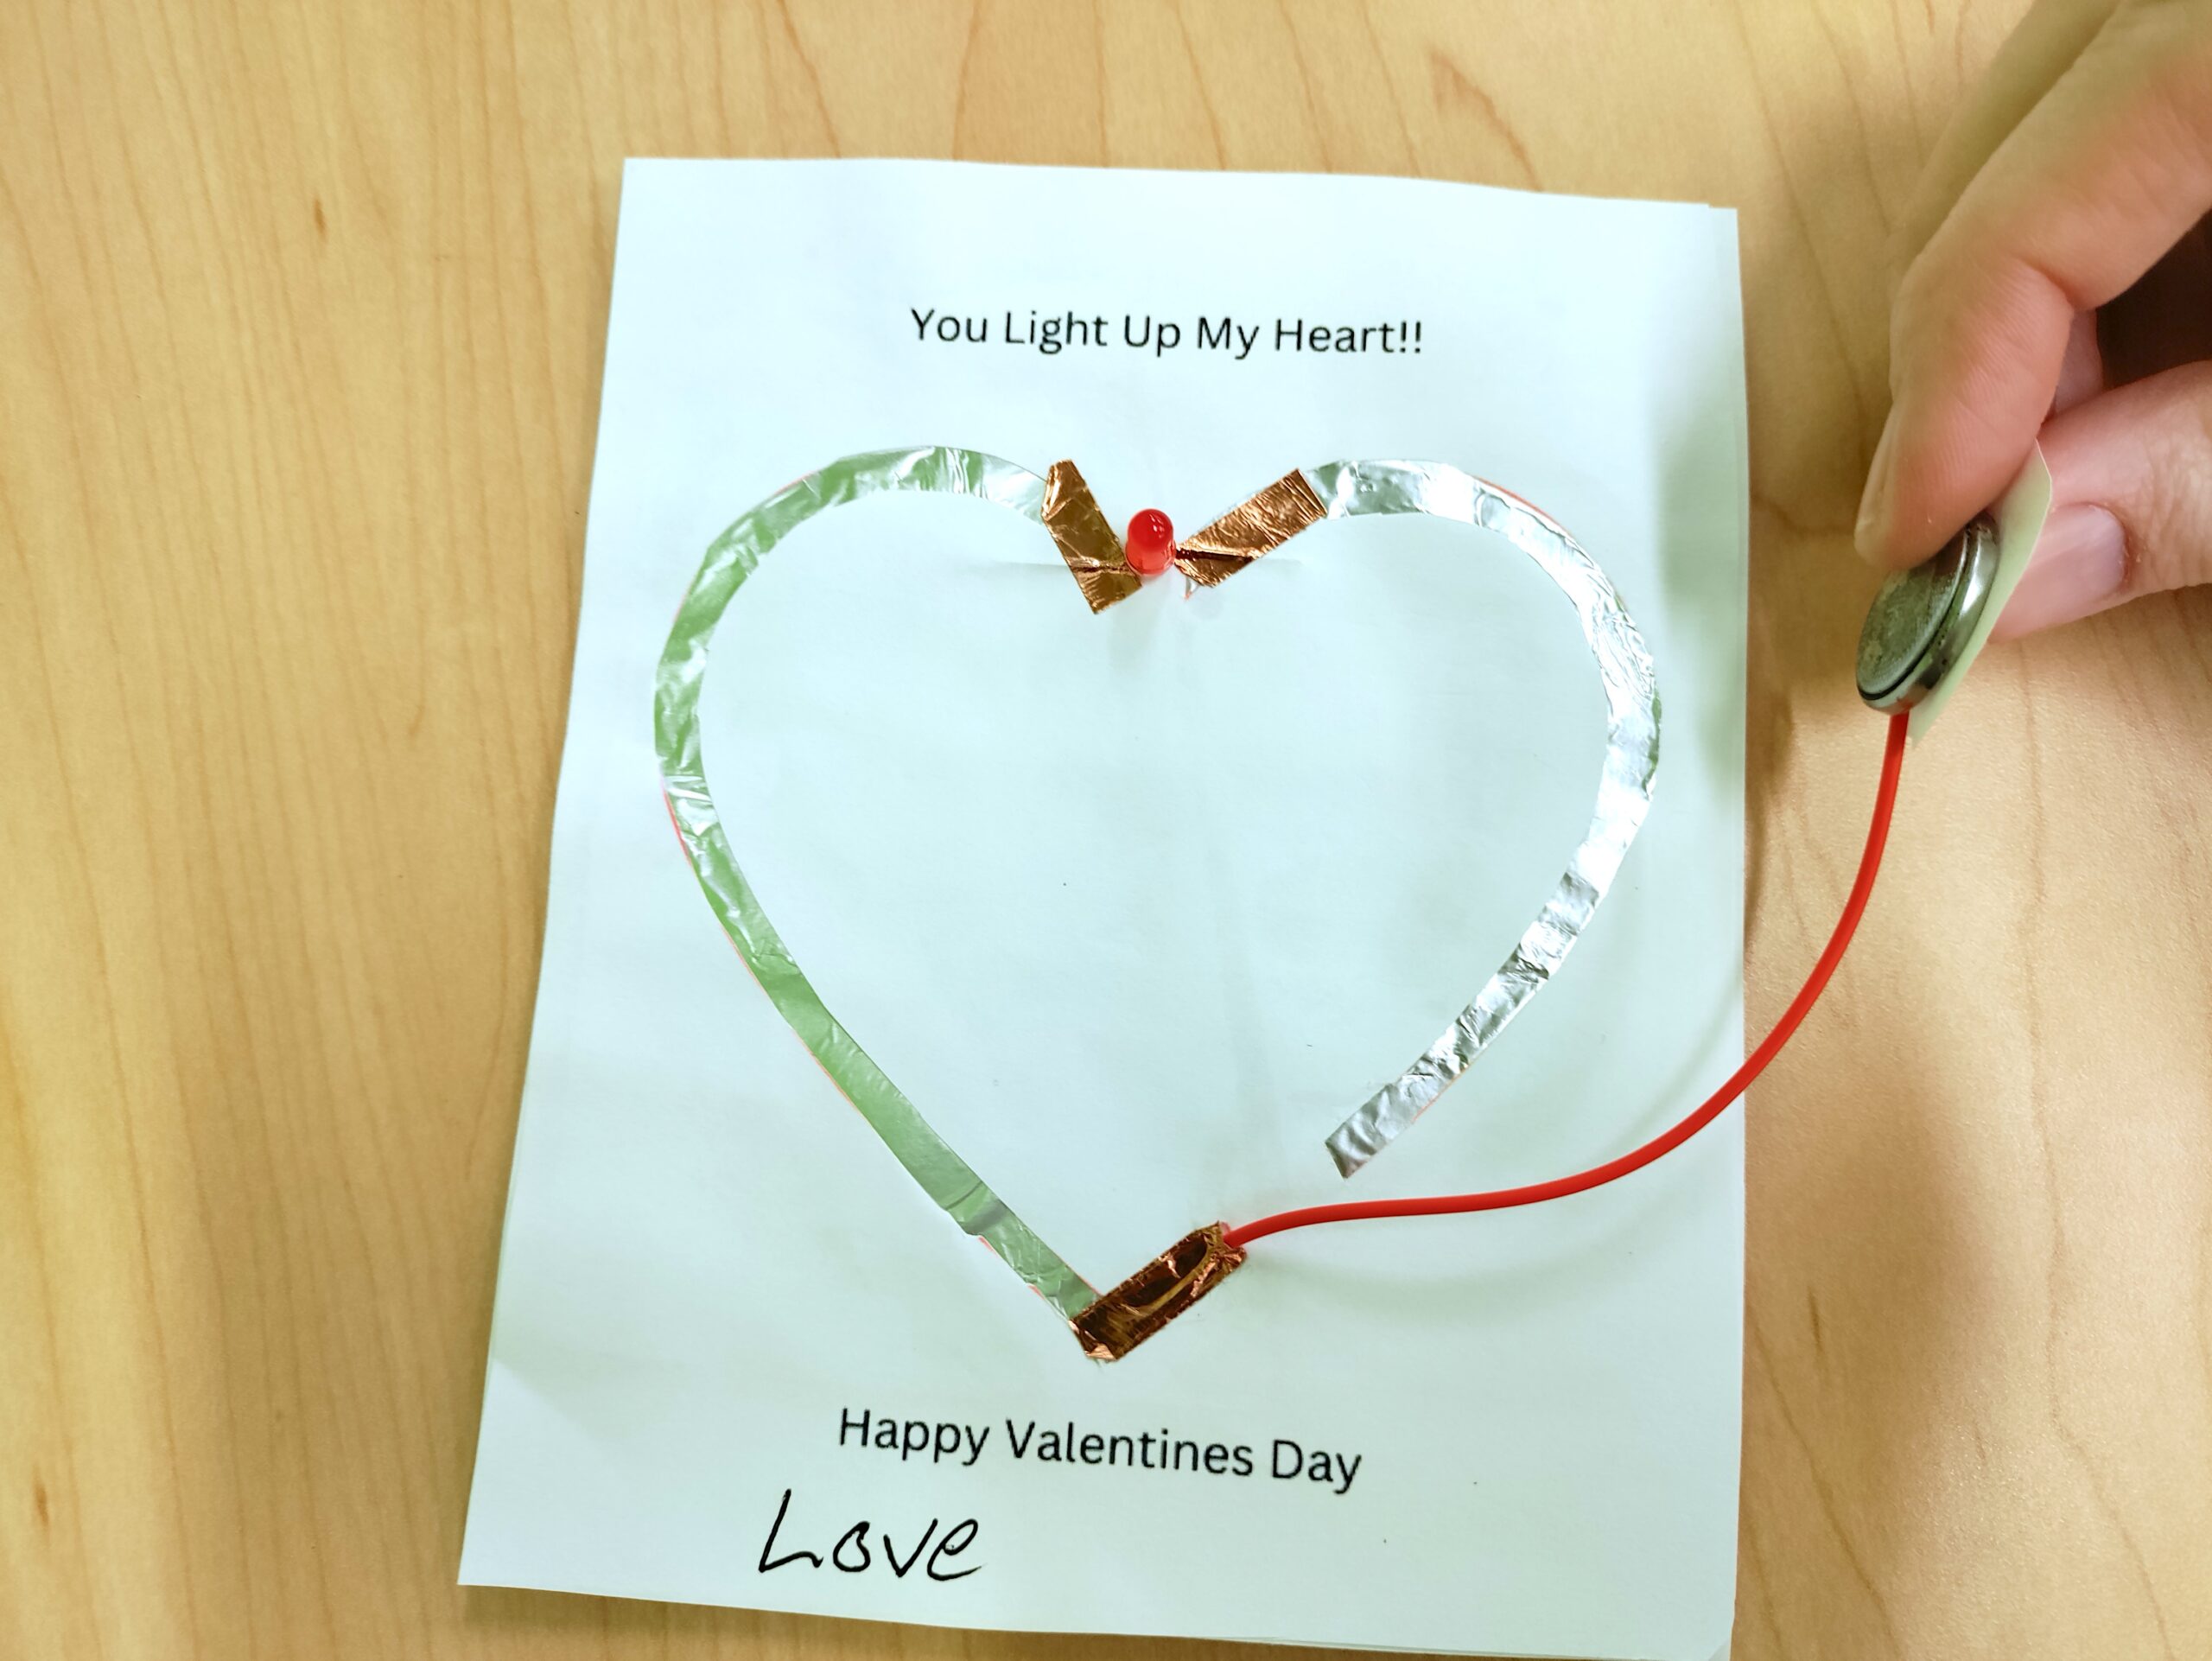
4. We’re almost done! As you see above, they will need to use a piece of copper tape to tape down one side of the bell wire (it doesn’t matter which side) at the bottom of the heart. Make sure the metal from the wire is overlapping onto the foil portion of the heart, and that the copper tape is placed on top holding it all together.
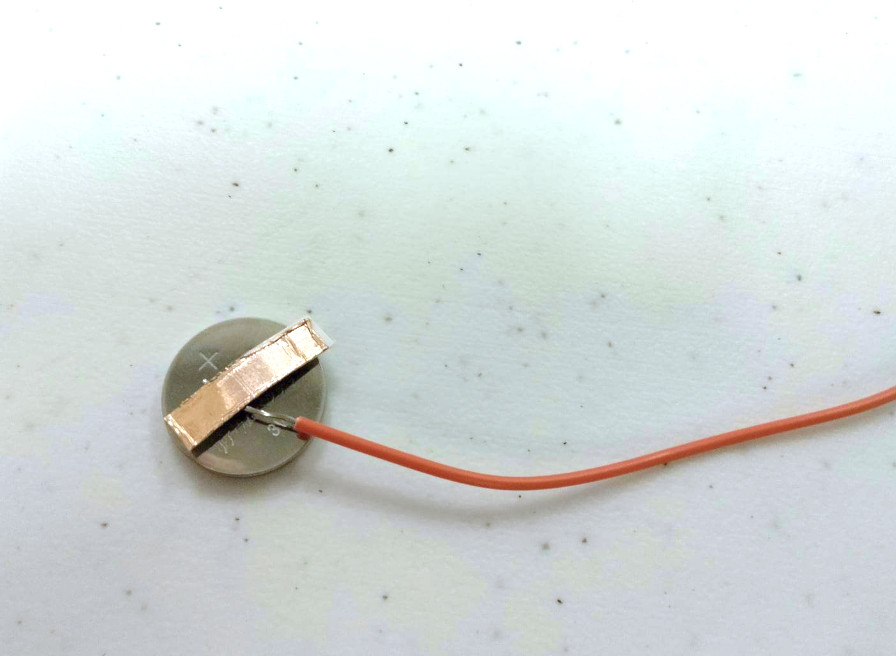
5. Next, tape the remaining end of your bell wire onto the TOP (or positive) side of your button cell battery. Make sure that the copper tape is NOT ALSO touching the bottom or negative side of your battery! Kids tend to wrap any excess tape underneath the battery and that will cause your light not to work!! Have them trim the tape to be smaller and ONLY touch the top positive side of the battery.
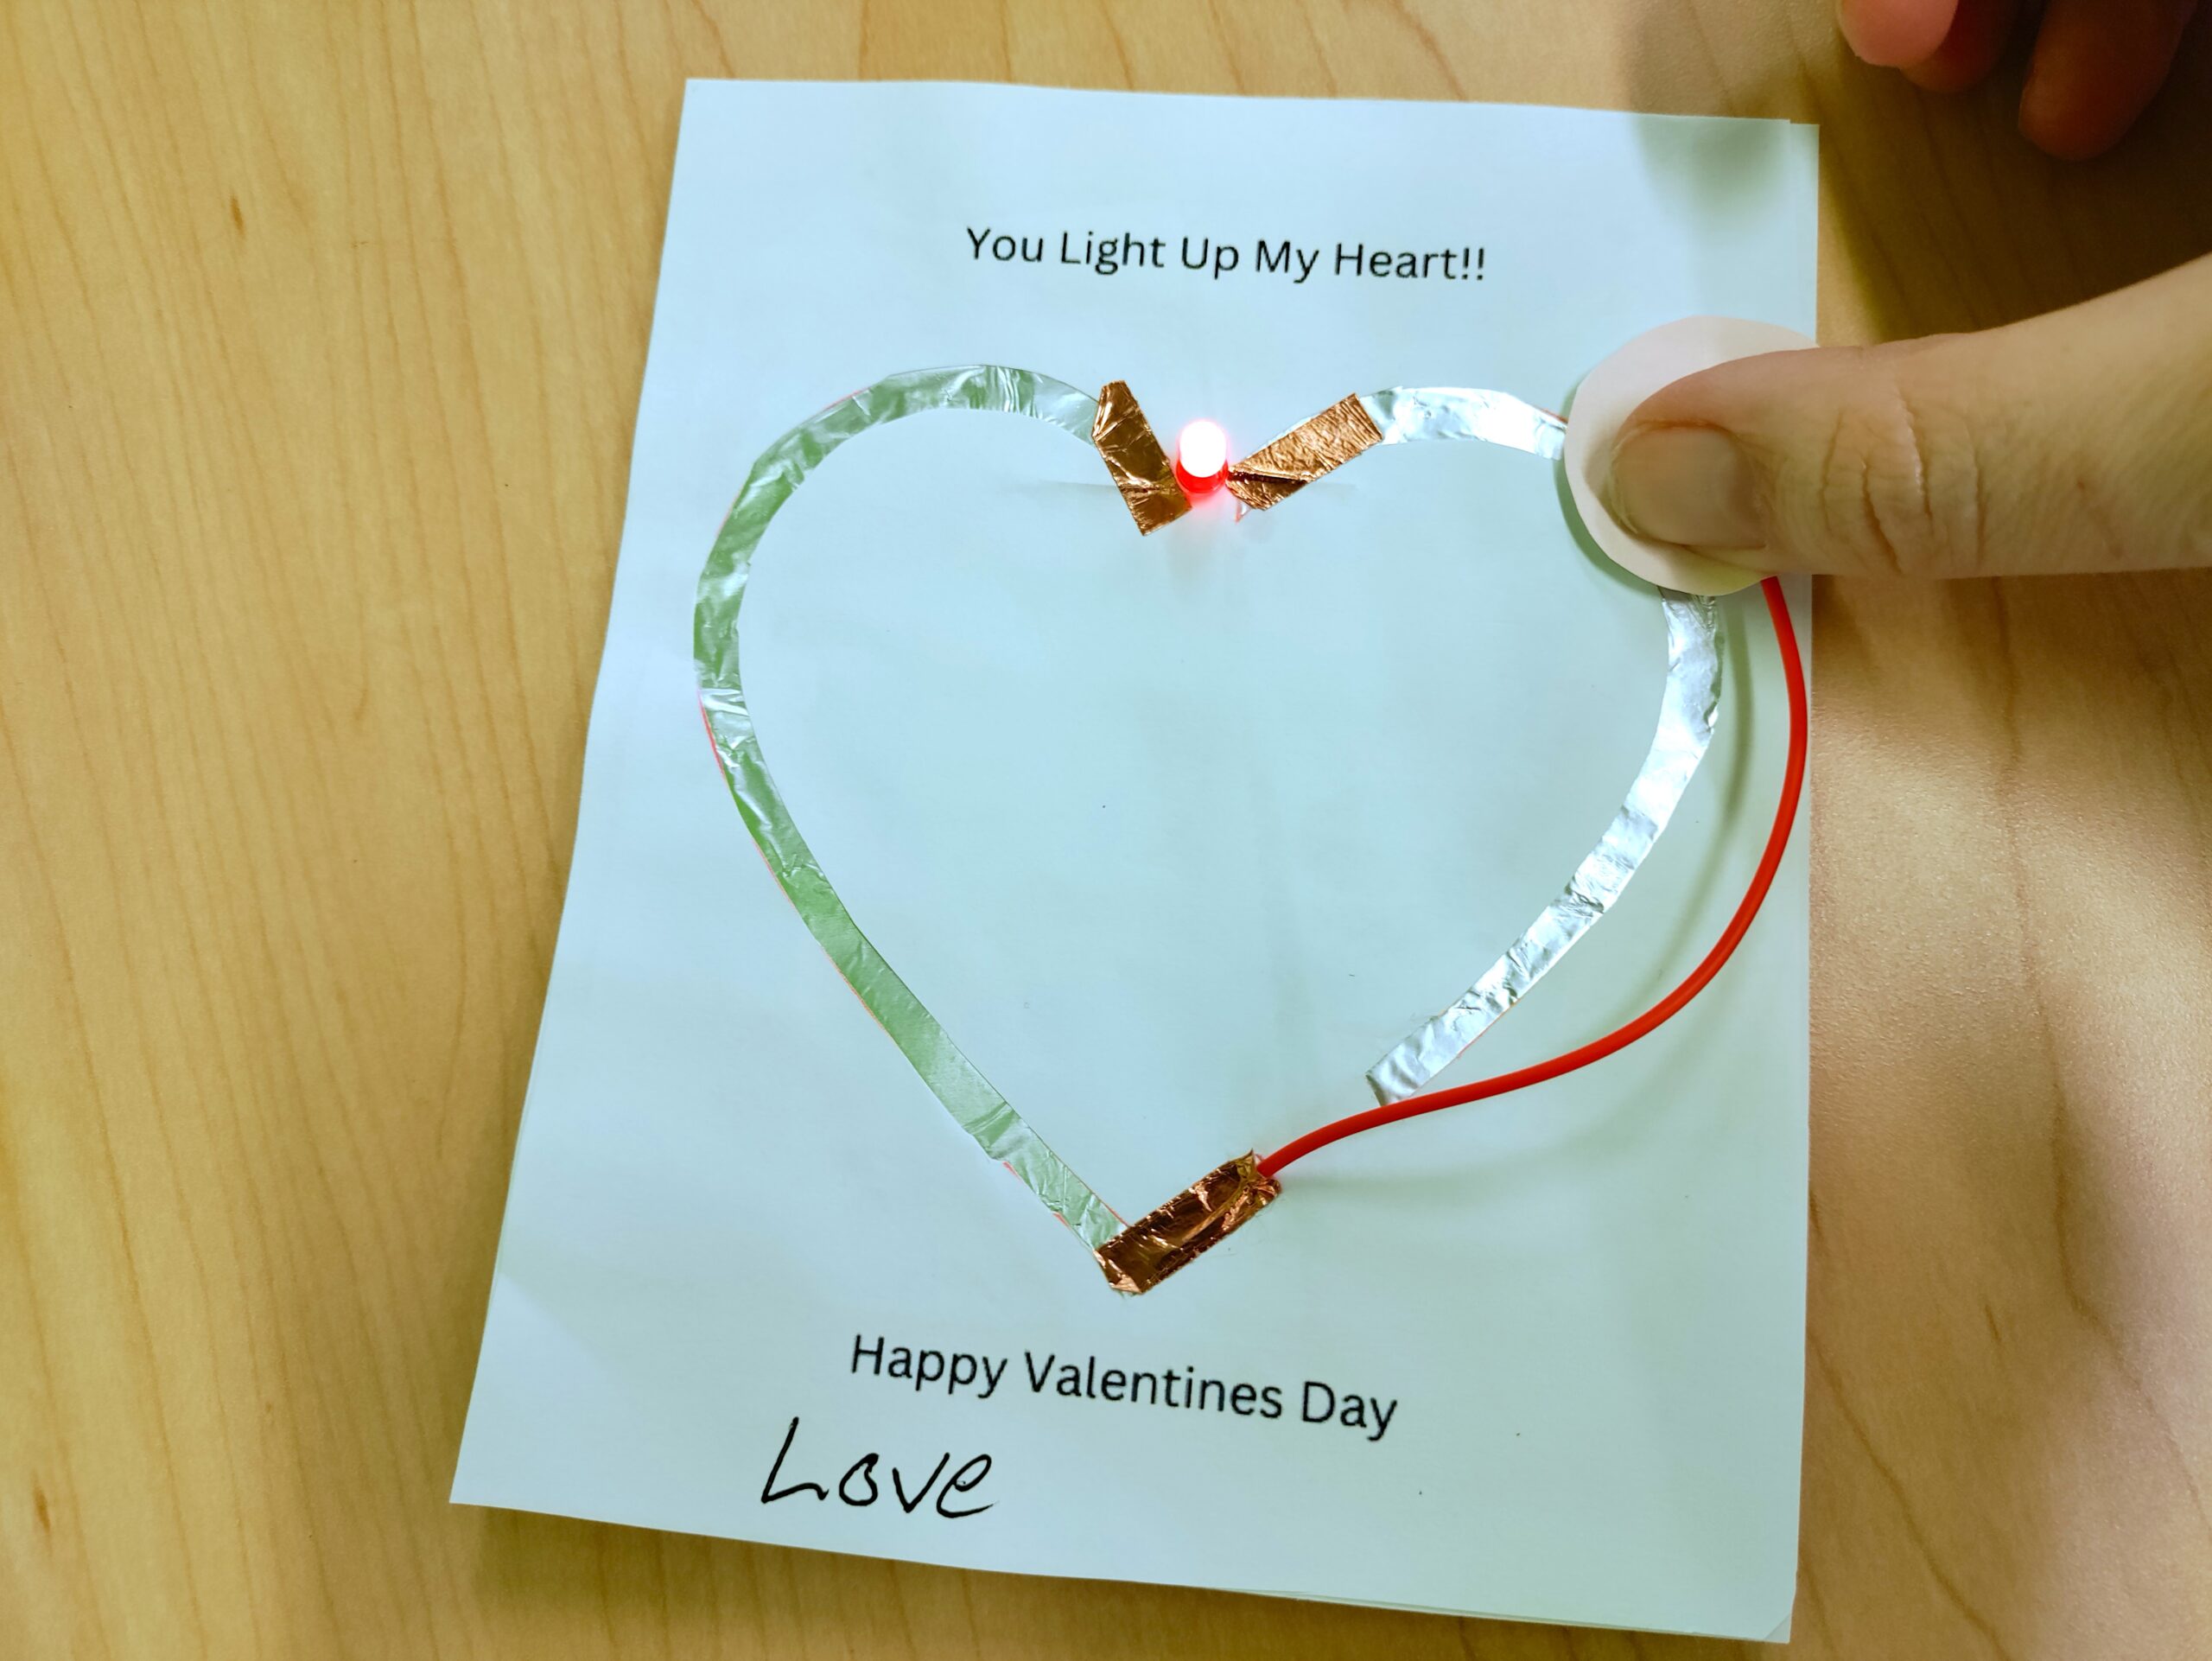
6. And that’s it! When you press the bottom (negative) side of the coin battery to the right side of the foil of your heart your LED light should light up! As you can see above we glued a circle “MOM” sign onto the top of the battery but you don’t have to. You could even create a flower if you really wanted to, or put a foam sticker on it!
TROUBLESHOOTING:
If your LED diode doesn’t work, double check the following:
- The back two pieces of foil are NOT touching or overlapped.
- The LED Diode legs are pointed the correct way (longer positive leg is pointing left, shorter negative leg is pointing right).
- The LED Diode legs are properly taped down between the aluminum foil exposed and the copper tape. AND that the copper tape from each leg is NOT overlapping with anything conductive on the other side.
- The bell wire is securely fastened onto the exposed foil on one end, and securely fastened to the positive top side of the battery WITHOUT touching the bottom or negative side of the battery.
- The bottom negative side of the battery is firmly pressed against the exposed foil to make a good connection.