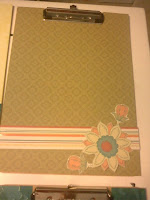
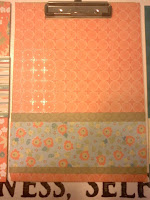
Teacher Gift Idea from Family Musings: Homemade Clipboard
This post may contain affiliate links, view our disclosure policy for details.
Family Musings has a fantastic gift idea for teachers!! It looks SO pretty and simple too! What a thoughtful and inexpensive gift for your child’s teacher!! She has a fabulous sight with lot of great craft ideas for kids! So check our her blog at Family Musings when you’re done reading this!
Easy Teacher Gifts
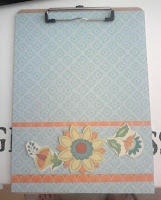
They are decorative clipboards. Here is your supply list:
- 1 plain clipboard (not the plastic kind)
- 1 bottle of modge podge
- 1 foam paint brush
- scissors
- cardstock of your choice
- nail file
- clear acrylic spray sealer
- old newspaper to cover your table
Step 1 – Design your layout. You can keep it simple and just use 1 or 2 sheets of paper. But they look more fashionable and designer-ish if you get creative. Think about interesting ways to cut the paper. Consider that a design might be best near the bottom so the thick paper does not mess up writing.
Step 2 – Cut out the space at the top for the actual clip part of the clipboard. If I am making more than 1 or 2 at a time, I prefer to make a template that I can trace on the back of the paper to make this part easier.
Step 3 – Remove paper from clipboard and apply first coat of Modge Podge directly to the clipboard. A thin layer is all you need. If your layer is too thick, your paper might buckle and that isn’t very pretty. (Note: If you’ve never worked with Modge Podge before, just know it is sticky like glue and can damage the finish on tables. To be safe, just lay out some newspaper or an old sheet to protect your work surface.)
Step 4 – Apply a thin layer of Modge Podge to the back of the first sheet of paper. By putting the Modge Podge on both items, you make it easier to slide the paper into the right place in case you put it down wrong.

Step 6 – Allow to dry. A thin coat should be dry in about 15 minutes. I don’t think a second coat is necessary, but if you have a lot of small pieces, you might want to add it.

Step 7 – Spray a clear coat of acrylic sealer over the clipboards.
Step 8 – Give to the gift recipient and be prepared for lots of thanks!
Ideas for paper include buying a “scrap pack” that is already coordinated (if you are fashion challenged like me). You could also create a theme for the kitchen by using food themed paper. Or if the clipboard might be used to track chores, you could work on that theme with your paper choices too.
These easy teacher gifts can also be embellished with stickers and ribbon. One friend uses ribbon to tie a nice pen to the top of the clipboard.
What is your favorite teacher gift?


