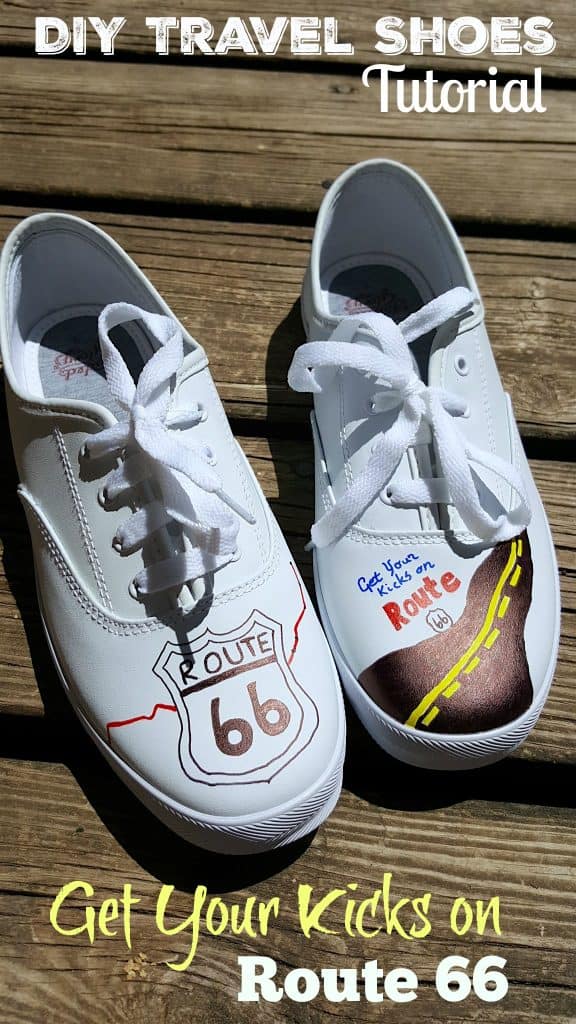
DIY “Get Your Kicks on Route 66” the Mother Road Travel Shoes Tutorial
This post may contain affiliate links, view our disclosure policy for details.
We are hitting the Mother Road on an EPIC ADVENTURE 7000 miles long and these DIY Get Your Kicks on Route 66 shoes are SWEET! PLUS they only cost a few bucks to make!
A little bit of joy comes into my life when Sharpie sends me over some new colors to try out. Last year we designed our own custom skateboard for my son’s room and a pretty cool Bigfoot gift set for my husband, but this year had me stumped a little! Most of you know that in May I have barely been home! Between being in Florida for a conference to being in California for a press trip, and now heading out to Yellowstone on a road trip then moving out of state – my life is in suitcases and boxes right now!
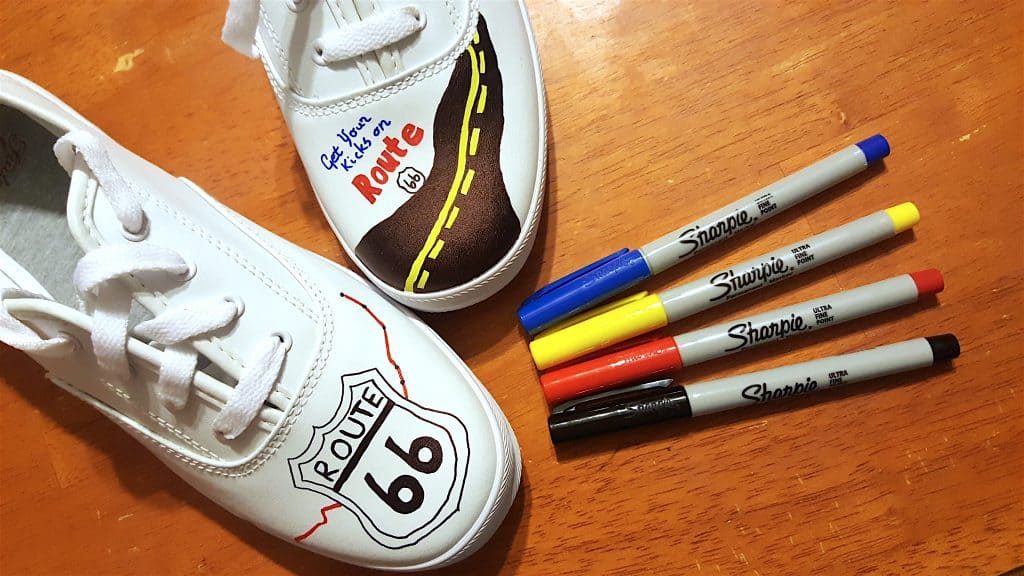
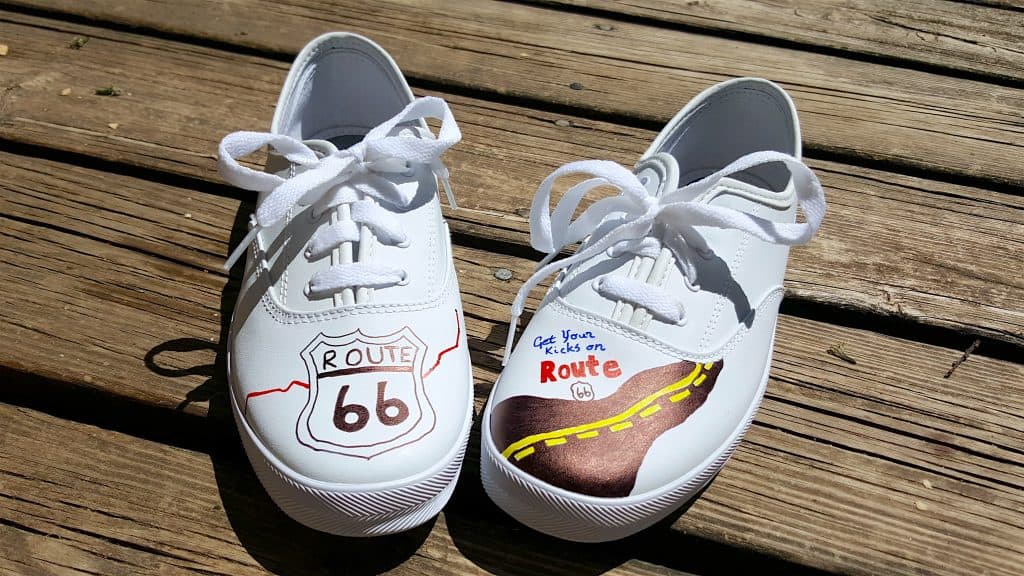
I have several awesome ideas for our new home when we move in a few weeks (especially for my son’s graffiti room!) but to kick off our summer (because TODAY is our LAST day of school! WOOT!) I really wanted something special to create that not only is sentimental but also FUN! My husband and I got married ON Route 66 just about 13 years ago now so it seemed fitting that I make myself a pair of fashionable travel shoes! With the theme of Route 66 of course! I’ve posted a bunch of close ups so you can recreate a similar style but don’t forget to make it specially your own! For these particular shoes I used the Sharpie Ultra Fine markers!
TIPS to Design Your Own Fashion Shoes:
You may remember quite some time ago we’ve created DIY Notebook Paper Teacher shoes & Pete the Cat shoes with our Sharpie fabric markers and I’ve been obsessed with DIY custom fashion ever since! Not only is it more budget friendly but I love having a unique creation! This time I decided to try a pair of smooth leathery shoe that I picked up on clearance for $3 at the store.
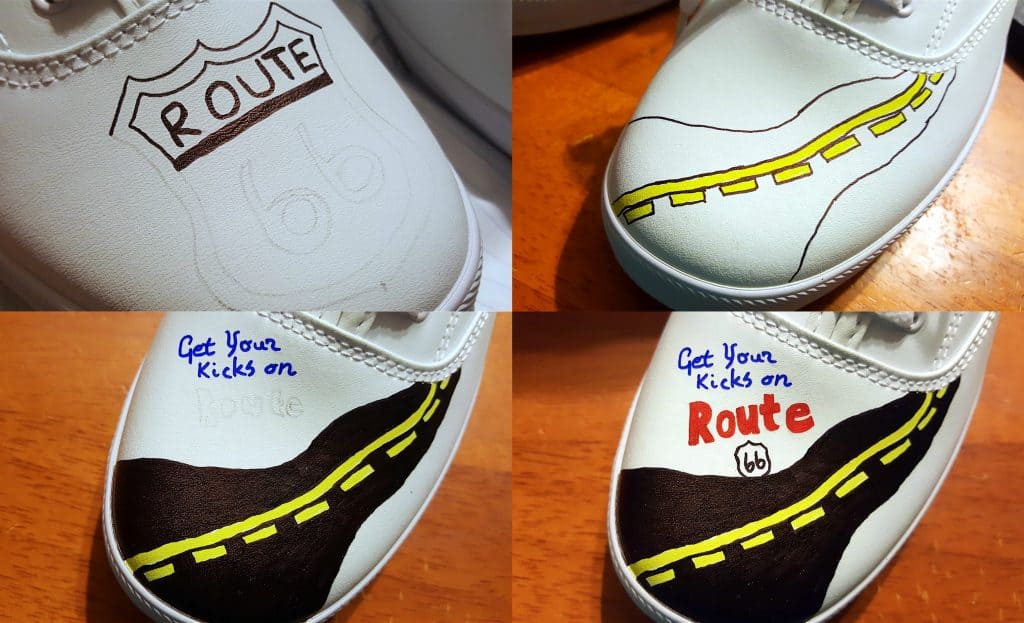
- Begin your design in PENCIL! It can always be erased (or washed out). The Sharpie Ultra Fine markers will color right over it! (although I do recommend lightly erasing what you can with a light color like yellow)
- Draw light colors first! In the photos above you can see that I colored in the yellow road lines first because it can always be covered over by the black. But you can’t draw the yellow on top of the black if you make a mistake!
- Outline everything first. Once everything is outlined then color in the rest like I did on the road! I made sure everything was outlined first and at the very end I colored it all in!
- Be careful where your hand is! This can be the tricky part – especially when working on shoes! Always be mindful of where your hand could be smudging! You don’t want to accidentally smear wet colors!
- Sign it! I try to initial or sign my custom designs – even if it’s on the sole or inside where no one can see it! It gives you a sense of ownership!
- Protect your shoes! (or shirt, etc.) After you’ve finished your custom artwork make sure you take care of it properly! Depending on the type of material you use you may need a waterproof sealer, or to throw an item in the dryer and heat set it.
How to Make a Custom Route 66 Coffee Mug: