Basement Educational Stations – Reading, Art, Building STEM
This post may contain affiliate links, view our disclosure policy for details.
When my kids were little we lived in Iowa for a while, and one of the many perks of that particular move was that it had a humongous unfinished basement! So we decided to turn the entire basement into a large kids play center – specifically an educational stations center for reading, art, building and science!
It was especially perfect during the winter months since it frequently dipped to negative temperatures outside where they didn’t want to play outside! Throughout our summer travels we love to travel. One of our favorite kid-friendly spots that we visited was the Chattanooga Children’s Museum which was absolutely amazing! You HAVE to go if you ever get the chance!
I loved how the entire museum was sectioned off by subject areas sort of in centers, so I wanted to do that with my basement.
There are THREE centers that I started with. The entire basement was just the concrete floor so we threw some carpet remnants on top to help us with cold bare feet. I thought about just doing the corners of each room in a flooring for each section but we were on a budget.
1. The Reading Corner
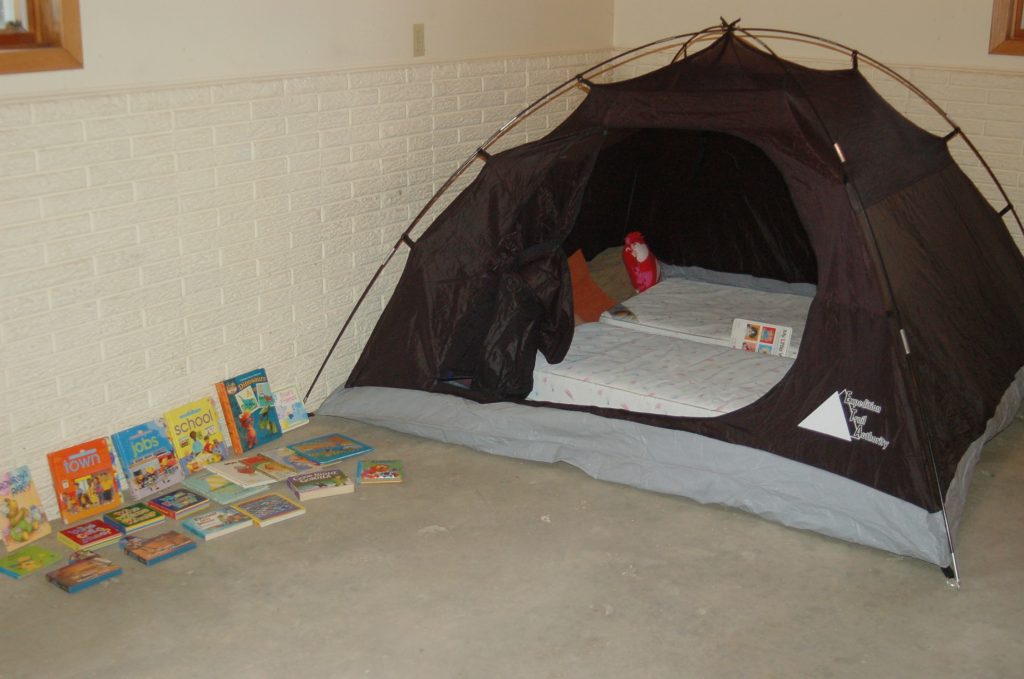
I wanted an enclosed quiet area for reading. Since we had picked up a few small tents at the local thrift store, I figured it would be a great idea to turn that into our reading corner! My kids had since outgrown their toddler mattresses so we put those inside to keep it cozy.
I’ve placed two crib mattresses inside and lined both sides with pillows. We need to buy some sort of bookshelf or shelving system to hold all of our books. I thought about stringing some rope lights or something inside the tent. I’d love to know if you had any more ideas to make this a nice quiet, cozy place to chill out and read.
2. The Art Station
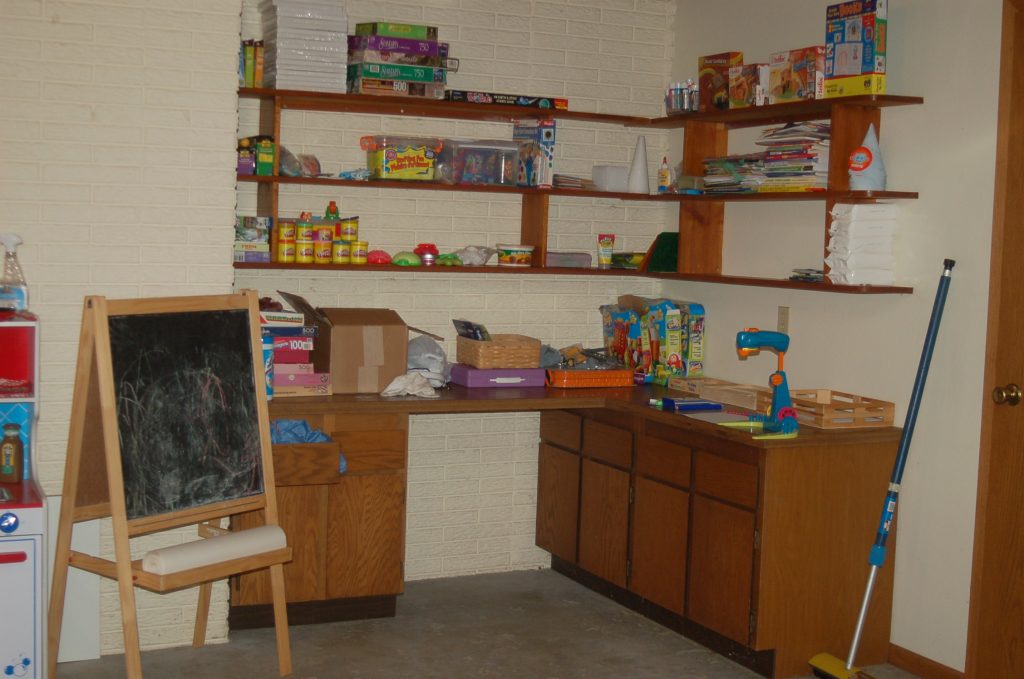
I am absolutely THRILLED that this shelving & desk area was already here in the basement when we arrived. This area will be for all arts/crafts and will be available for the kids to get a hold of at any time. I wanted to encourage them to be creative instead of having everything locked up like I used to.
All their Moon Dough, Play-doh, Playfoam, and other squishy things are here too. I thought about using mason jars to store things like pom poms, googly eyes, etc. to make things easier to see. Any other fun ideas for this corner?
3. The Building Construction Zone
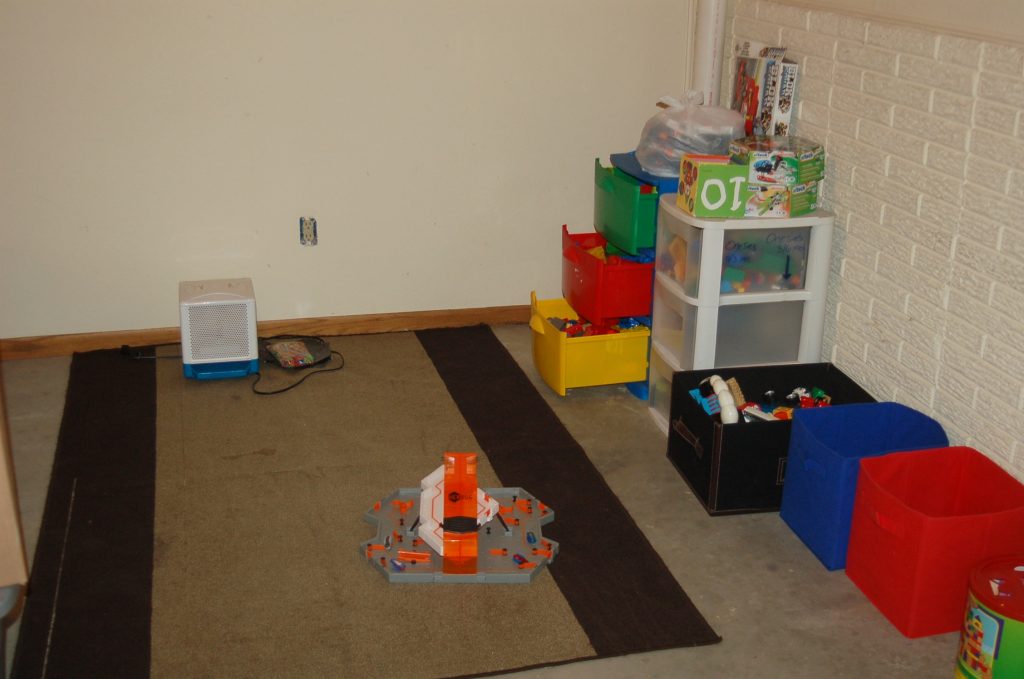
This is going to be the building zone. Mega Bloks, LEGOs, Hexbug sets, wood blocks, Eitech sets, etc. I have another rug to put down once I find it in my boxes but this needs some good ideas for this corner. What do you think?




How about a sports zone with all sports/games….could even have board games….OR an active zone with cars/trucks etc – best of luck!
a JUNGLE corner!
For about $20 you can purchase wire cubes from Target. They can be put into various combinations (we doubled up one and put my boys large nerf guns into that one!) We move a LOT since I’m military, and these are VERY good for changing my mind on how I want the boys to store their toys every year when we move!! You can either put items in clear shoeboxes and/or clothe cubes (watch for sales) so that the building toys can be seen and thus used to play with!
Congrats on the move. One way to add to your construction zone area is to put the Legos large square pieces on the wall so they can build different ways ( I put a little tray to caught Legos that fall).
Or you can use cardboard boxes for your kids to hammer things in. If you don’t have cardboard you can use the green stuff that holds flowers in.
In your art station you can paint the cabinets with chalkboard paint they have several different colors now and the boys can draw different things
For the Lego area, how about some of these ideas? (Using a cheap side table as a construction space and/or creating labels from scrapbook paper for your plastic drawer units and bins to sort by color or shape…)
http://pinterest.com/pin/173247916884910015/
http://pinterest.com/pin/95771929546015389/
Also, I found some of those cheap plastic shelves that come apart (that my parents had in the garage and were done using) and spray painted them a pretty color for my classroom office. They have all sorts of colors of paint these days, and if you keep to a color theme (maybe primary colors? or blue/yellow, green/blue, etc), it can really unify a room and make it look more cohesive.
(They were shelves like these: http://www.homedepot.com/h_d1/N-5yc1v/R-202520085/h_d2/ProductDisplay?catalogId=10053&langId=-1&keyword=plastic+shelves&storeId=10051&superSkuId=202858079#.UCG3OaDAERQ)
Hope that helps! 🙂
Rain gutters for the bookshelves in the library area! They attach easily to all types of walls & you can have the books facing outwards so you can see the titles/covers displayed.
How funny that the three areas you need help with are the three centers that I feel need the most help in my classroom. I will definitely be watching this post for some ideas! I saw something neat for the library online the other day. Someone had taken the drop side front off an old crib and turned it sideways to hang books over the slats. It was just leaned against the wall. I also keep puppets and a flannel board in my library at school. Blocks and library should also have writing materials for recording ideas, drawing their creations, etc.
There is a really cool DIY Lego table idea on lowes.com I believe. It would be perfect for your block area.
As for your art storage problem, I recommend buying as many of the plastic pencil boxes that are on sale at Target this week as you can. They stack really nicely, and you can either label the side or actually glue on an item that is representative of what is inside each box.
Good luck!
When I saw your construction zone, I thought it would be cool to have Lego building plates permanently attached to the floor and/or walls!
And for your reading corner, I would definitely try to put up gutters for books facing covers out (rather than spines out) a la Jim Trelease (Read Aloud Handbook). That brick might be hard to deal with, though…
You have done a lot already in your short time here! I am soooo impressed! 🙂
I don’t know if it would work, but I have a friend who uses gutters attached to the wall for her kids books. This way the covers (which are eye-catching) can always be seen. I think that my friend posted it on her blog…. but I can’t seem to locate it. I can get more details if you would like! 🙂
You could also use mason just but attach the lids to the bottom side of the shelf and then they would screw on the bottom of the shelf and you would still have the shelf space below the jars! (Might not be a good idea with glass jars with the cement floor but you might be able to find some plastic ones.)
Good luck and happy decorating! 🙂
Instead of those breakable Mason jars (especially on a concrete floor), try cutting the tops off of the liquid laundry detergent containers. You can cover the wording with fun contact paper. They take up less space and have a built in handle! I have used these in my classroom for years. Easy clean up and easy to tote around! You can label the outside of the containers so you can easily spot what you are looking for.
1) Use peel and stick vinyl or carpet tiles in various colors or patterns to differentiate each area.
2) Try lanterns and flash lights in the reading tent. You could also add dark sticky notes and glow markers or crayons to mark down new vocabulary or questions as they read. You could make fabric pockets to hang on the wall to contain the books. You could make each pattern or color a different genre or level. Fake vines from the craft store, stuffed animals (they can also read to them) and twinkle lights would add to the wilderness feeling.
3) Add a step ladder and colorful labels so that your children can easily access and put away all of the great materials at the art center. A drying rack would fit nicely in the inset section of the cabinets.
4) Cover a large section of a wall in your building corner with several flat lego sheets to keep their building off the floor. Also add a save shelf or table so that their creations aren’t left all over the place being “saved”. This way they have a limited space and it is less likely to be damaged and it won’t clutter the basement.
The rain gutter idea is great but if you want more of a splash of color you can hang 2 curtain rods at different lengths away from the wall and sew fabric to be the shelf part. That way you can change it with the boys getting older and the books face out so they will like it better than just seeing the spines of the books
Flooring:
http://pinterest.com/pin/80150068339394343/ {http://diyshowoff.com/2012/03/08/painted-play-mat-and-the-pinterest-challenge/}
For your books:
Ten Dollar Ledges – http://pinterest.com/pin/80150068338044647/ {http://ana-white.com/2010/10/plans/ten-dollar-ledges}
Pallet Shelving (to have books face front out) – http://pinterest.com/pin/80150068338234228/ {http://practicalenrichment.wordpress.com/2011/06/29/recycled-pallet-furniture/}
Spice Racks (same as above) – http://pinterest.com/pin/80150068337961724/ Book Sling – http://pinterest.com/pin/80150068337839550/ {http://pennycarnival.typepad.com/penny_carnival/2009/02/tutorial-hanging-book-display.html}
Rain Gutter Shelving
Hope this helps!
For space #1-
Put a soft, thick comforter over those matresses and a rug outside of it with a small rocker on it with a basket next to it for books.
Gutter bookshelves-
http://pinterest.com/pin/275142476935
Lantern String lights for inside of tent- LOVE these for the camping theme!
http://www.target.com/p/battery-operated-10-white-led-lantern-string-lights/-/A-11007609#?lnk=sc_qi_detaillink
Space #2-
Here is a cool way to display their art or you could use wire-
http://pinterest.com/pin/111816003217787775/
These foam ABC mats clean up pretty well-
http://www.walmart.com/ip/Alphabet-4-x-4-Activity-Play-Mat/20595824
Definitely put a small table there for them to work at. You could find a small kitchen set on Craigslist cheap. Use cans covered with scrapbook paper for art supplies. Love the idea of painting the cabinets with some chalkboard paint!
Space #3-
I use a low coffee table for my boys to play on in our family room. They love to build on that and the rug. Use some road maps as decor.
I think you have a great start; you just need to cozy it up a little. Have you thought of a fourth area- a grocery store? Please keep us updated- I love what you’ve done so far!
I think you have some very blessed children to to have such a nice place to play!!
I hope to have a basement one day like you–first on my wish list is an indoor playhouse. Depending on if your husband or family members are able to create this I think it could be easily done: http://pinterest.com/pin/255790453805937842/
This would look cute in your ‘art’ area and serve as a great way to display art work: http://pinterest.com/pin/255790453805637669/
For book storage: http://pinterest.com/pin/255790453805794307/