DIY How to Build Your Own Chicken Coop #DigIn #HeartOutdoors
This post may contain affiliate links, view our disclosure policy for details.
This is a sponsored post written by me on behalf of The Home Depot.
You guys know we’ve been working on a huge project lately – building our own chicken coop thanks to The Home Depot!! I am SO excited and I finally have everything together to share with you!
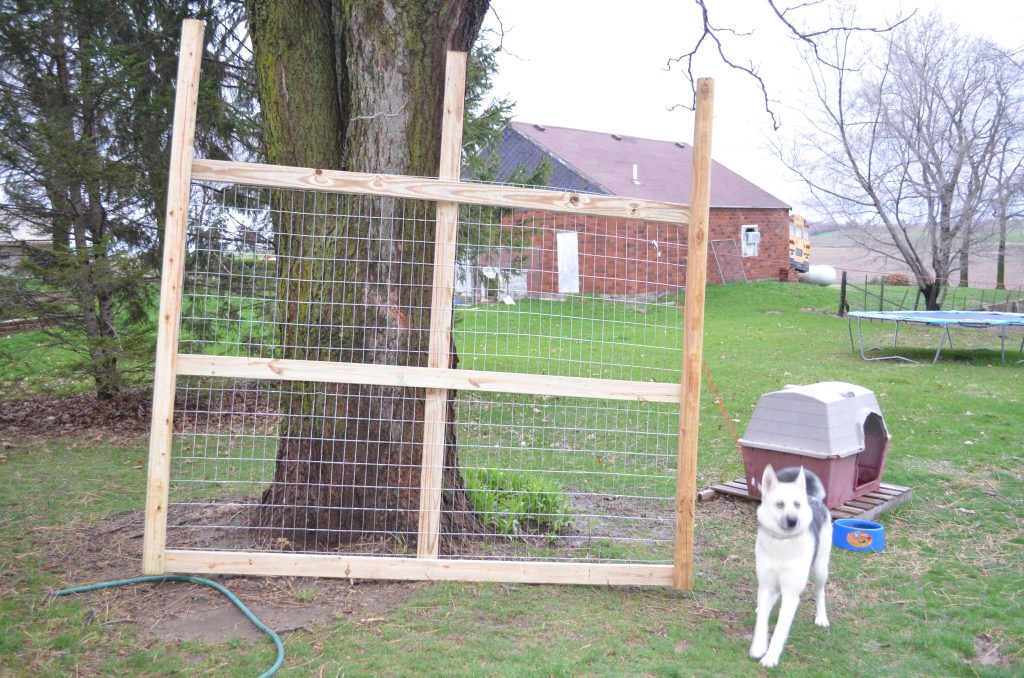
When we decided to start building our chicken coop the weather here in Iowa had turned awful. It was just sopping rain, flooding roads….it was practically impossible to work outside so we improvised and started building what we could in the garage. When the rain finally stopped we carted everything out into the back yard. The first thing that we built was one panel of the chicken yard. In the photo it’s upside down and the 3 extra lengths of wood will be sunk into the ground. We needed to completely enclose the chicken coop and yard because of the amount of predators we have out here in the country.
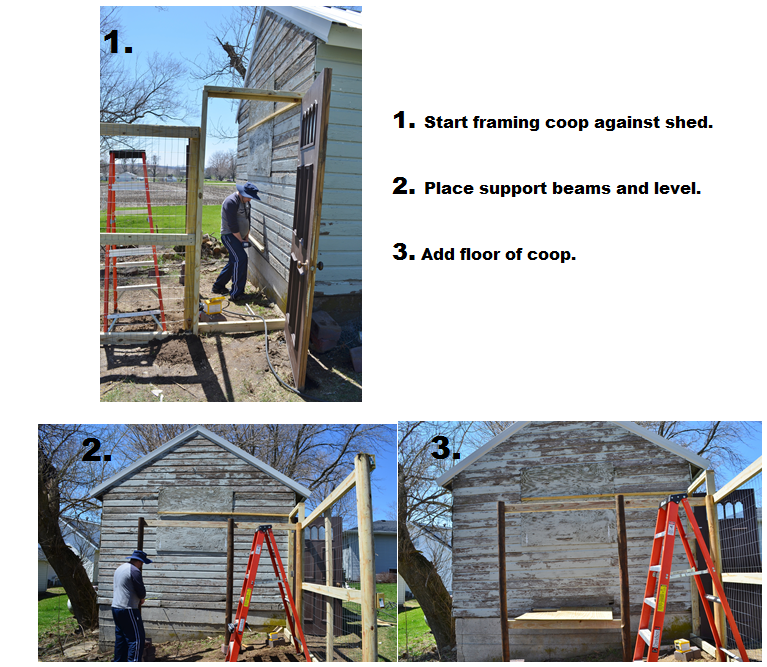
We are very fortunate that we have an old shed to build our coop up against so our plans for our hens are pretty extensive. If you don’t have an old shed to back your coop up against you can just close the back of the coop up with a large sheet of plywood.
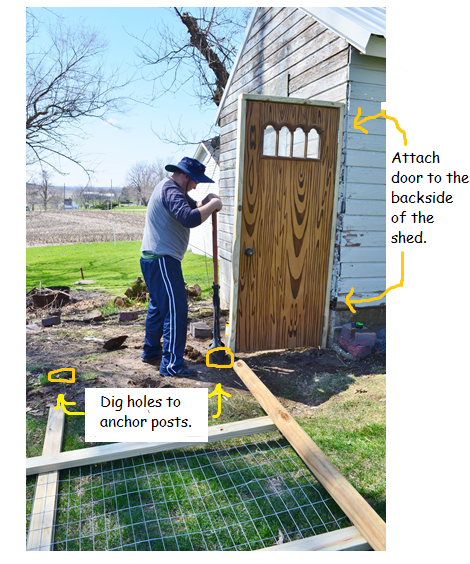
We had an old steel door laying around that we decided to use for our chicken yard because of the extreme high winds we face especially in the winter. This chicken coop and yard had to be absolutely rock solid or we knew it wouldn’t last. For less extreme weather areas it’s very simple to build a wood frame door with chicken fencing in the door panel. Because it was such a heavy door we had to secure it to the back of the shed.
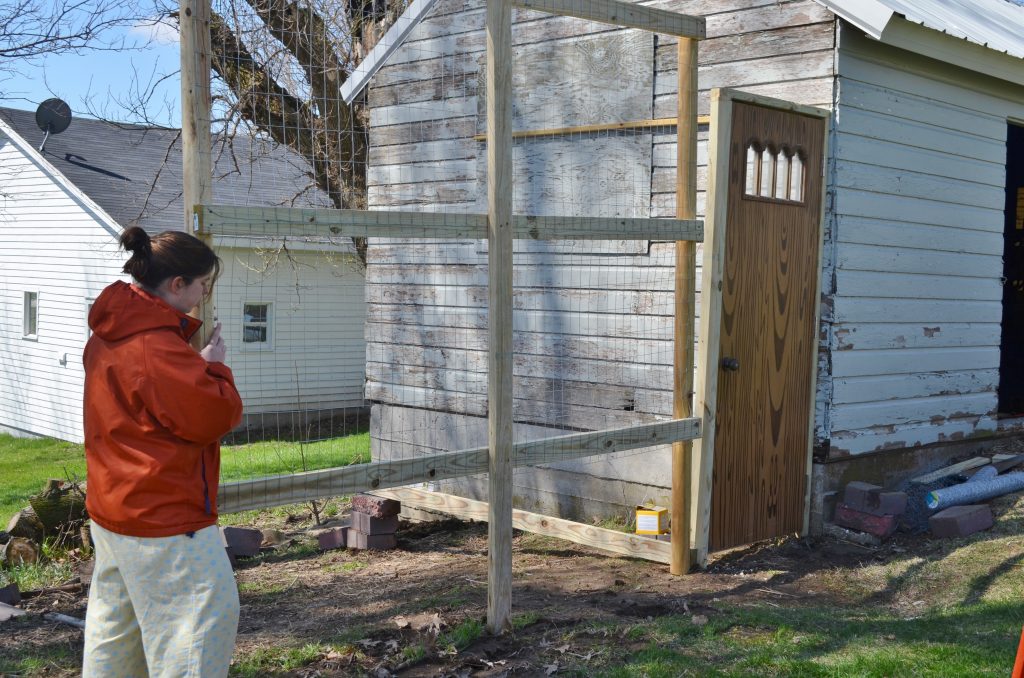
Next we measured and dug the three holes we needed to secure the panel of the chicken yard in place that we had pre-built due to poor weather conditions.
Yes, I admit, by this point we were ancy and ecstatic and I even started work that cold morning in my pajamas!
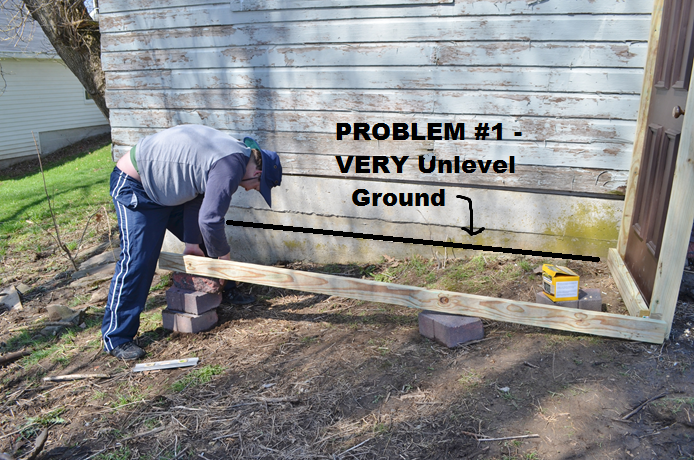
Our biggest issue to overcome was how unlevel the ground behind the shed was as you can see in the photo above. A real Iowan would have just built the entire yard slanted to match the ground (which is what I wanted to do) but my husband wanted everything leveled off to ensure it’s durability. We couldn’t afford the extra expense of filling in the area to make it level so we built around it. My husband used some old landscaping bricks that we had in the shed to help support the actual hen house.
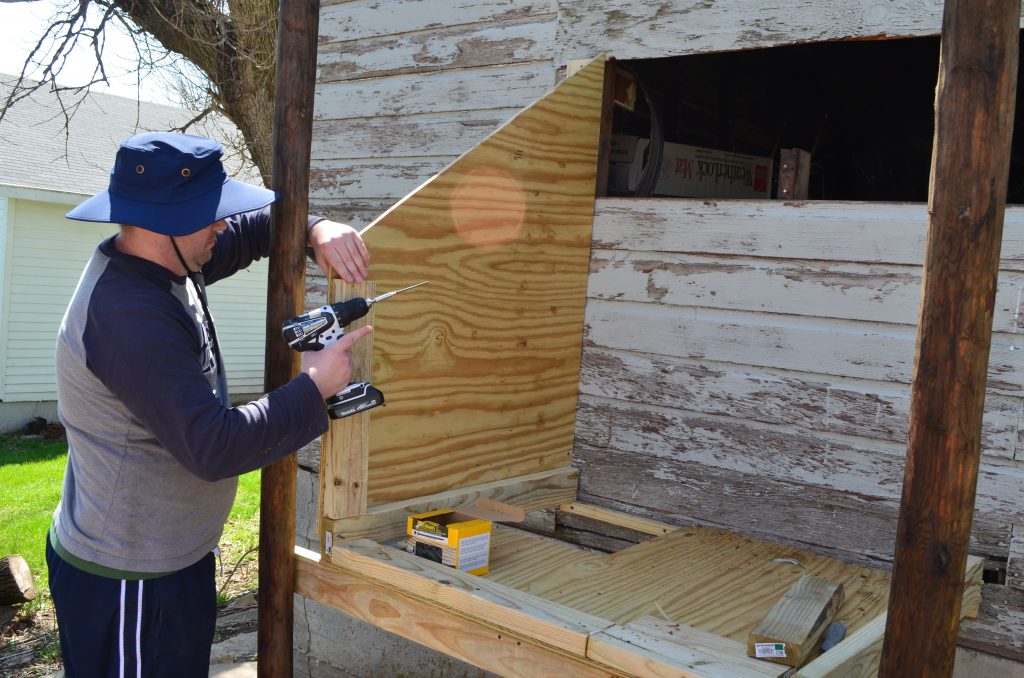
This part of the project seemed to take forever. We were very careful to make sure everything was level which proved to be very tricky! With the high amounts of snow, ice, and rain that we can get I knew erosion of this area was also going to be an issue. We used two landscaping timbers to attach the actual coop to. The floor of the coop is a piece of plywood with a small square cut out of the backside which will later turn into the entrance of the coop for our hens.
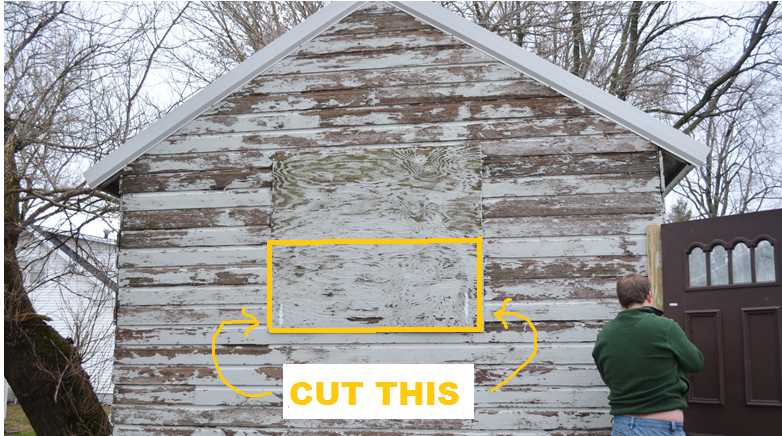
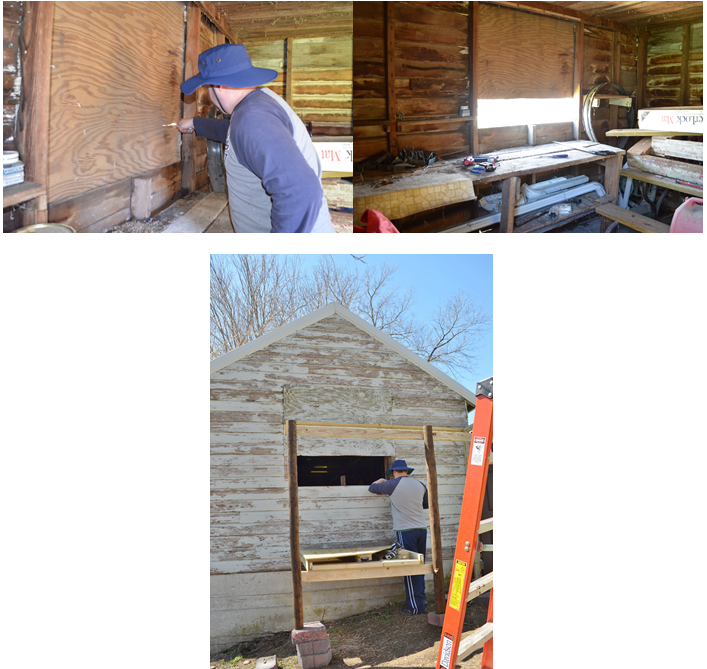
Because we had the luxury of building our coop against our shed, and since our weather temperatures can drop into the -30’s in the winter we decided to actually cut out a section of the shed so that our hens could go inside for extra protection during ice storms and blizzards. This is an extra step most people won’t be able to do but it works perfect for our weather conditions.
Our plan was to build the coop against the back end of the shed and create it so that our hens can come inside the shed in the cold months where we would station a heat lamp for them in addition to extra hay.
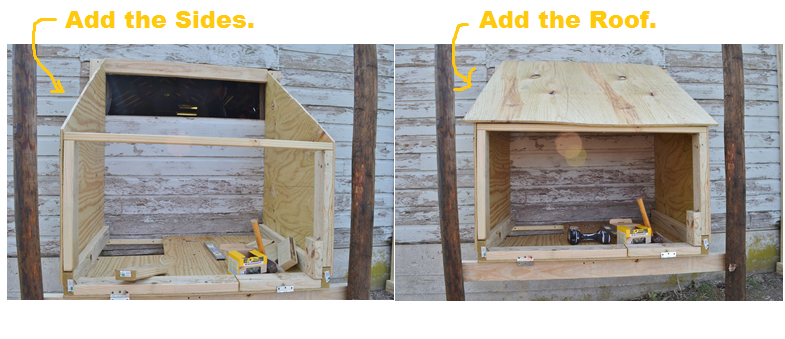
Once we had cut the hole out of the shed it was time to get started on actually building the coop itself.
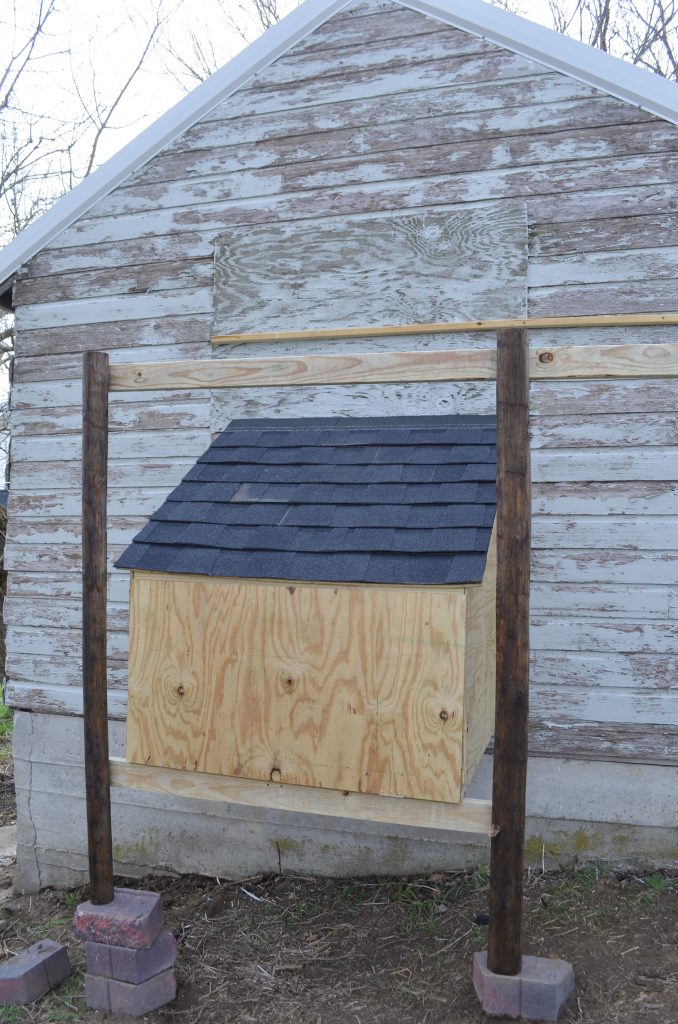
For the roof we decided to use a single sheet of plywood since we had old shingle stored in the shed. If you don’t have shingles to use on the roof I highly recommend building the roof with at least two sheets of plywood or some sort of tin roofing to keep your hens dry.
For the front of the coop we simply attached a sheet of plywood with some door hinges so that the entire front can swing down in case we needed to get inside this outdoor coop. The door stays shuts with a set of eye hooks on either side of the coop.
Here are a few up close shots of some of the features of our coop. You’ll see that we have two different ramp systems – one that is sturdier located beneath the coop outdoors and one inside the coop to help the hens get into the shed. As you can see we had plenty of little helpers at our disposal as well! And we ended up creating a brick “wall” to help support the coop and prevent further erosion in the chicken yard.
Here are a few of our hens perched on the shed wall in the “doorway” between the coop and the shed.
And to get a better glimpse of the entire project completed, what the chicken yard looks like, and our possibilities for expansion check out my video!
In the future I may add another panel of chicken wire around the bottom of the chicken yard as our smallest chicks can get out if they want to. I can hardly wait until the fall when they start laying eggs! You can build a chicken coop as simple or as elaborate as you want it to be. All they need is a little place to roost at night and stay out of the elements.
You could have easily cut the cost of our project in half if you don’t need to enclose it or make it as large. Our area can house about 13 hens although ideally I would love to only have about 6 in there for an extra spacious chicken yard. In a year or two we will expand the enclosed chicken yard another 8-12 feet. We also chose to purchase deck screws as they came with a lifetime guarantee.The entire project probably took us a full 3 days or so. Don’t forget to use your level! We spent under $260 for supplies which included:
- 3 landscaping timbers
- 21 2×4’s
- 2 large sheets of plywood
- 8 furring strips
- 2 pack of door hinges
- 2 pack of eye hooks
- 2-4 rolls of chicken wire or garden screening (depends on your size)
- 4 pack of small hinges
- 1 large box of deck screws (lifetime guarantee)
It’s home improvement time, and The Home Depot has everything you need to #DigIn for Spring. No matter what projects you want to tackle, they have great values on all you need. They’re ready to help you with renovation ideas and expert advice, too.
Get over $300 in email exclusive savings each year, sneak peeks on new products, monthly lawn & garden ideas for your region and access to The Home Depot’s gardening experts. Or go to homedepot.com/gardenclub to see some of the many benefits of membership.
This is a sponsored post written by me on behalf of The Home Depot.







I love Home Depot, I can get into so much trouble there! But, after checking out the website I especially love that they are featuring DIY projects and how-to’s. Perfect for someone like me with big ideas whose not really sure how to get there!
That’s really cool, Crystal! I am a bit jealous. I have been thinking of doing the same thing but we haven’t taken the plunge yet. Maybe I can convince my husband to make me one.
Honestly having chickens is easier than having most any other pet 🙂 We love it and it’s great fun to teach the kids where their food comes from!
WOW! Seems like a big project, glad you were able to get it done. It turned out great!
I definitely couldn’t have done it without my husband! I’m thrilled with how it turned out!
Your coop looks so simple. We’ll have chickens one day when we don’t live in a place with an HOA.
Wow! What a huge project and so neat! I love how the whole family pitched in!
We could hardly keep my kids away! 🙂 They were just as excited as we were!
Wow! That is HUGE! I would love the room to make a chicken coop that big. I can’t wait to hear how it goes for you doen the road!
Wow! That is such an awesome project. I love the Home Depot and what you were able to build on your own.
You guys rocked that!! I’m going to have to refer back to this when we go to make a coop, thank you!!
I love how you gave extra consideration to them for weather conditions. This is amazing!
That’s cool! I would love to have chickens but our Hoa would not allow it.
Looks like you have made a lot of progress. We always shop in Home Depot.
I can’t believe how inexpensive this project was. And it looks fabulous…lucky chickens!
i need to show this to my mother in law. she has chickens running in the yard and this would be great for her to make.
Your coop looks great!! Chickens can be a lot of fun.