VEX Robotics by Hexbug – DIY RC Spider Robot
This post may contain affiliate links, view our disclosure policy for details.
Disclosure: I received the product below as a Hexbug Ambassador. All opinions are my own.
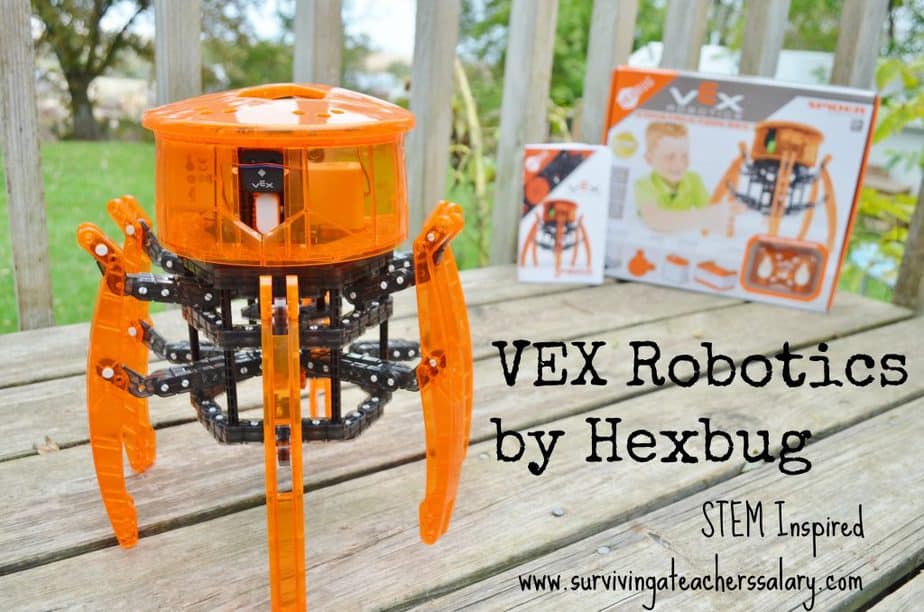
If there is one thing that gets my kids excited after school it’s seeing a box from Hexbug sitting on our doorstep! However this shipment was much different than I was expecting – it was a SNEAK PEEK surprise at the ALL NEW VEX Robotics by Hexbug! Inspired by STEM education! It’s a HUGE Remote Controlled DIY Hexbug Spider! It looks just like the “regular” Hexbug Spider but is gigantic, and after you build it can walk around and spin it’s head 360*! It also uses sensors so that it doesn’t crash into things – WAY COOL!!!! VEX Robotics not only has the Spider version but also the Ant, Scarab, and Strandbeast! I want each and every single one!!! And you wouldn’t believe it but you can program them to have 64 different programming variations. PLUS this 350+ piece set is cross compatible with the other VEX Robotics products!
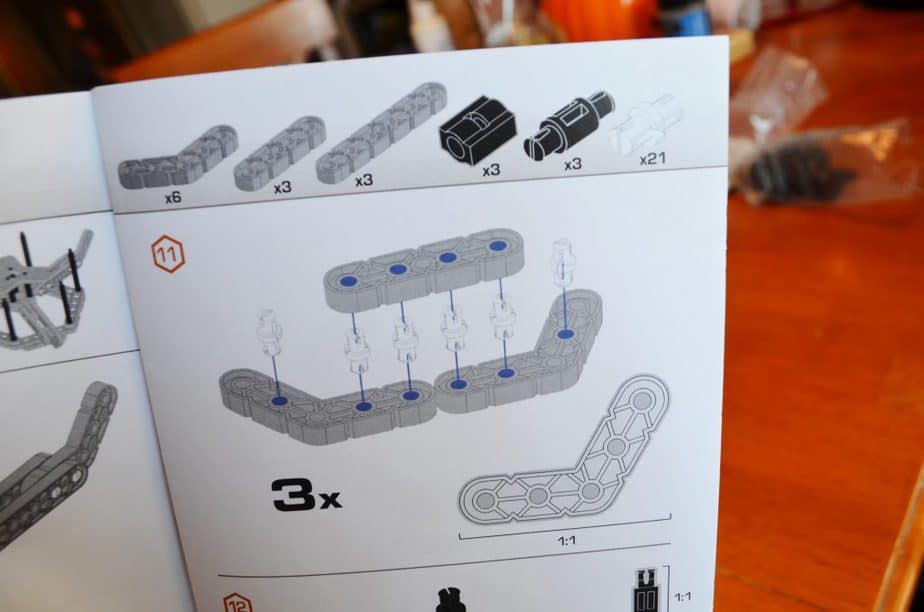
The VEX Robotics Spider is geared for ages 8+ (although my 7 year old was able to do much of this project with me) but I still recommend having an adult nearby on hand to help out! The instruction manual easily shows you how to build this Spider step by step, but I’m not going to lie – it will take a LONG time! Well, if you’re 9 months pregnant and super tired like me it will take you a long time! 🙂 In fact I spent several hours building this only to realize that I had mixed the legs up and put them on wrong! I finally had my husband help spare my sanity and fix them for me later. It was not a complicated building set, just a time consuming one – but SO incredibly cool if you’re an avid Hexbug fan like us!
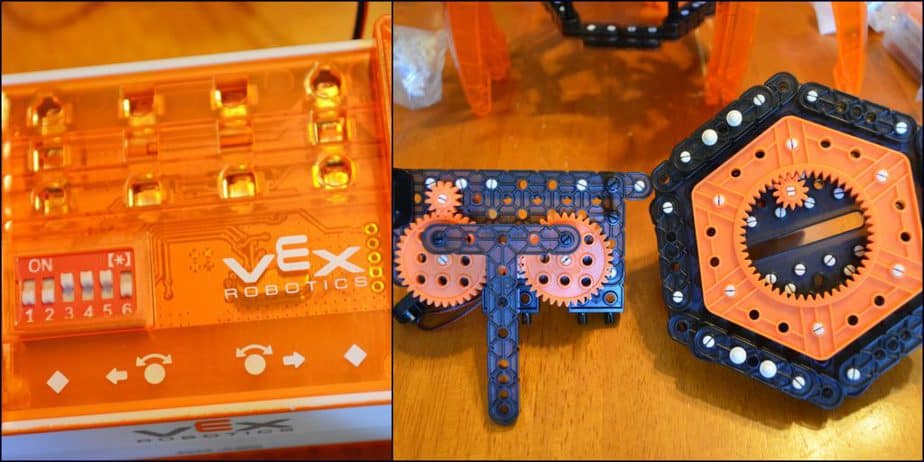
All of the pieces come neatly placed inside a storage box and true to Hexbug standard the Spider pieces are made of sturdy plastic parts. The parts simply snapped together firmly and never once fell apart. If anything it’s a little difficult to pull pieces apart if you mess up which I’d much prefer over something falling into pieces! On the left in the photo above you can see the “brain” of the Spider where you can flip various switches for different programming options. On the right you can see some of the gears that we built simply snapped together.
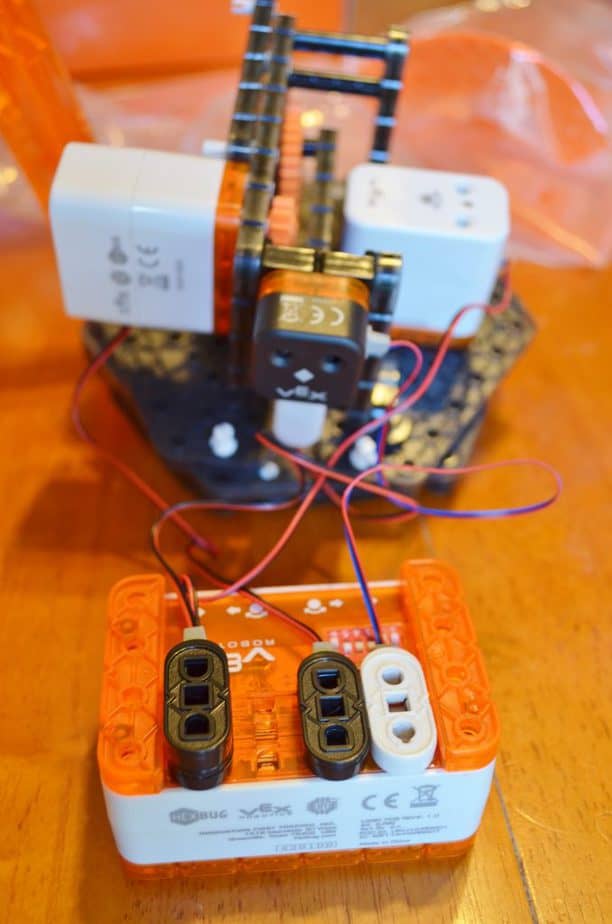
Just a shot of some of the electrical inside workings of the Spider! Follow the directions closely here so everything works properly!
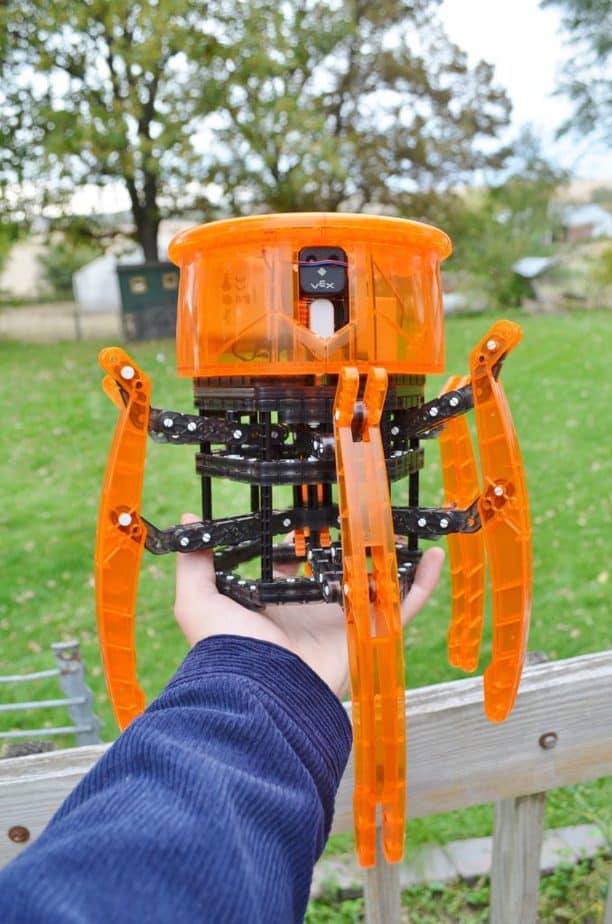
You can see how LARGE the VEX Robotics Spider is just by how I have to hold it in my hand! It walks and acts just like a regular Hexbug Spider, perhaps a touch slower but definitely cooler since you can build it yourself! The VEX Robotics products range in price from $49.99+ to $149.99 for the whole kit to make all 4 of them (biggest bang for your buck but you can only build one at a time)! Although this is a short low light Instagram video here’s a quick clip of our first use of the Spider in action:
Loading
We’ve been working on building this @hexbug Spider life sized #robot RC #toys #kids #educational … I think we’ve got it!
Overall thoughts – absolutely awesome! The plastic pieces are VERY sturdy and snap together tightly – I can’t possibly imagine how you could break it without putting some serious force on it. The difficulty level with adult assistance was spot on and although it took a LONG time to build it wasn’t difficult to follow the directions. Be prepared to knock out a good day or several hours over several days to build this with your kids. I swear the people that create these kits are just genius! It’s an amazing contraption. The price is right compared to other Build your own RC sets we’ve used and would certainly make a stunning gift under your Christmas tree this year! ESPECIALLY if your family loves Hexbug products as much as we do! It’s also a fantastic project for an after school robotics club to build although I recommend buying the 4 robot set so that you can create different Hexbugs throughout the year and get more for your money! Not to mention that the 4 robot set also allows you to create your own which would be an awesome STEM middle/high school project too! The VEX Robotics are definitely worth the price – I would LOVE to own them all!!!




Okay, that is SO FLIPPING NEAT! I got one of the original hexbugs and thought with how small i was, it would be too easy to lose/break/get eaten by a dog. The larger sized bugs are definitely more of my preference. But wow, 350 parts? No wonder it took a while to put together! If you’re kiddos are the kind who love putting things together, this would be an awesome toy for them!
Ha! My daughter is on the robotics team at the STEM academy here in Knoxville! She would love this.
Okay, that thing is cool looking! My kids used to love the small hex bugs they got in their stockings!
How cool is this…I’ve been looking for a Hexbug spider. My son just loves these and plays with them all the time.
Whoh.. This looks so very cool! I am sure my daughter would just have a blast building this. And the fact that this has a motor, that would make it even cooler for her.
I must say that these look really neat. I know my boys have always wanted them but I haven’t went by and got any yet. Looks like a really creative toy that makes them work for what they want. Legos but with nuts and bolts, love it.
My son got this for his birthday and he loves building things! He has been working for hours on it and is rebuilding now. First go was a bust but he is trying again. He is 9 and this was the perfect for him!
Which instructions did you follow? My son got this for Christmas, and we are very frustrated – the booklet that came with it is not consistent with the parts provided – the hexagons that it has you build using the pieces specified do not fit together. There are 2 different angled pieces, with 12 each (both in the parts list and actually in the kit). However, when you go through the manual it gives direction to use one angle 9 times and the other 15 :/ I went to the website and the instructions there are completely different. Help!!!
Have you tried contacting the company? Our book, although sometimes we used the wrong pieces, was in fact correct for our robot.
You mentioned that you put the legs on wrong. We made the same mistake. How did you get the little white snap piece our of the holes? They snap together easy but can’t get them apart if you make a mistake.
Hah yes it IS hard to take that apart!! I used pliers so I had a better grip on it!
We had fun putting this together but now we can’t get it to do much. Every time you want to change the controls, you have to take the “brain” off. I am NOT good with the electrical part of this and my son has just given up. I think I have the parts with the wires attached in the correct places but we still can’t get it to walk. Any suggestions?
I had that problem the first time too and ended up dismantling half of it and rebuilding – I had some of the middle connecting pieces in the wrong holes!
there is no Assembly instruction in the Box how to assemble. there is just one CD
I would contact the company or check for the instructions on the CD