Make Your Own Chalk!
This post may contain affiliate links, view our disclosure policy for details.
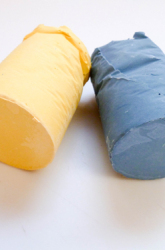
Your child can create a fun collection of colored chalks with a couple of simple ingredients. In the process, he can experiment with color combinations as well as measurement! Along with being a standard in the classroom for use on the chalkboard, chalk is used in the construction industry to mark line cuts, by mechanics to mark leaks in tires, and by tailors when sewing clothing!
What You Need
- 1 1/2 c. Plaster of Paris
- 2 toilet paper tubes
- Waxed paper
- Scissors
- 1 tsp. tempera paint, in a color of your choice
- Measuring cups and spoons
- Recycled plastic container, like a large yogurt tub
- Plastic spoon
What You Do
- Invite your child to measure 1 ½ cup of plaster of Paris and place it in the recycled plastic container. He can use the plastic spoon to break up any lumps in the plaster.
- Now he can slowly add ½ cup of warm water to the plaster. Encourage him to mix the plaster well to make sure there are no chunks, which will cause the finished chalk to break apart.
- Once the plaster is smooth and resembles cake batter in texture, invite him to measure 1 teaspoon of tempera paint to mix into the plaster.
- Now he can give his plaster another good stir, building all those muscles in his arms and hands!
- Before pouring his colorful plaster, he can tear off a piece of waxed paper and then roll it so it will slide into the toilet paper tube. Then, he can cut the waxed paper so it is the same length as the tube. Place another piece of waxed paper on your work surface and then position the toilet paper tube in a standing position.
- Now he can pour half of his chalk mixture into the toilet paper tube using the spoon to help as needed.
- With the remaining plaster, invite your child to experiment with color mixing by adding another 1 teaspoon of a different color of tempera paint for some more chalk fun! Once he’s happy with his color mixing, he can line the other toilet paper tube with waxed paper, position it standing up, and scoop the rest of the chalk mixture!
- Tell your child to leave the chalks to dry overnight in a warm dry spot and then invite your child to tear and cut away the toilet paper tube and waxed paper to reveal his homemade chalk! All that’s left is to head outdoors to use his chalk for creating some colorful hopscotch squares!