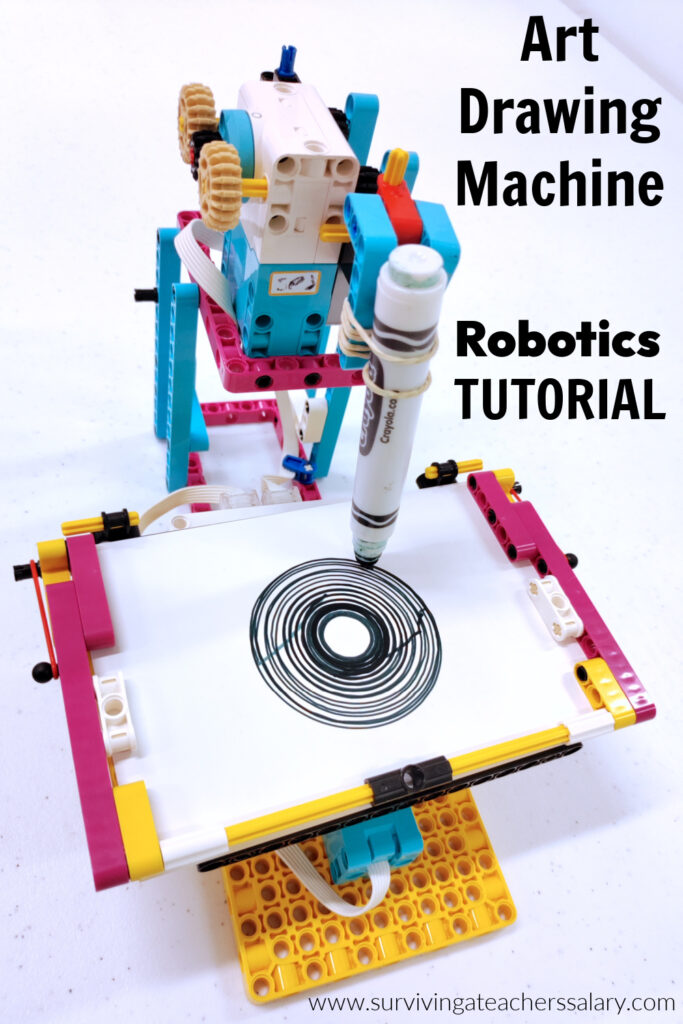
LEGO Spike Robotics Art Drawing Machine Tutorial
This post may contain affiliate links, view our disclosure policy for details.
I’ve been using the LEGO Spike Prime Robotics kits with our Robotics Club and STEM club this past year and have been learning so much! Although LEGO Spike Education has a website with some great building instruction and coding tutorials on it, after a while you’ll realize you run out of lessons!
I am in some LEGO Education groups online and they have great ideas, but I’ve noticed a big lack of actual directions on how to make anything! Sometimes it’s great for the students to figure out how to build and code their robotics kits on their own, but a lot of times I like to have a slideshow presentation to reference to as students are learning new concepts and ideas!
This simple LEGO Spike Robotics Art Drawing Machine is simple enough for about age 7 and up. The older your group is the more complicated work they can try to design with their robotics kits! After all, exploration and play equates to learning!
Art Drawing Machine Video In Action:
LEGO Spike Robotics Art Drawing Machine Tutorial:
For this project you will need a LEGO Spike Prime robotics kits. (You can purchase them on Amazon but they are much cheaper purchasing them directly through LEGO here.) You’ll be able to figure out the exact pieces needed from our detailed photos below, but right off the bat you’ll need:
- 1 LEGO Spike Hub
- 1 Large LEGO Spike Motor
- 1 Small LEGO Spike Motor
- 1 Marker
- 1 Piece of Paper
- 1-2 Rubber Bands
- Other Basic LEGO Spike robotic building pieces
Bear with our instructions! There are a LOT of photos but I’ve broken them down into individual step by step visual arrangements so that you can see the exact pieces you’ll need, and exactly where to place them.
I’ve also included the block coding that you will want to start with in the Scratch platform as well! Lastly, the bottom half of these images are all brightly lit close ups of the robotic machine itself just in case you’ve made a mistake or gotten stuck in the building process!
You can easily just scroll down past the code blocks to build from the machine images.
Building the Base and Spinning Platform:
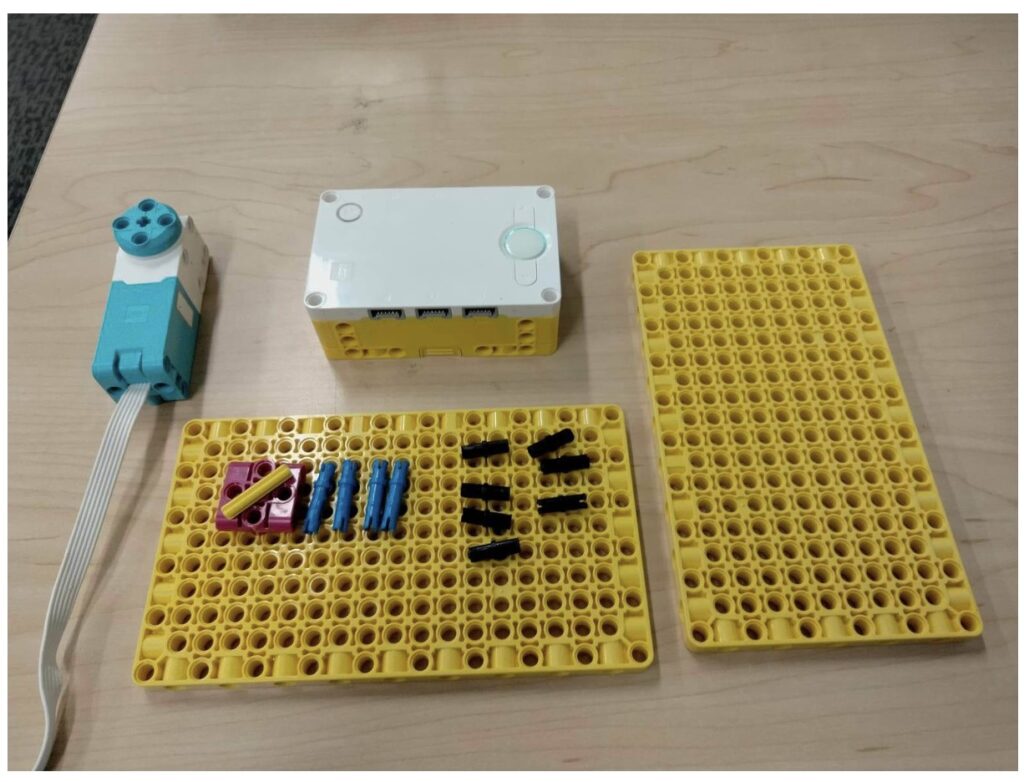
These are the pieces above that you’ll need to start with when designing your art machine’s base and spinning platform.
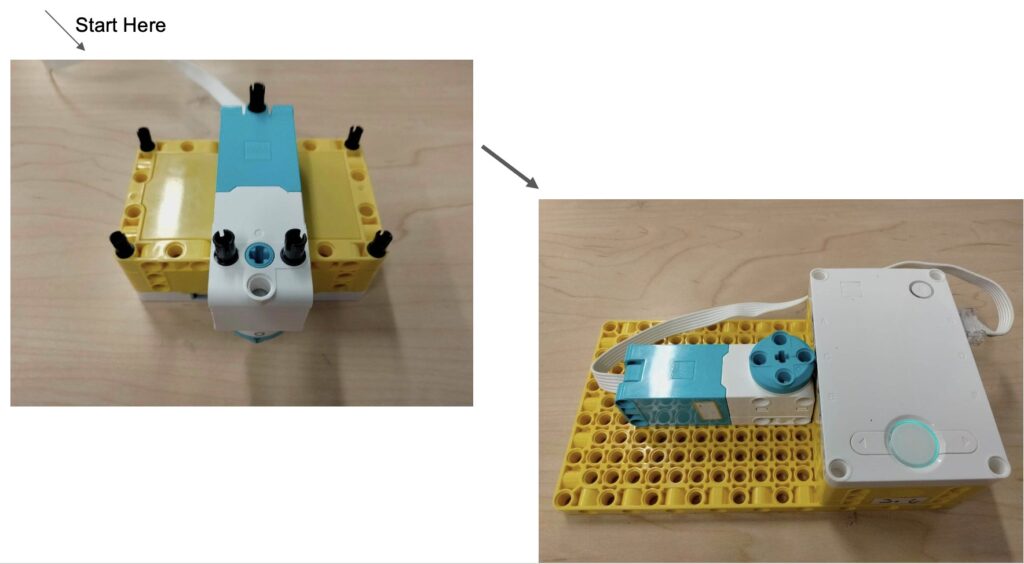
Assemble them as shown above.
TIP – Make sure you grab the right sized motor for this project! It requires the smaller “half-sized” motor, not the larger motor in the LEGO Spike Prime robotics set.
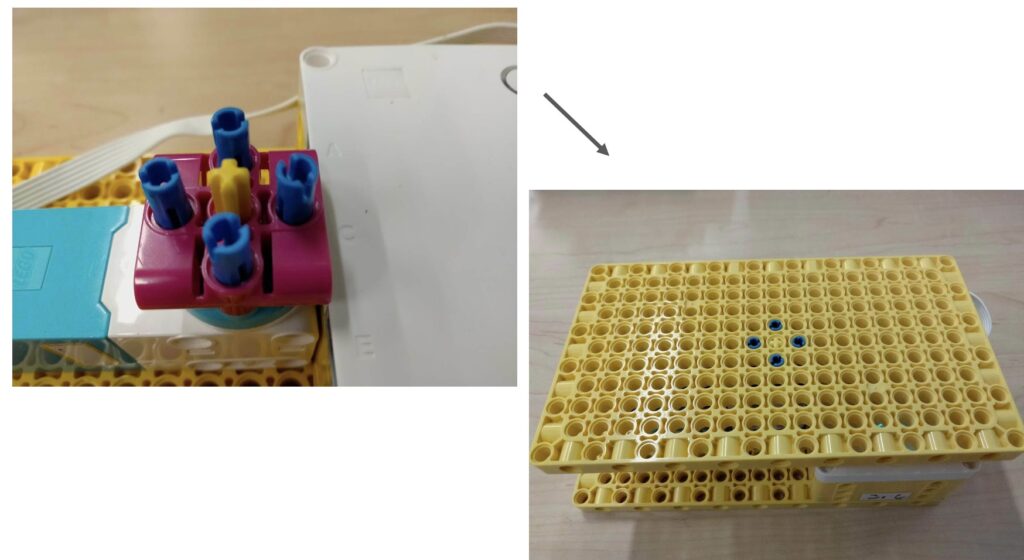
This step above completes the process of building the base and spinning platform. It leaves plenty of room to charge your LEGO Spike hub in between uses.
Building the Paper Holding Arm:
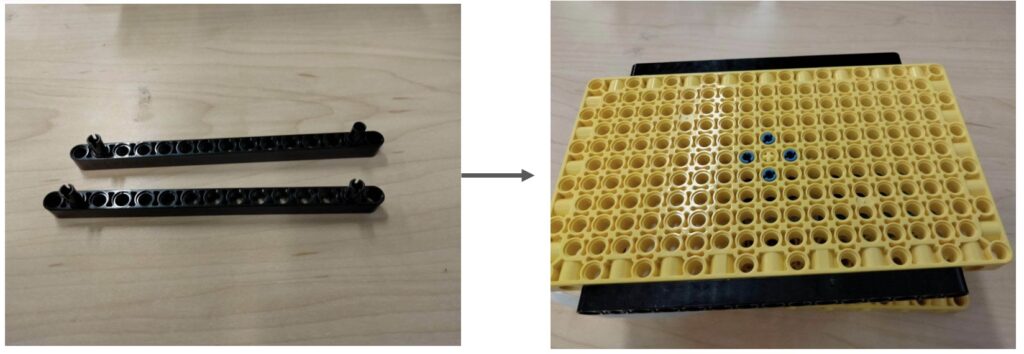
If you have a difficult time figuring out where to place these pieces, or any other steps as shown below, scroll to the bottom of this post and check out our completed project designs in our close-up photos!
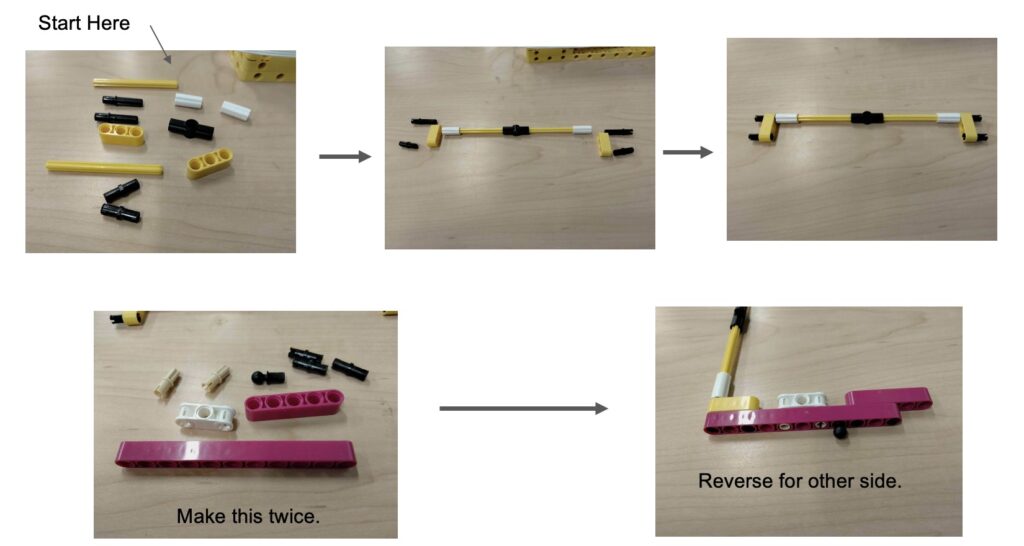
Make sure to grab the correct sizes of pieces in this step!
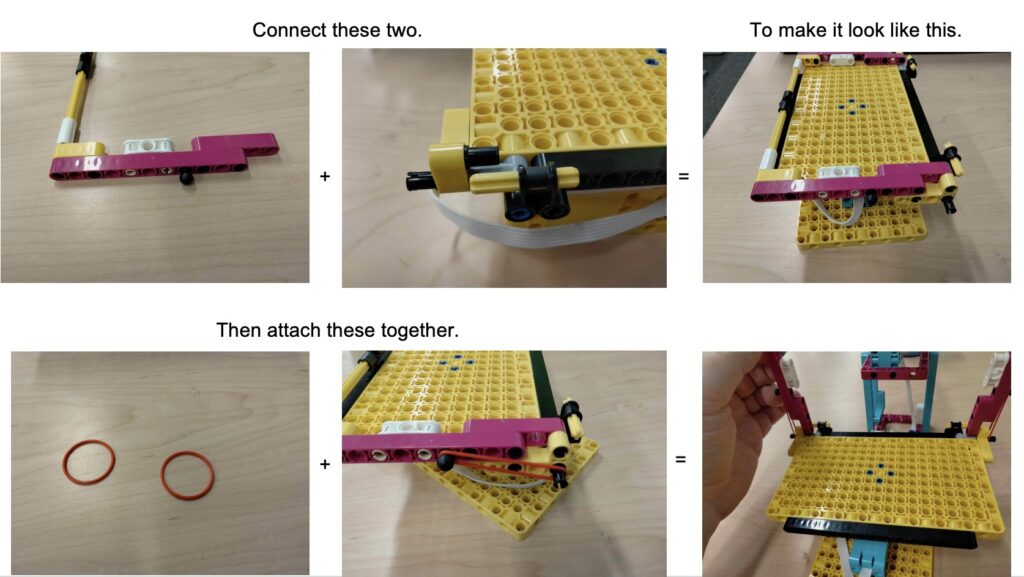
The rubber bands will allow flexibility in the paper holding arm here.
Building the Drawing Motor Platform:
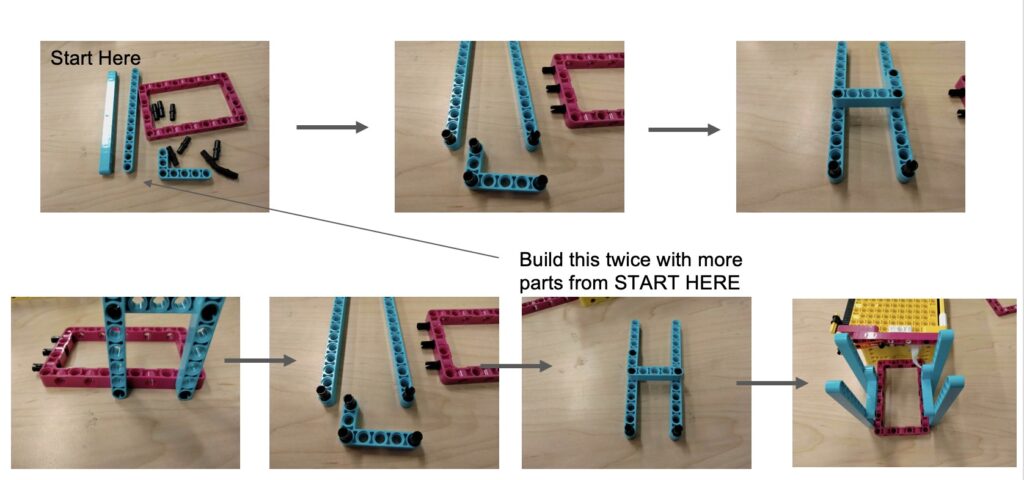
Make sure to double this step and build the blue “H” twice!
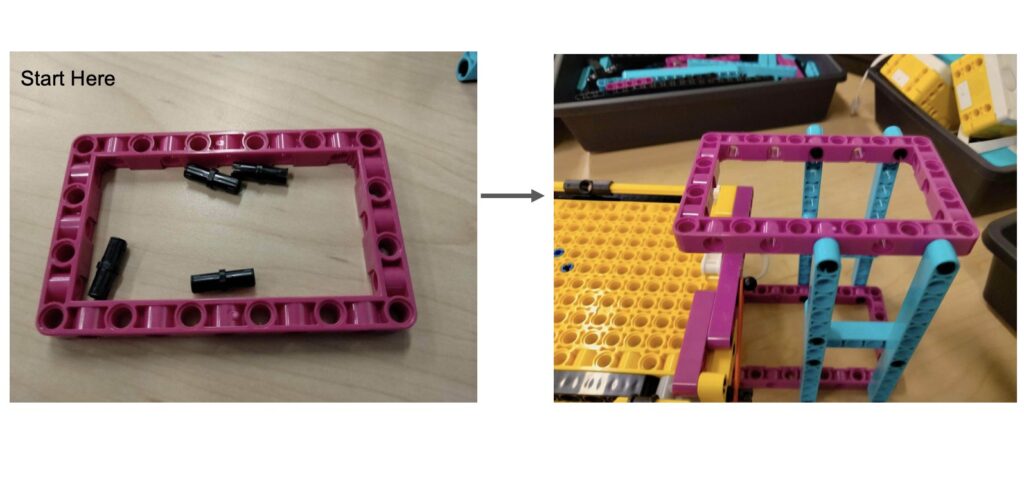
Phew – you’ve made it to the last and easiest step of the drawing motor platform!
Creating the Drawing Arm:
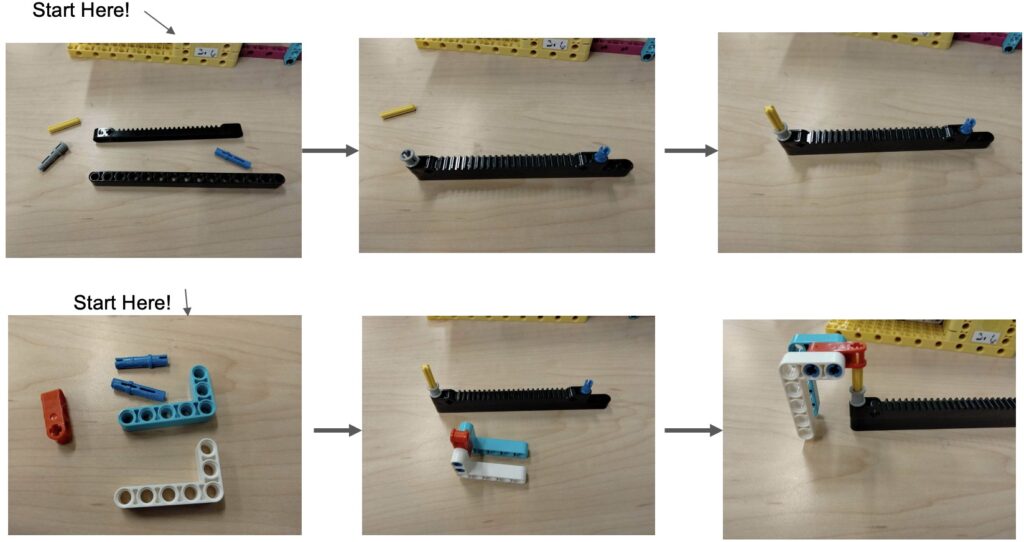
Designing the drawing arm is one of the most important steps of the process!
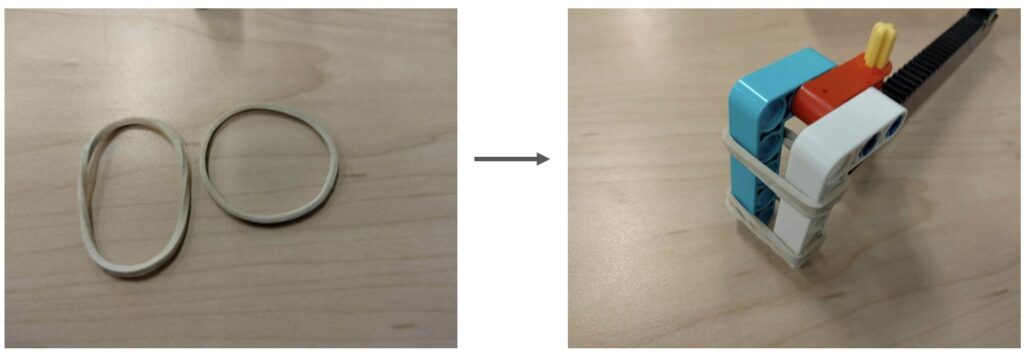
Loop the rubber bands two to three times to ensure a snug fit.
Building the Drawing Motor:
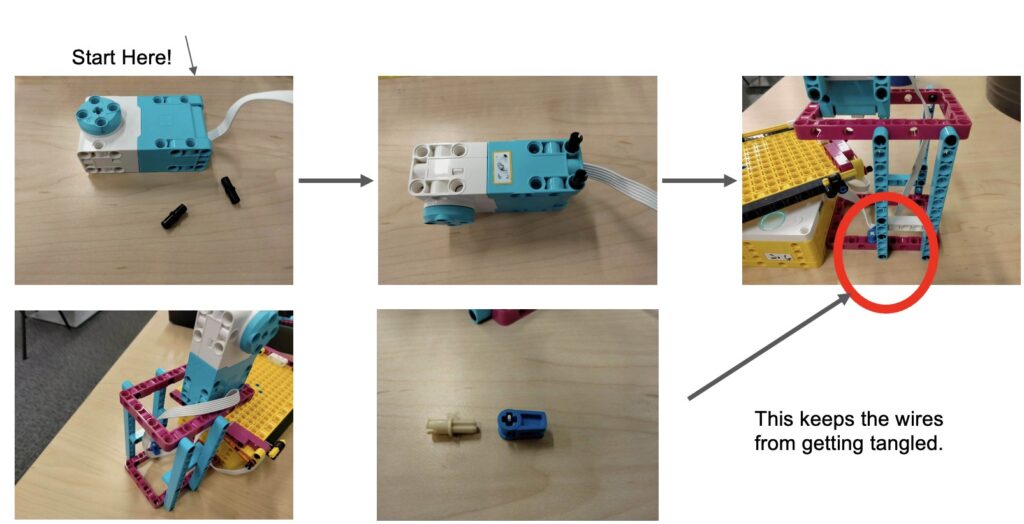
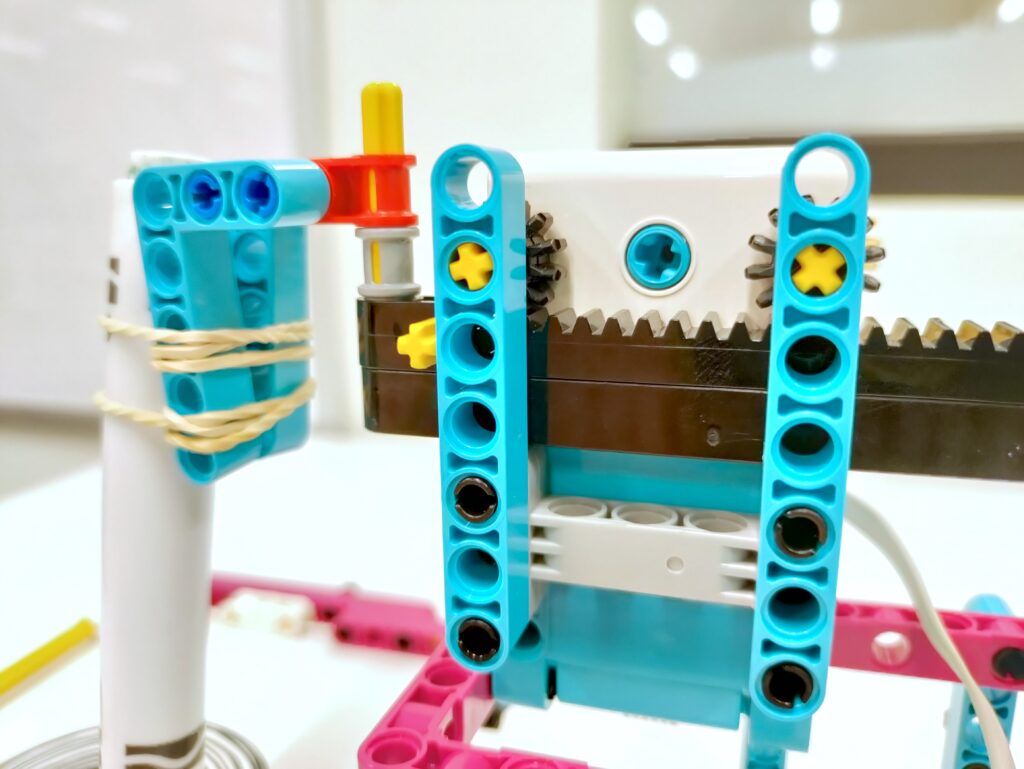
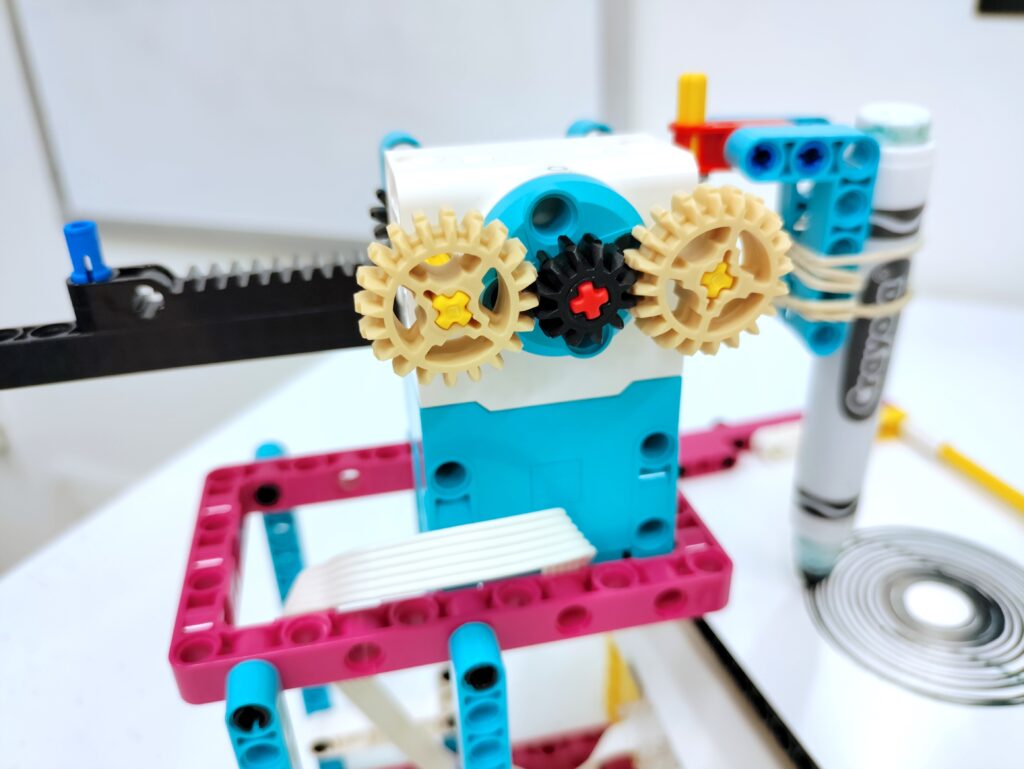
Our kids get a little tripped up on this step. You’ll want to point out the motor size they will want and WHICH side of the motor they will be using! Placement must be proper in order to allow the art drawing machine to work!
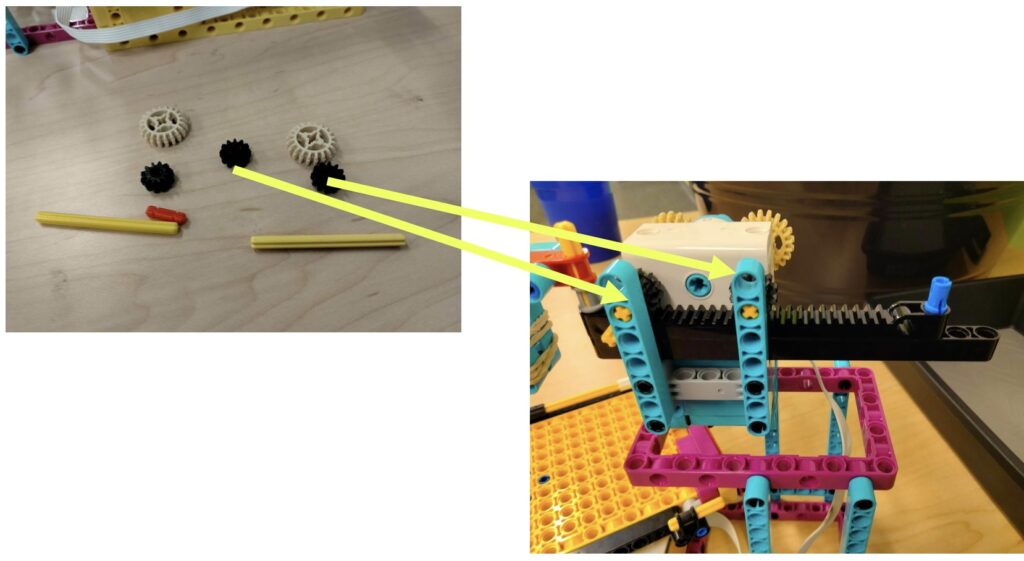
You’ve made it to the last step! The last bit of gears to add on! Below you will see an example of the block coding we used in Scratch.
Block Code in Scratch for Art Drawing Machine:
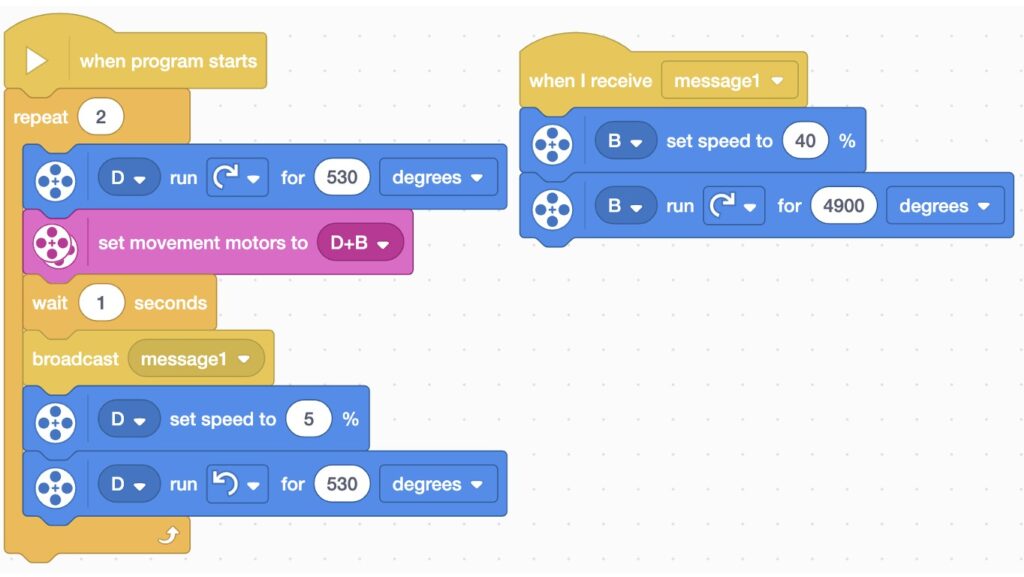
Additional challenges would be such things as changing variables for the speed, the degrees the motor changes, etc. If you have enough time I definitely recommend giving the kids the freedom to try and change not only their code but alter their designs anyway they see fit.
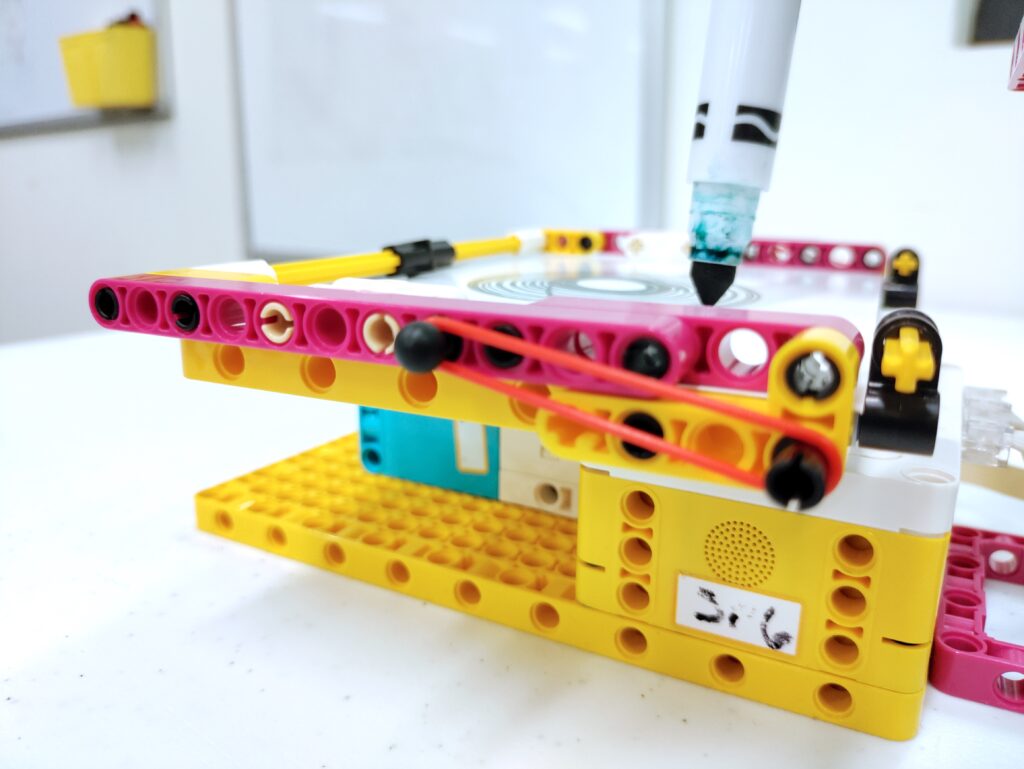
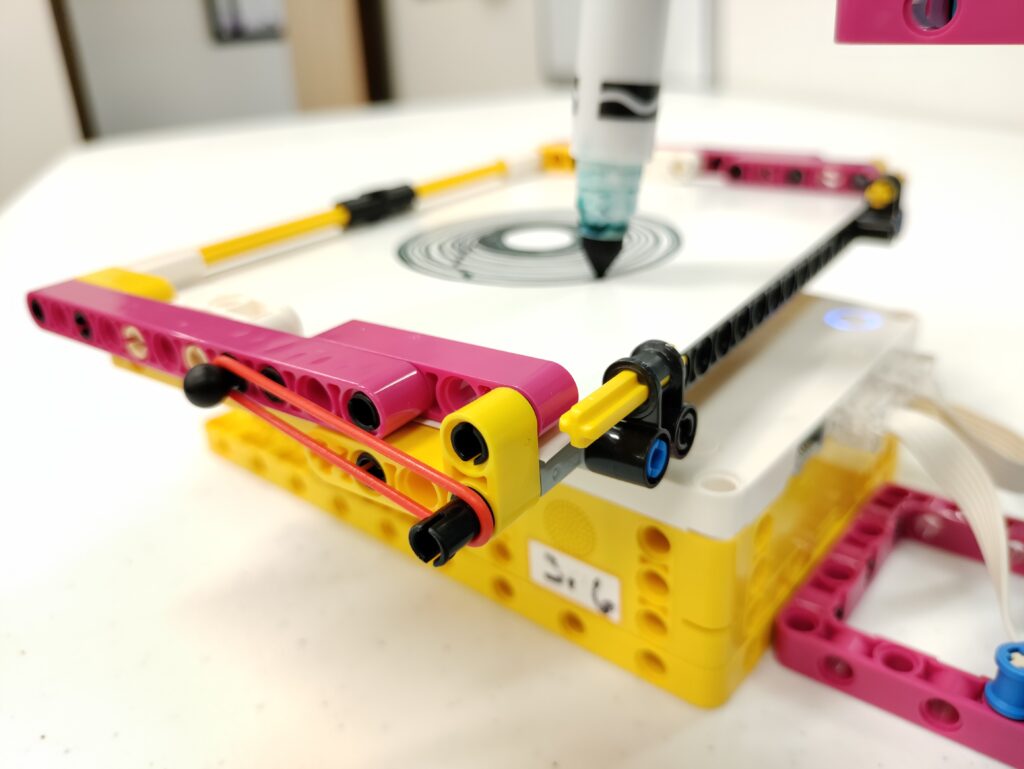
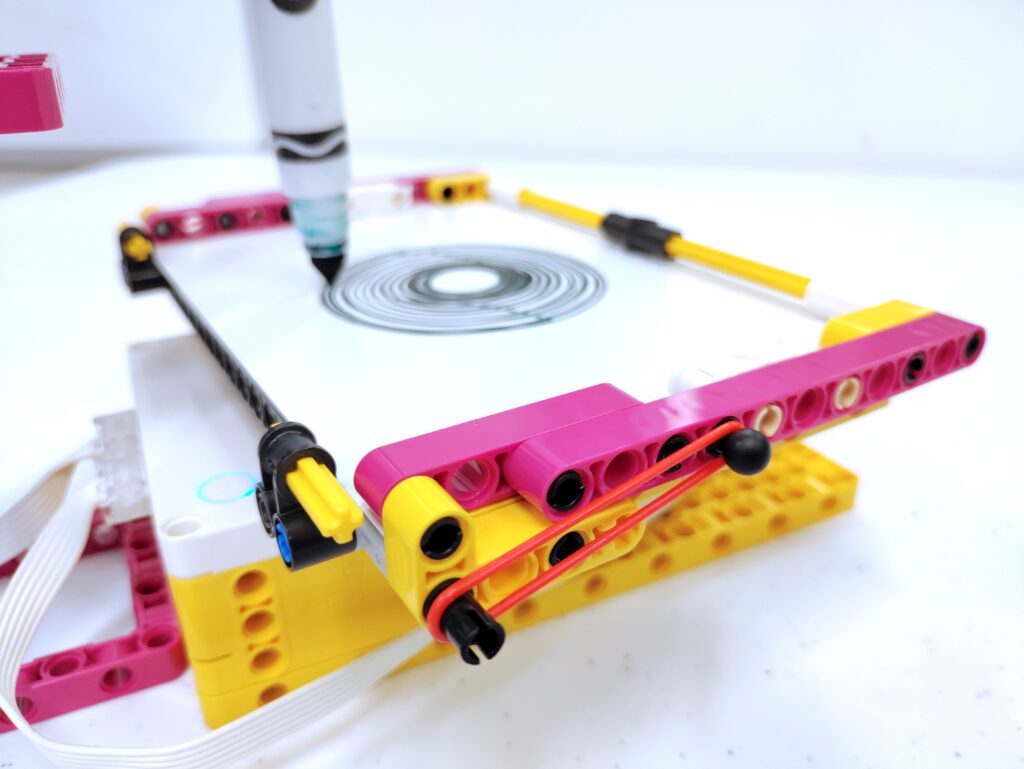
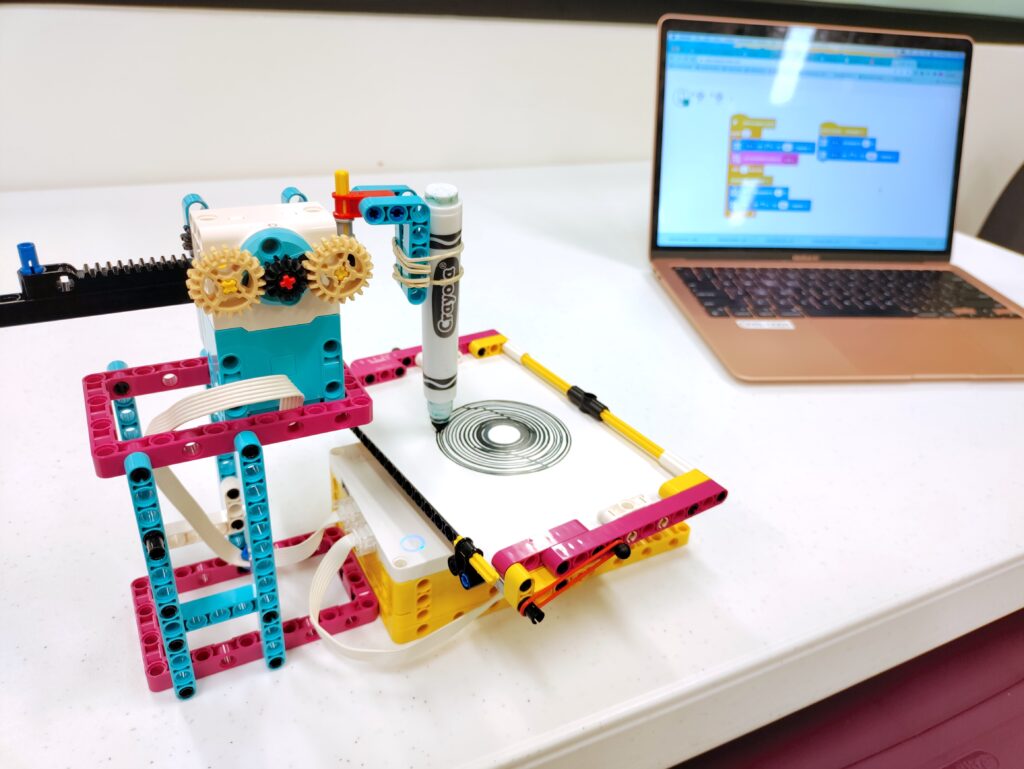
Close Up Images of the Art Drawing Robotic Machine:
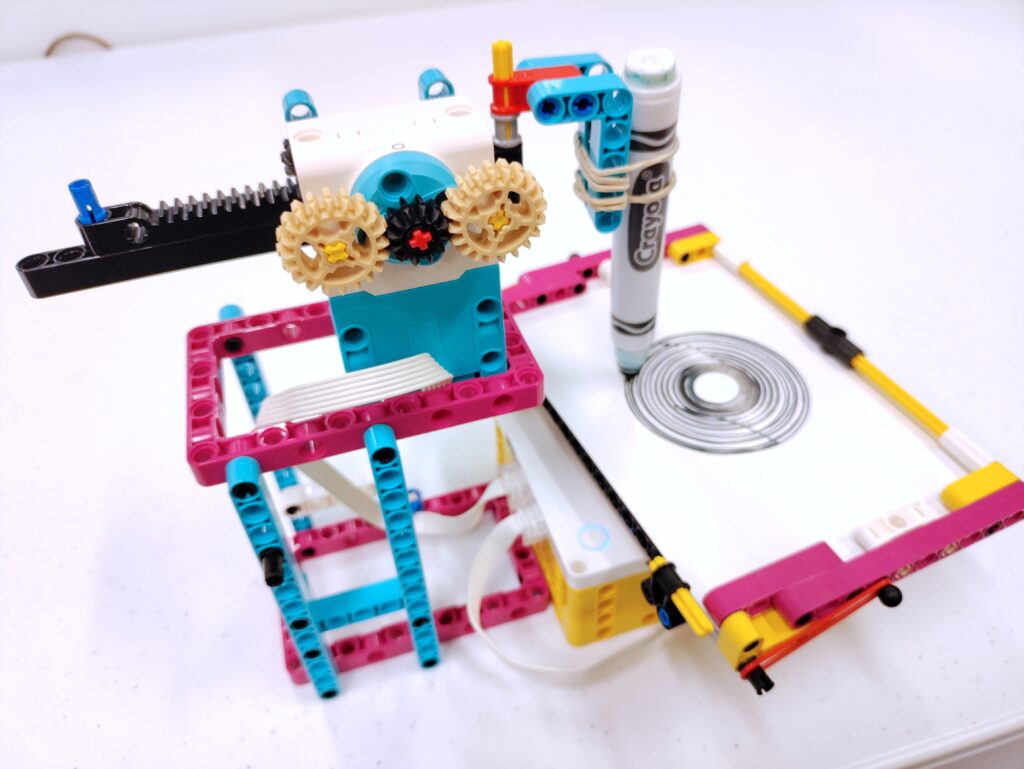
You can use any size marker you want! We preferred the fat markers since we didn’t need to tighten the rubber bands quite as much but you can play around with all sorts of variables and colors here!
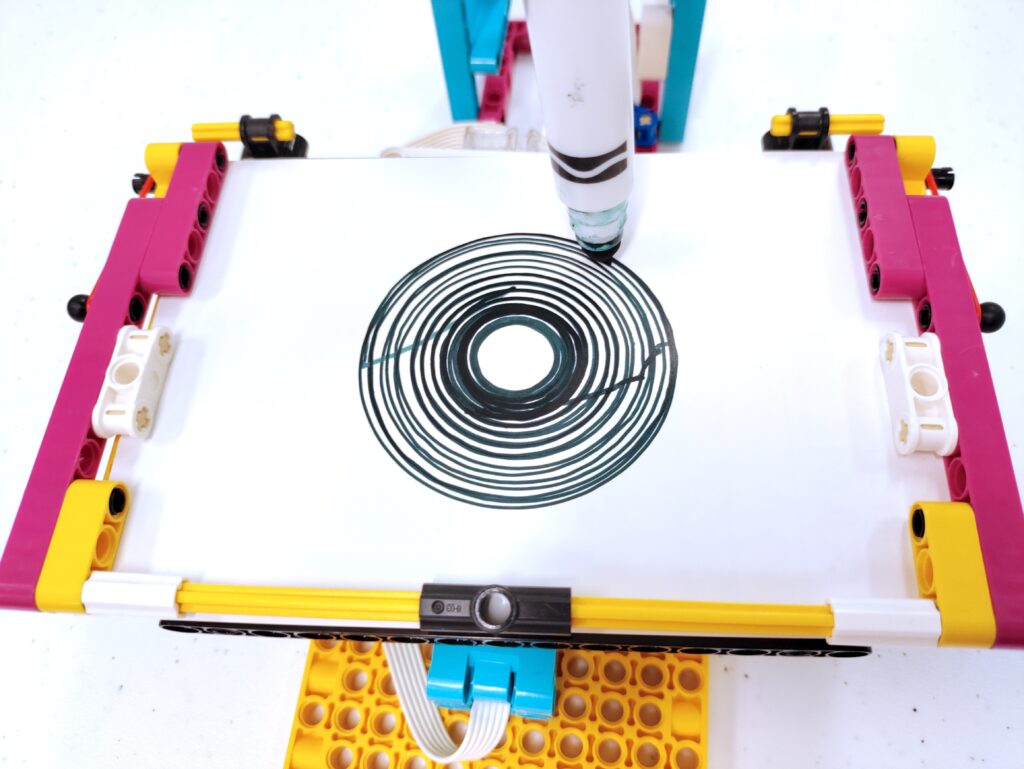
As you can see it makes some pretty awesome circles!
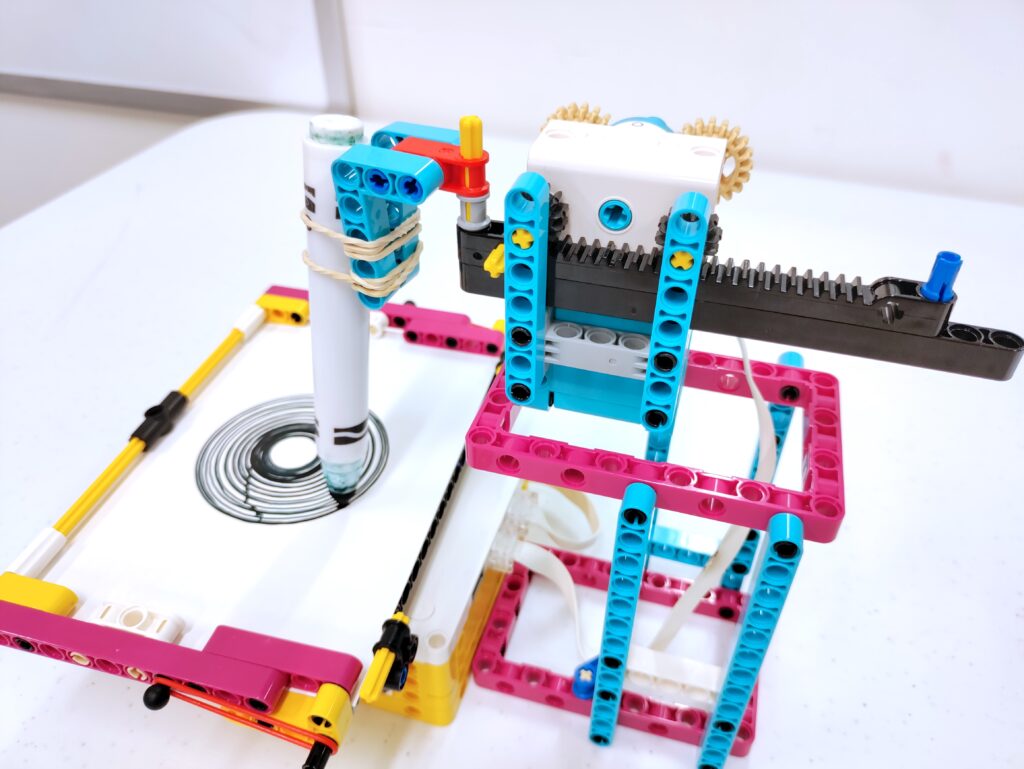
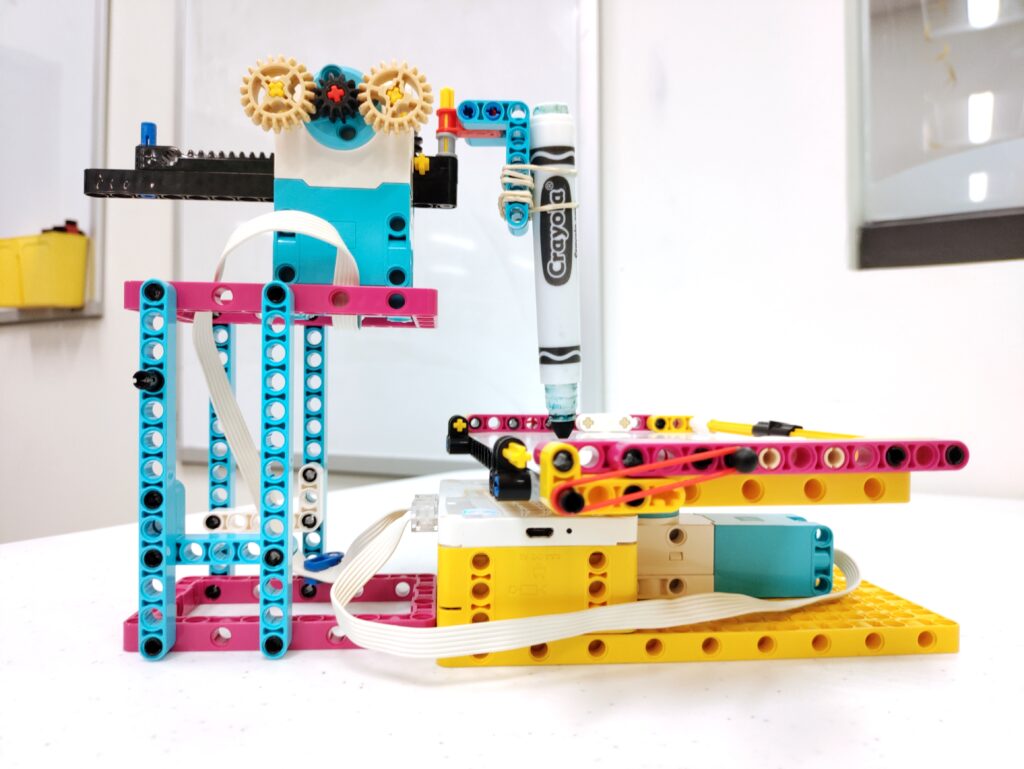
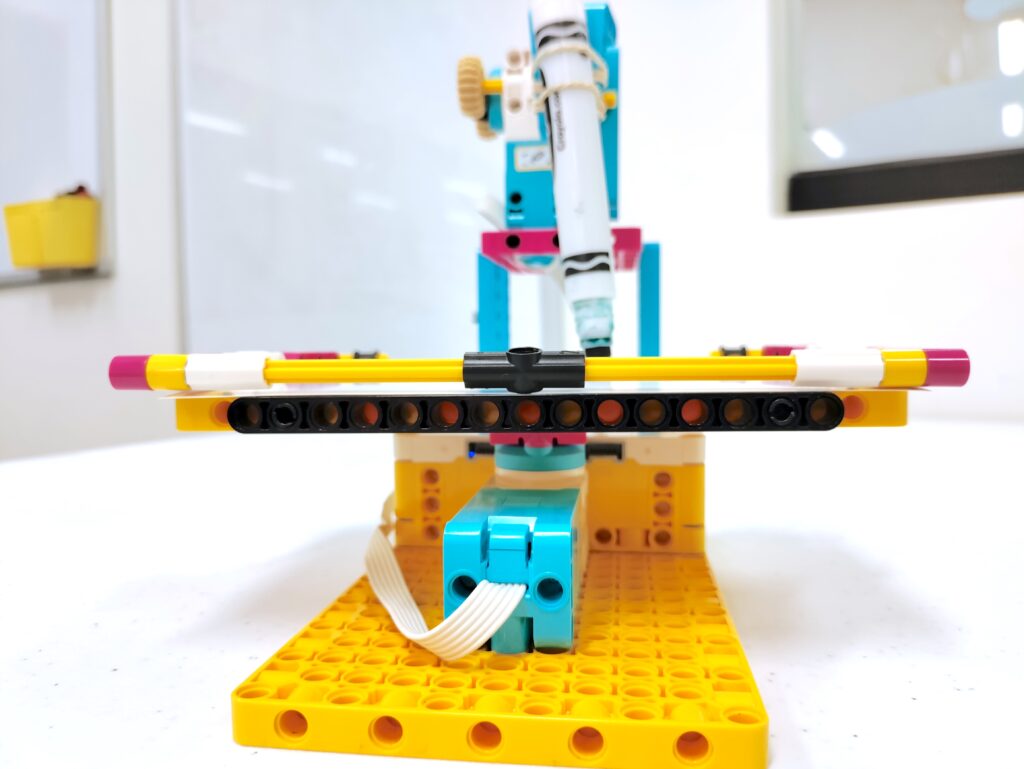
Occasionally the marker will slip to the side, just straighten it back up again! We had a few kids who even tried a “freelance” type of system to create additional circles off to the side which was fun to try.
I hope you have enjoyed our free art drawing machine tutorial that we used our LEGO Spike Prime robotic kits for!
If you appreciate this free content and would like to help contribute in a small way in helping me continue providing free educational resources for others, feel free to send a token of your appreciation via Paypal here. Any amount helps and is greatly appreciated.
