

How to Make a DIY Rubik’s Cube Fridge Tutorial for Math Geeks
This post may contain affiliate links, view our disclosure policy for details.

I’ve seen some REALLY awesome Rubik’s Cube furniture ideas on Pinterest and Amazon so when I came across someone selling this little cube shaped fridge in our area I snatched it up for $15! It was UGLY and I knew I could make it look better by turning it into a Rubik’s Cube fridge!
Check out unique Rubik’s Cube gift ideas here!
PLUS it’s perfect for my husband’s school office! Now there are 2 very different ways you can make your fridge – the prettier but more time consuming way, or the cheaper quicker way. I chose to go with the cheapest quickest way by using simple cheap acrylic paints that you can buy for about $1 per color depending on the store and sale.
(The nicer more time consuming way is to use Rustoleum spray paint in the desired colors which will look more uniform and sleek but the process will be much longer since you have to cover the entire fridge for every different cube you paint.)
Rubik’s Cube Fridge Tutorial:

I started by measuring all 4 sides that I was going to paint and marking them with a dry erase marker so I could swipe it clean when I was ready to add tape.
I first taped the middle sections of each side then finished taping the rest as evenly as possible around the fridge handle and door. Just a simple roll of masking tape will do.

Before I began painting I made sure to collect all of my paint colors to start. I also grabbed a scrap piece of paper and planned out which colors I was going to put on what squares of the fridge.
Because I used the cheap acrylics to paint on my Rubik’s Cube fridge I needed several coats for some of the colors. If you’re using the Rustoleum spray paint you’ll probably only need 1 coat, 2 tops.

Just keep painting! The nice thing about choosing the acrylic paints versus the spray paint is that I could keep the mini fridge on my table to paint instead of needing to move it around outside! This thing is heavy!
Finished Rubik’s Cube Fridge:

TA-DAAAA! Isn’t it awesome!? Once I pulled the masking tape off of the fridge I quickly ran some black paint to emphasize the “lines” of the Rubik’s cube where the tape was covering. (which you could also pre-paint or spray if desired)
Unfortunately for whatever reason my red paint did NOT want to work with my and kept peeling off like a latex paint would so I had a little fixing to do for that color. Everything else turned out perfectly! Although I probably should go back and add some extra coats to a few areas.

I haven’t yet but I DO want to spray a sealer over it so that it doesn’t get scratched up at school. Just don’t forget if you use a sealer to cover up the rubber door parts as well as the coils in the back if you have an old mini fridge like mine!

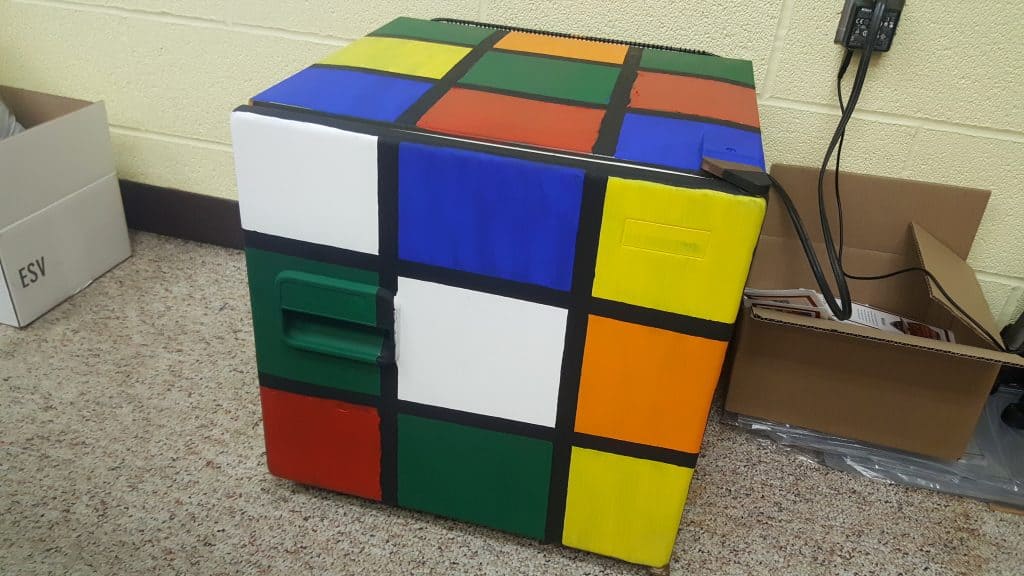
Here it is in it’s new home in the school office! The students are going to LOVE it!

And check out that AWESOME Rubik’s Cube lamp below!!! It’s a completely functional cube with a rechargeable cord! How cool is that?! You absolutely HAVE to check out these amazing Rubik’s Cube gift ideas on Etsy!
 |  |
 |  |
What a cute idea, especially for your husband’s office! It will get a lot of conversation mileage, that’s for sure!