

Chemistry in the Kitchen: Make Your Own Edible Rock Candy!
This post may contain affiliate links, view our disclosure policy for details.
Making your own rock candy is such a fun way to get kids involved in baking, checking out crystal formation, and to observe the changes that occur during the process. Not to mention having fun making their own candy! Your main ingredients? Sugar & water! (food dyes if you want to color it too)
You will need:
3 cups sugar
1 cup water
clean glass jar or glass cup
wooden skewer & clothespin
food coloring (optional)
1/2 tsp. flavoring (optional)
pot

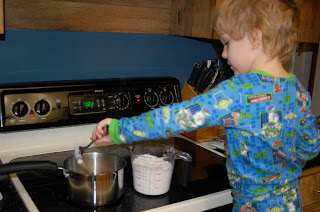
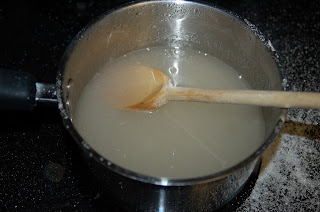
Boil the water into the pot, then slowly add the sugar, stirring constantly. Continue to stir until all the sugar has dissolved.
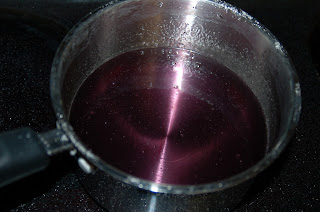
If you are adding coloring or flavors this is the time to add them. My son is on an artificial dye-free diet, so I used a natural food colorant. If you want to use natural flavors try juice from lemons & limes, although the acid may cause your crystals to form slower.
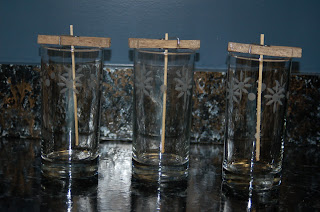
Put your pot of ‘syrup’ in the fridge till it cools to about 50*F. While this is cooling you will want to set up your wooden skewers. I set up 3, although I only needed 2. Clip the skewer with the clothespin and position it in the glass jar so that the skewer is not touching the sides or bottom of the jar. I suggest to ‘jump start’ your crystal growth dipping your skewer in the sugar solution, then rolling it in some sugar. Make sure that it is completely cooled & dry though before you put your skewer back in the jar.
Once your sugar solution has completely cooled, pour it into your glass jar and let it sit for several days. Make sure you don’t forget about your syrup pot in the fridge like I did- by the time I rememebered it was there it was already cold and starting to harden before I poured it!! I’m not sure whether that affected how our candies turned out.
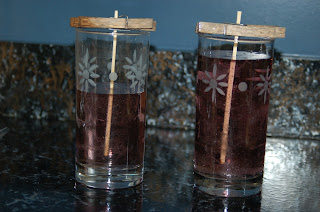
Watch your crystal grow! Here is how ours looked after about 2 days. The glass on the right turned out to be a better looking candy. The glass on the left was the syrup in the bottom of the post, and a lot of it was hard because I had accidentally left it in the fridge WAY too long! Oops!
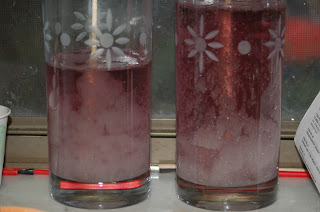
It will take about 3-7 days for it to finish growing! We got a little ancy after 3 days so I let me kiddos go ahead & eat their rock candy treats! Here is how big we got the candies to grow after 3 days:
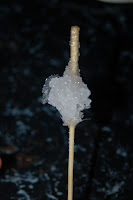


I did not flavor my candy but it was SO good! Yummy & sugary!! My kids LOVED it! My oldest almost choked himself trying to get all of the sugar off of the stick, and my toddler licked the stick till every last granule of sugar was gone!! This was REAL treat for them since they don’t usually get a lot of sugar.
I would like to try this today…can I use a Popsicle stick instead of a skewer?
Hmmm very good question! You'll have to let me know how it works out! I don't see why it wouldnt work….try dipping your popsicle stick in the sugar solution first before you set it up in the cup so encourage the process! If you happen to take any pictures of it I'd love to share it on my blog! You can message me at [email protected] too if you'd like! I'm interested to see how it turns out!!
I just happened to look at the other blog you posted this on. It was a blog a friend of mine started for a group of friends so we could share stuff and keep our playdate schedule handy. I haven't looked at it or posted on it in years! I may try this project this afternoon since we snowed in and getting hit again tomorrow with another storm.
I did this today but I didn't take pictures. Sorry! I will try to take pictures everyday as it starts to form the candy and while the kids are enjoying them. I am hoping that it works because when I put it in the fridge the sugar started to separate again. We licked the mixing spoon and measuring cup though and it tasted yummy 🙂
Ohh I can't wait to see!! Mine did get hard on the top but we would just break it up a little or leave it alone & everything under the surface still worked good. MMMM it was delicious- makes me want to start another batch!!