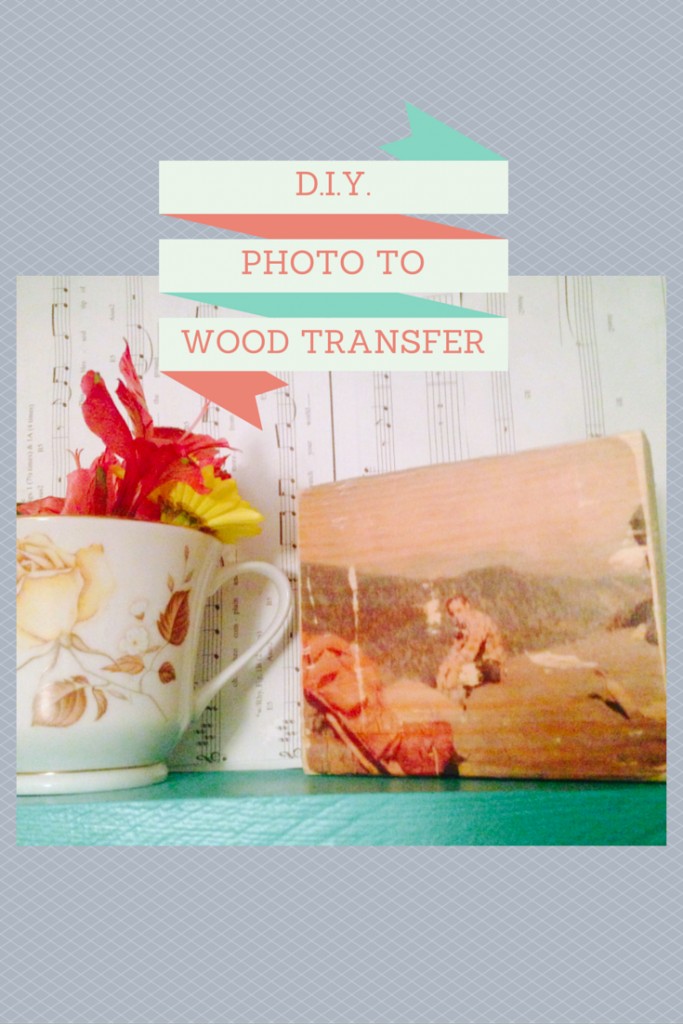
A Do-It-Yourself Guide to Transferring Photos to Wood
This post may contain affiliate links, view our disclosure policy for details.
A Do-It-Yourself Guide to Transferring Photos to Wood
By Kelly Rae Smith
Admittedly, I’m the girl who’s always snapping photos, collecting random picture frames, and filling them with as many memories as possible. So naturally, my eyes light up when I discover new, creative ways to preserve special snapshots.
Transferring photos to wood is the perfect way to keep and uniquely display photographs, and as it turns out, it’s pretty easy to do! The hardest part is gathering materials, and that’s not difficult either.
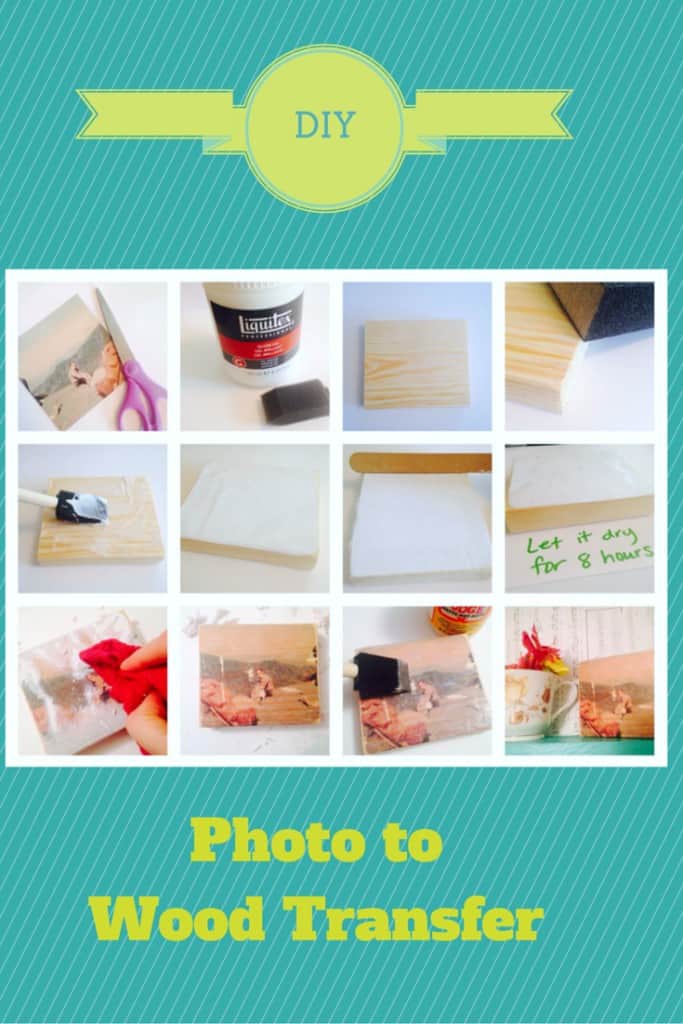
Here’s what you’ll need:
Laser-printed photos on standard paper (the cheap stuff!)
Wood blocks or plaques
Gloss gel medium (I used Liquitex )
)

Foam brushes
A gift card or similar
Sandpaper
Scissors
Pencil
Here’s what to do:

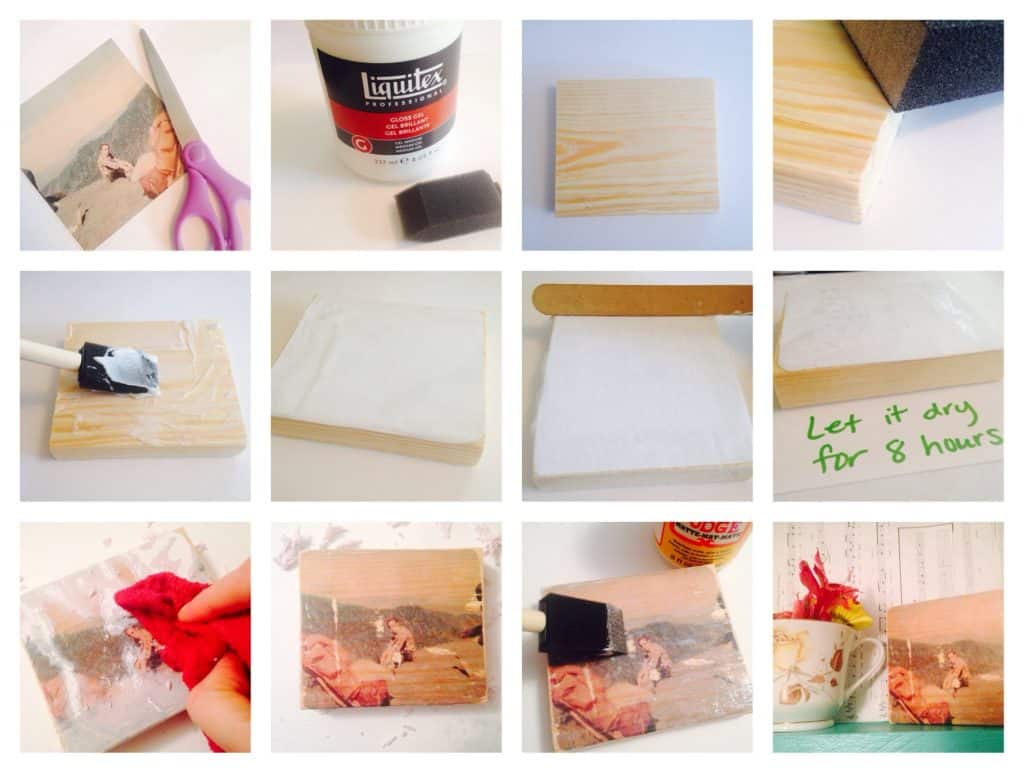
- First, figure out what special photos you want to preserve on wood — I chose a vintage photo of my father in the Great Smoky Mountains. Size the images to your desired measurement. 3.5” x3.5” works well for Instagram photos, FYI. Print them out using a laser printer and thin copy paper. Cut your images out. I rounded the edges of my photograph.
- Ready the gel medium. I used gloss gel medium by Liquitex, found in the fine art section of your local craft store.
- Now let’s talk wood blocks. You can buy a plaque in various shapes from a craft store, or you can get a plank of lumber at the hardware store and have them cut it up for you. It’s cheaper to go the hardware store route, especially if you want to have a lot of extra blocks around the house for a last-minute gift!
- Using sandpaper, buff out the edges and any rough spots of your wood block.
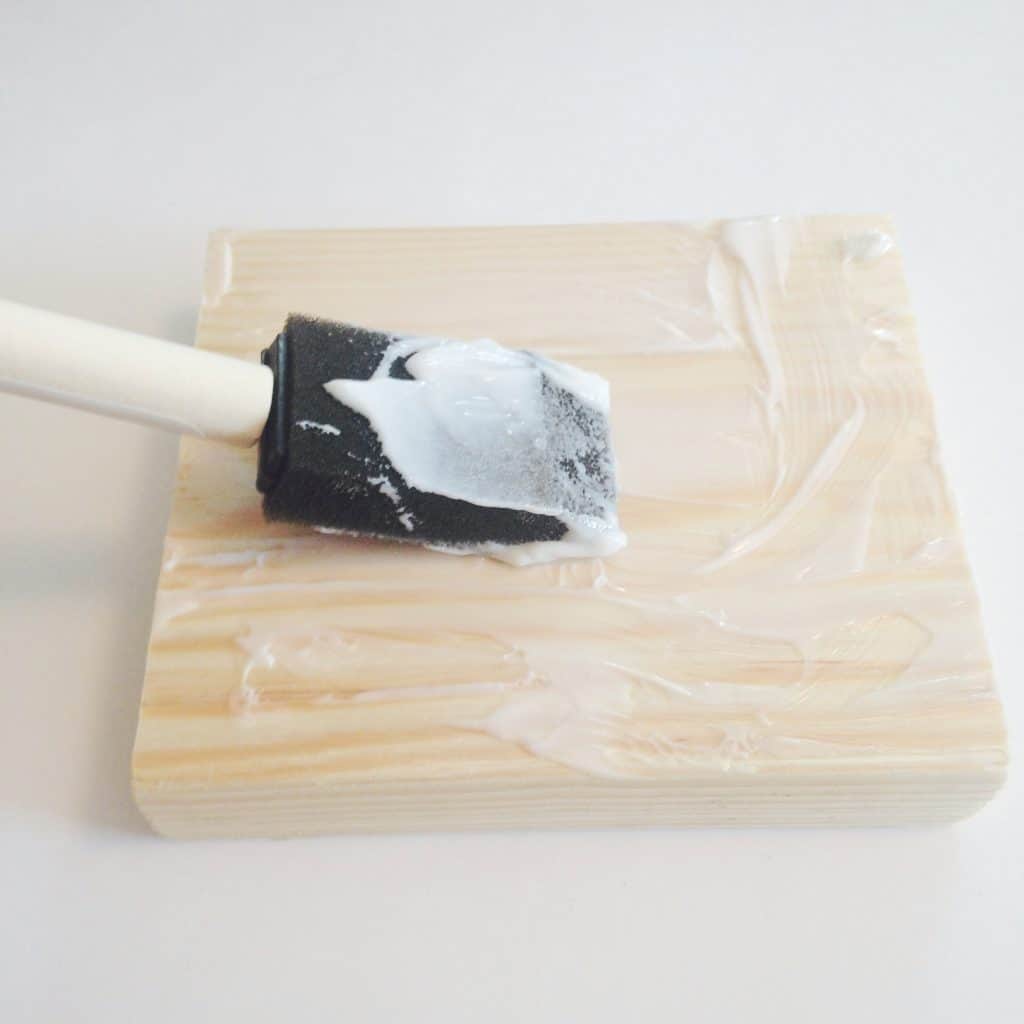
5. Grab a foam brush and start covering one side of the block with gel medium.
6. Now, simply place the photo face-down on the wet side of the block. You should be looking at the white side of the photo.
7. Using a gift card or something similar (I actually used a nail file!), slide it against the photo’s back to get rid of the bubbles and smooth the paper out. Be sure to scrape off any excess gel from the edges.
8. The hard part: Let the gelled-up wood block dry for eight hours. A great way to avoid anxiously awaiting the next step all day is to start this project before you go to bed — because what’s happening during the wait is like magic.
9. Once you’re confident it’s had plenty of time to dry and transfer, get a clean, wet rag. It’s time for the big reveal! Place the rag on the photo and press. You want to make sure the paper is dampened.
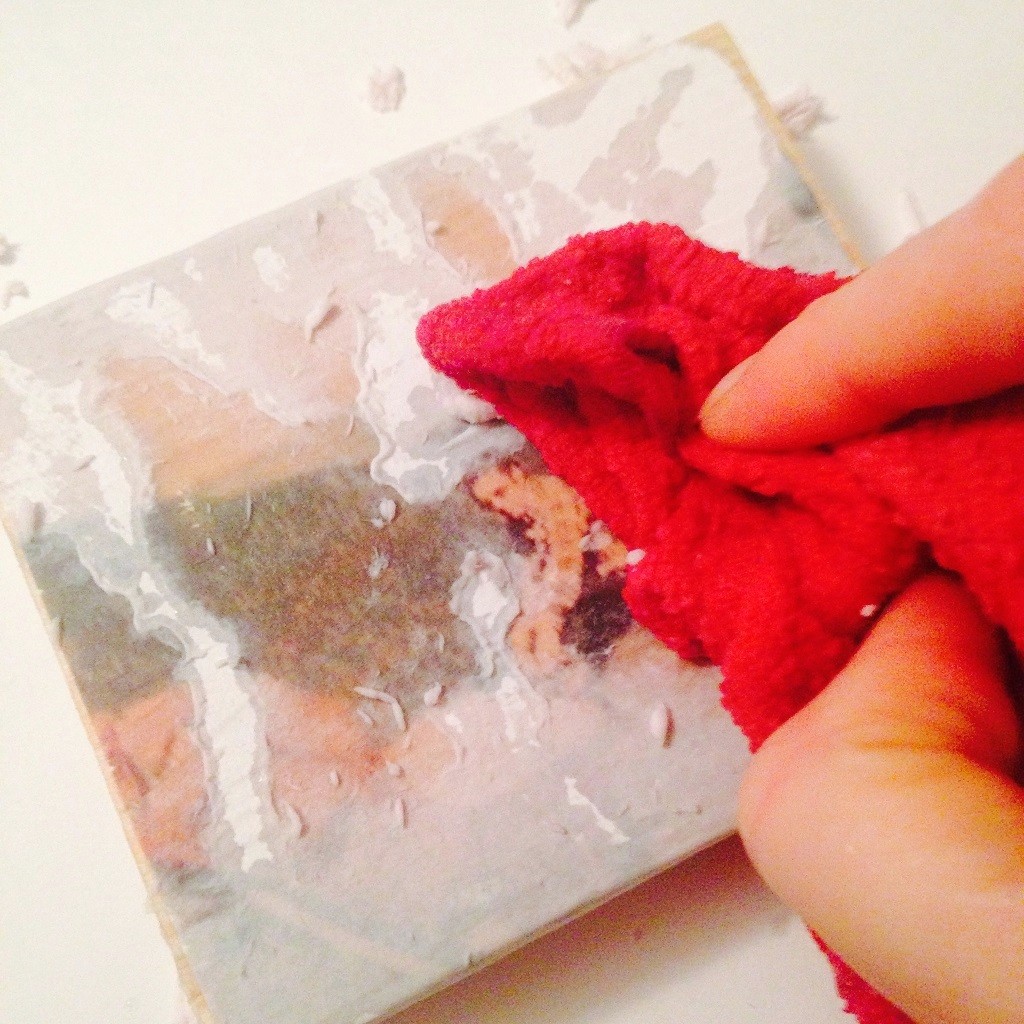
10. Scrape the paper away until you have a full picture. Don’t worry about any little scuffs in the photo. This kind of project welcomes such flaws, as it looks nicely distressed.
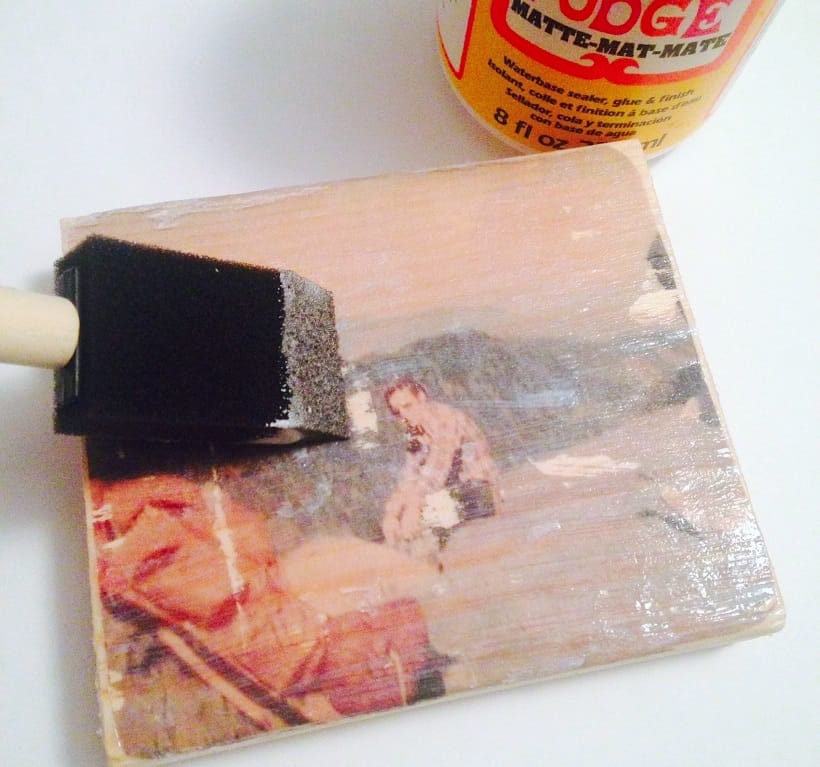
11. Give it a minute to dry again and Modge Podge over the photo to seal it and make it waterproof.
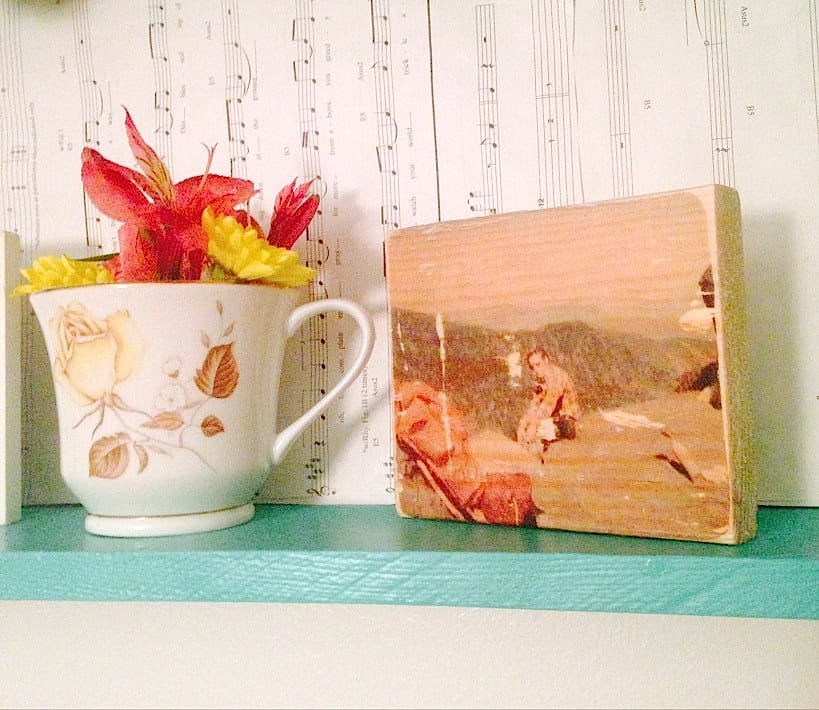
12. To display, you can attach frame hooks to the back, drill a hole in the block to slip over a nail, or simply place on a shelf. It would also be cute to do a series of a certain place or event and neatly align them as wall decor, salon wall style.
If you’ve read my DIYs on this site before, you won’t be surprised to see that I’ve used sheet music on the wall of a shelf here. I think it goes adorably with a teacup of flowers and this special photo, don’t you?
Kelly Rae Smith loves to write about her craft projects and home décor for Shutterfly.com. The wood art photos she talks about in this article were inspired by the selection you can find on the Shutterfly website.