DIY Easter Egg String Art Home Decor Craft
This post may contain affiliate links, view our disclosure policy for details.
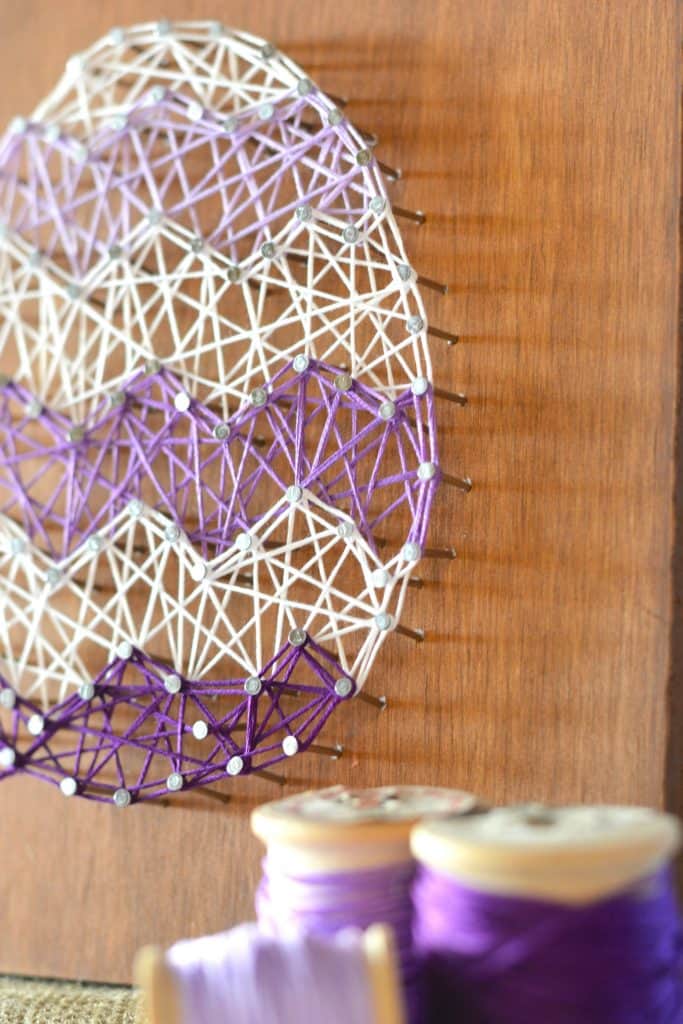
Whether you’re decorating for Easter or just the warmer spring weather this DIY Easter Egg String Art makes a beautiful home decor for your place or as a gift! FREE Printable string art template below!
If you’ve got crafty kids this makes an absolutely fantastic fine motor skills activity for them to not only create but to proudly hang in the house. Below is our tutorial on how to create your own with a printable template to make it even easier for you!
Materials Needed:
- Printed Pattern (Print Here: Egg String Printable Template) Note- you may need to print larger than 100% if you have a larger board.
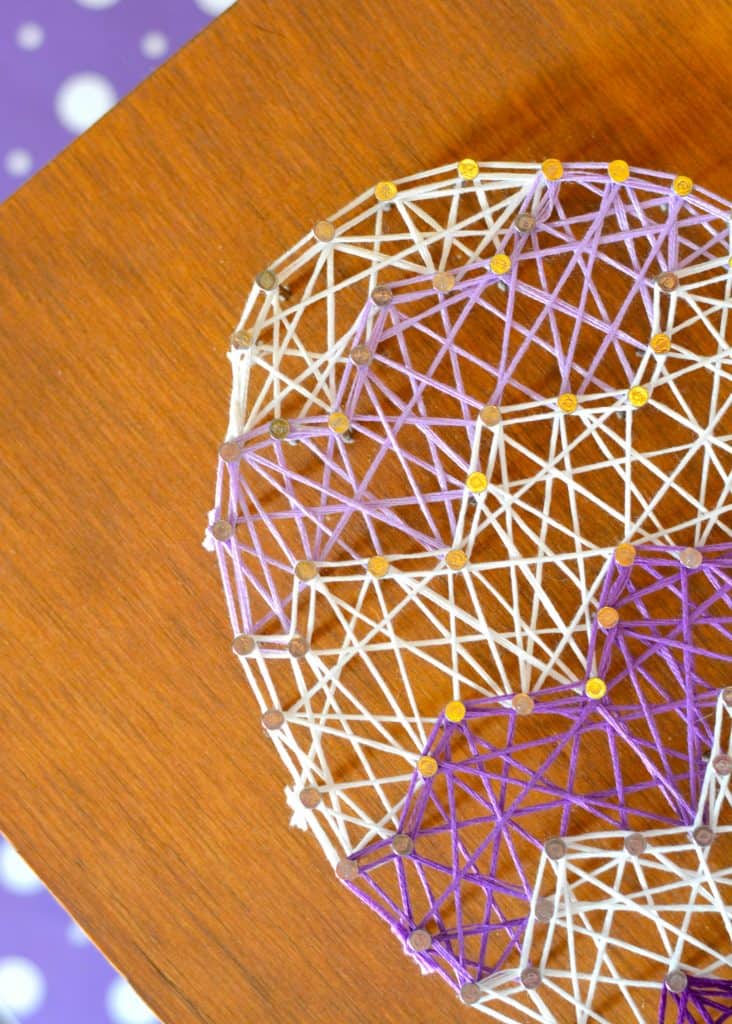
- Wood Board (Mine measures around 8″x8″. I had some plywood on hand and I stained it a Fruitwood Stain Color I also had. I did not seal it.)
- Embroidery Floss (8.7 yard pkgs) in colors you desire.-For this egg, you’ll need: 3 different purple colors to create an ombre look, and 3 white.
- Wire Nails: 7/8″ long or something similar
- Tack Hammer (or any other type should do)
Easter String Art Instructions:
- Center your pattern on your board and tape it in place.
- Begin to pound the nails into the wood with the tack hammer. I pounded mine about 3/8″ into the wood. Space the nails about 1/2″ apart, or the size of your finger. I’m right handed, so I begin placing nails on the left, and follow the pattern to the right. I work from top to bottom.
- When finished, Lift your paper up to the heads of the nails, and then off of the board. You’ll probably have to rip it apart.
6. When finished, you should meet at the beginning. Tie your floss in a double knot with the starting piece.
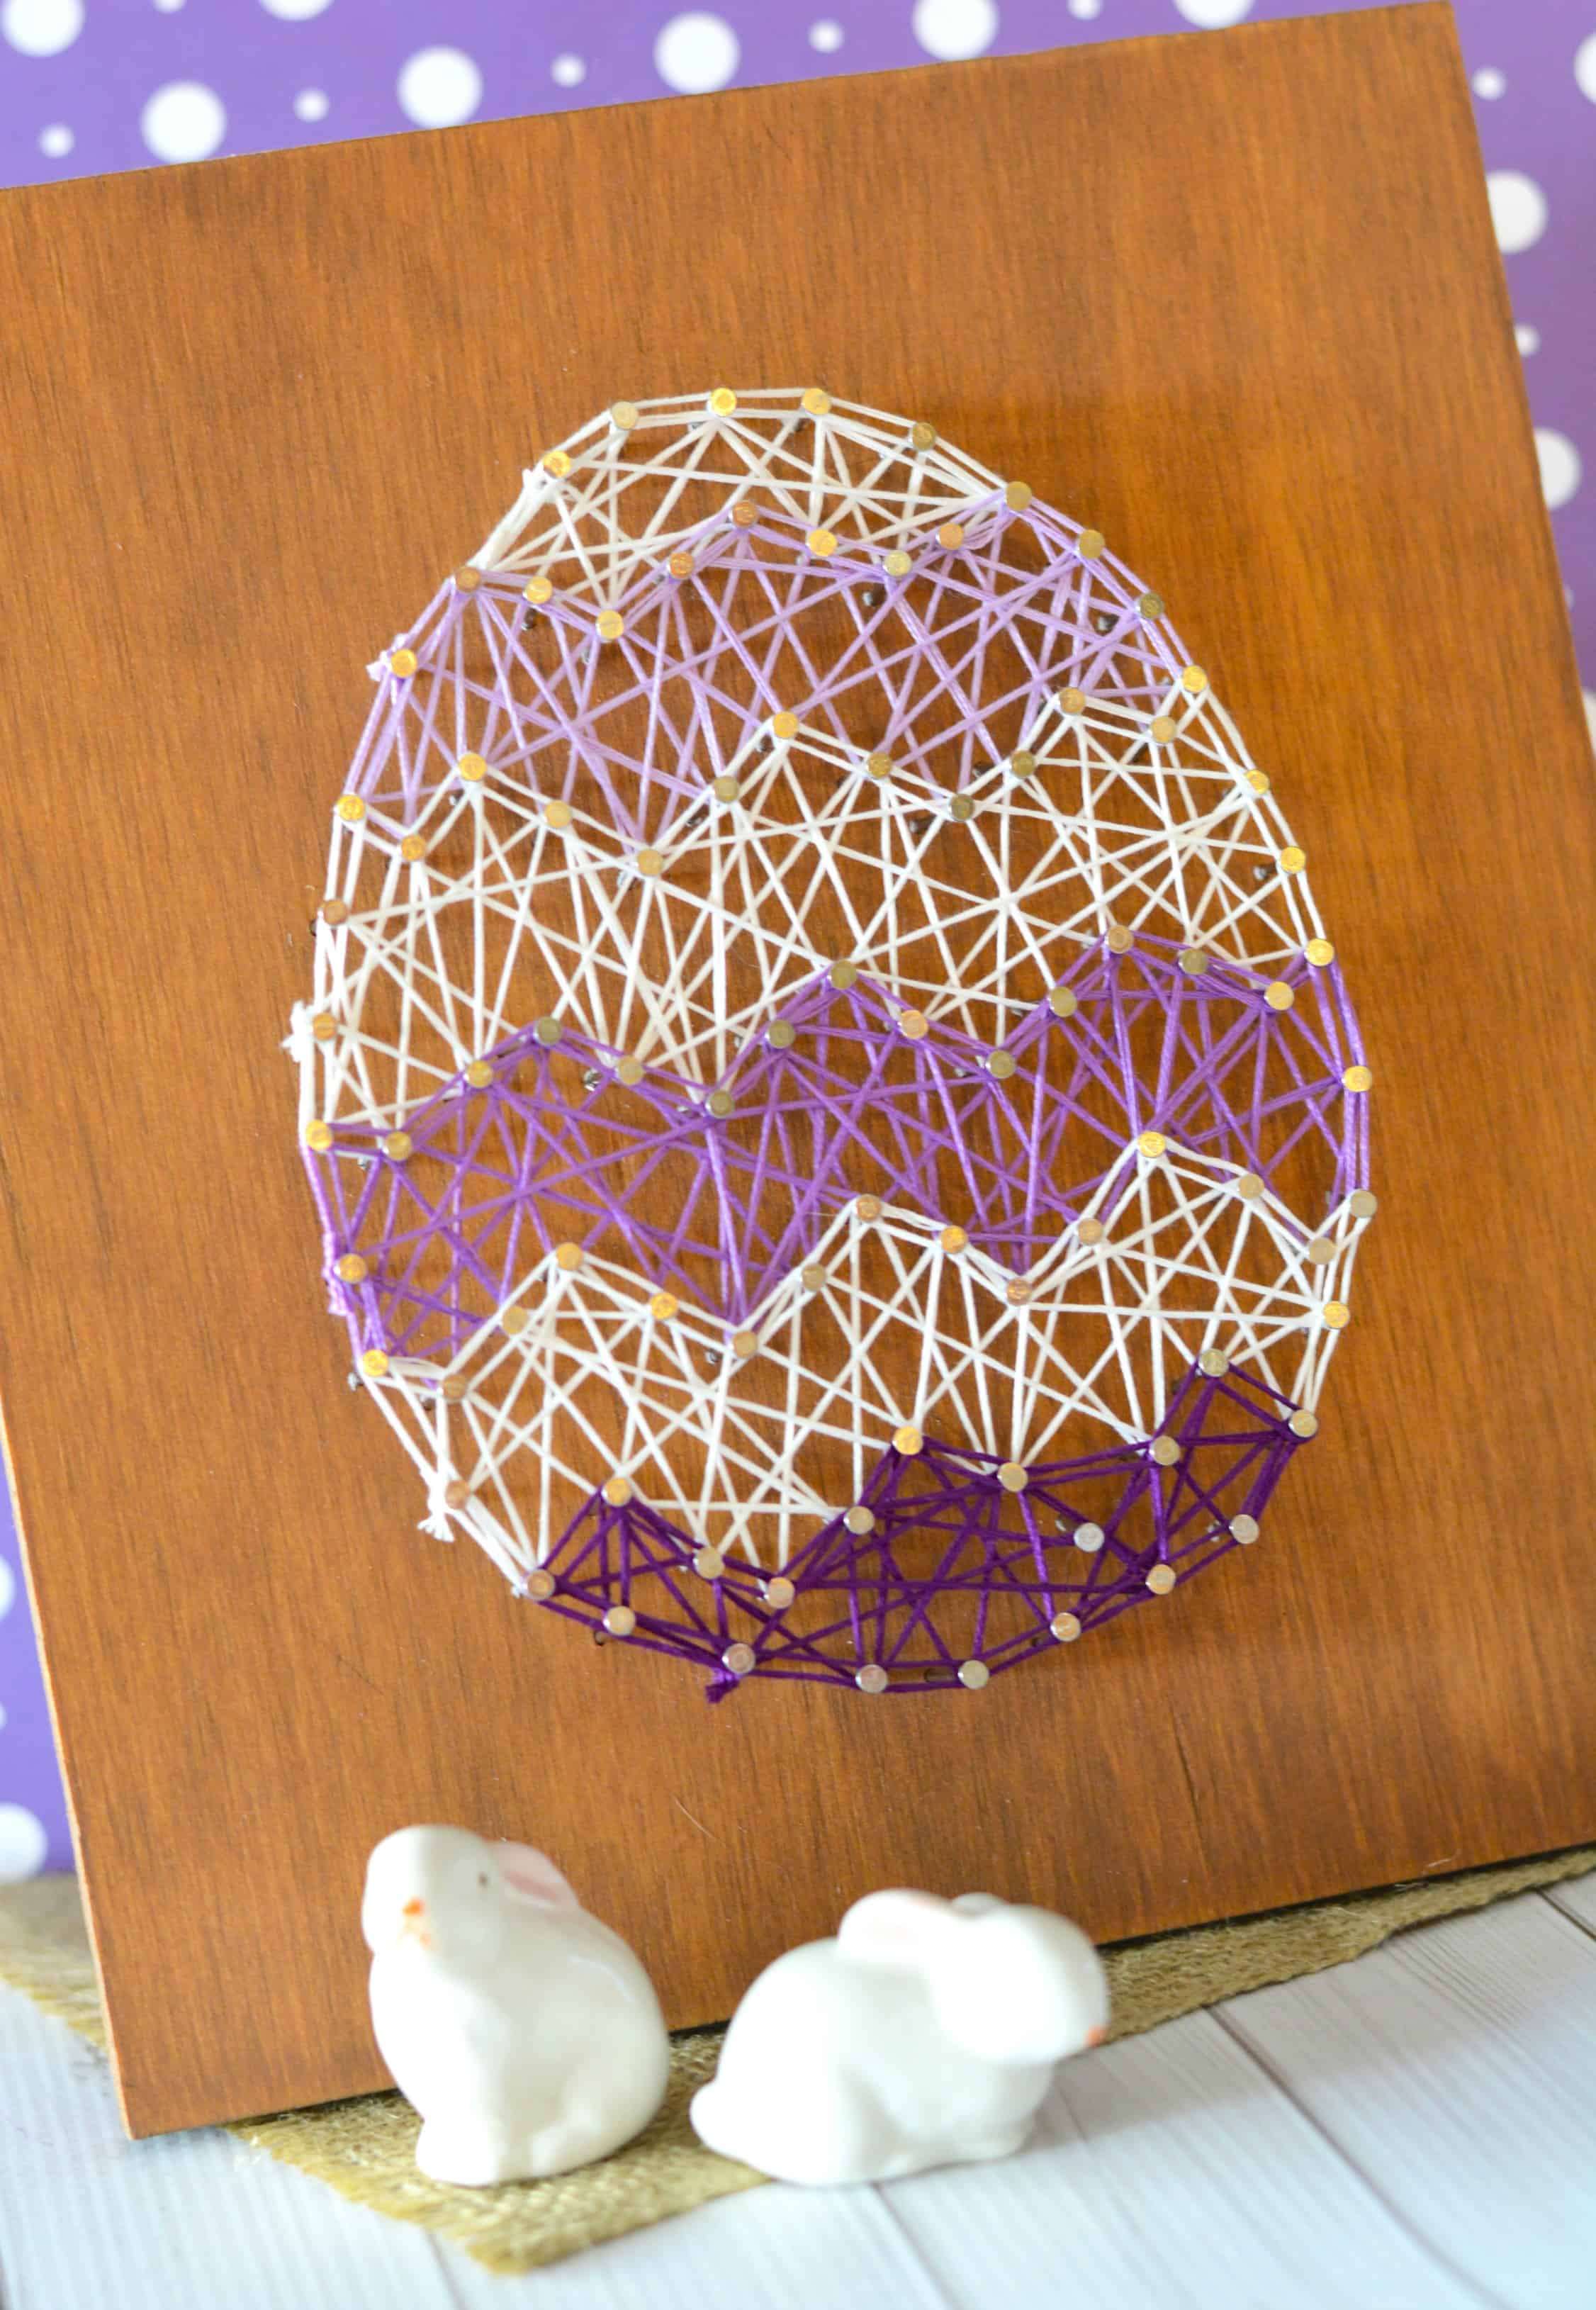
You can hang it up on the wall or prop it against a mantel or shelf. Add a few decorative bunnies nearby (I personally love these elegant bunnies!) or some colorful spring flowers.
It’s fun to see what kids come up with and the different patterns you can create. Try a tie dye egg, or color coordinate with your room! I also have this Easter design if you want to do different string art!