Worm Factory Composting Bin Set-up UPDATE
This post may contain affiliate links, view our disclosure policy for details.
Remember how I mentioned a few weeks ago that we were growing worms and reviewing the Worm Factory 360 Composting Bin from The Squirm Firm? It takes a few months to fully go through the entire process so I thought I would give you a quick update on how this project is going! I wanted to try this out for 2 reasons:
1. I do a LOT of veggie gardening and need good compost material!
2. I wanted to see how viable this was to do INSIDE a classroom or house in the winter for homeschoolers/gardeners! (I KNOW – worms inside!!)
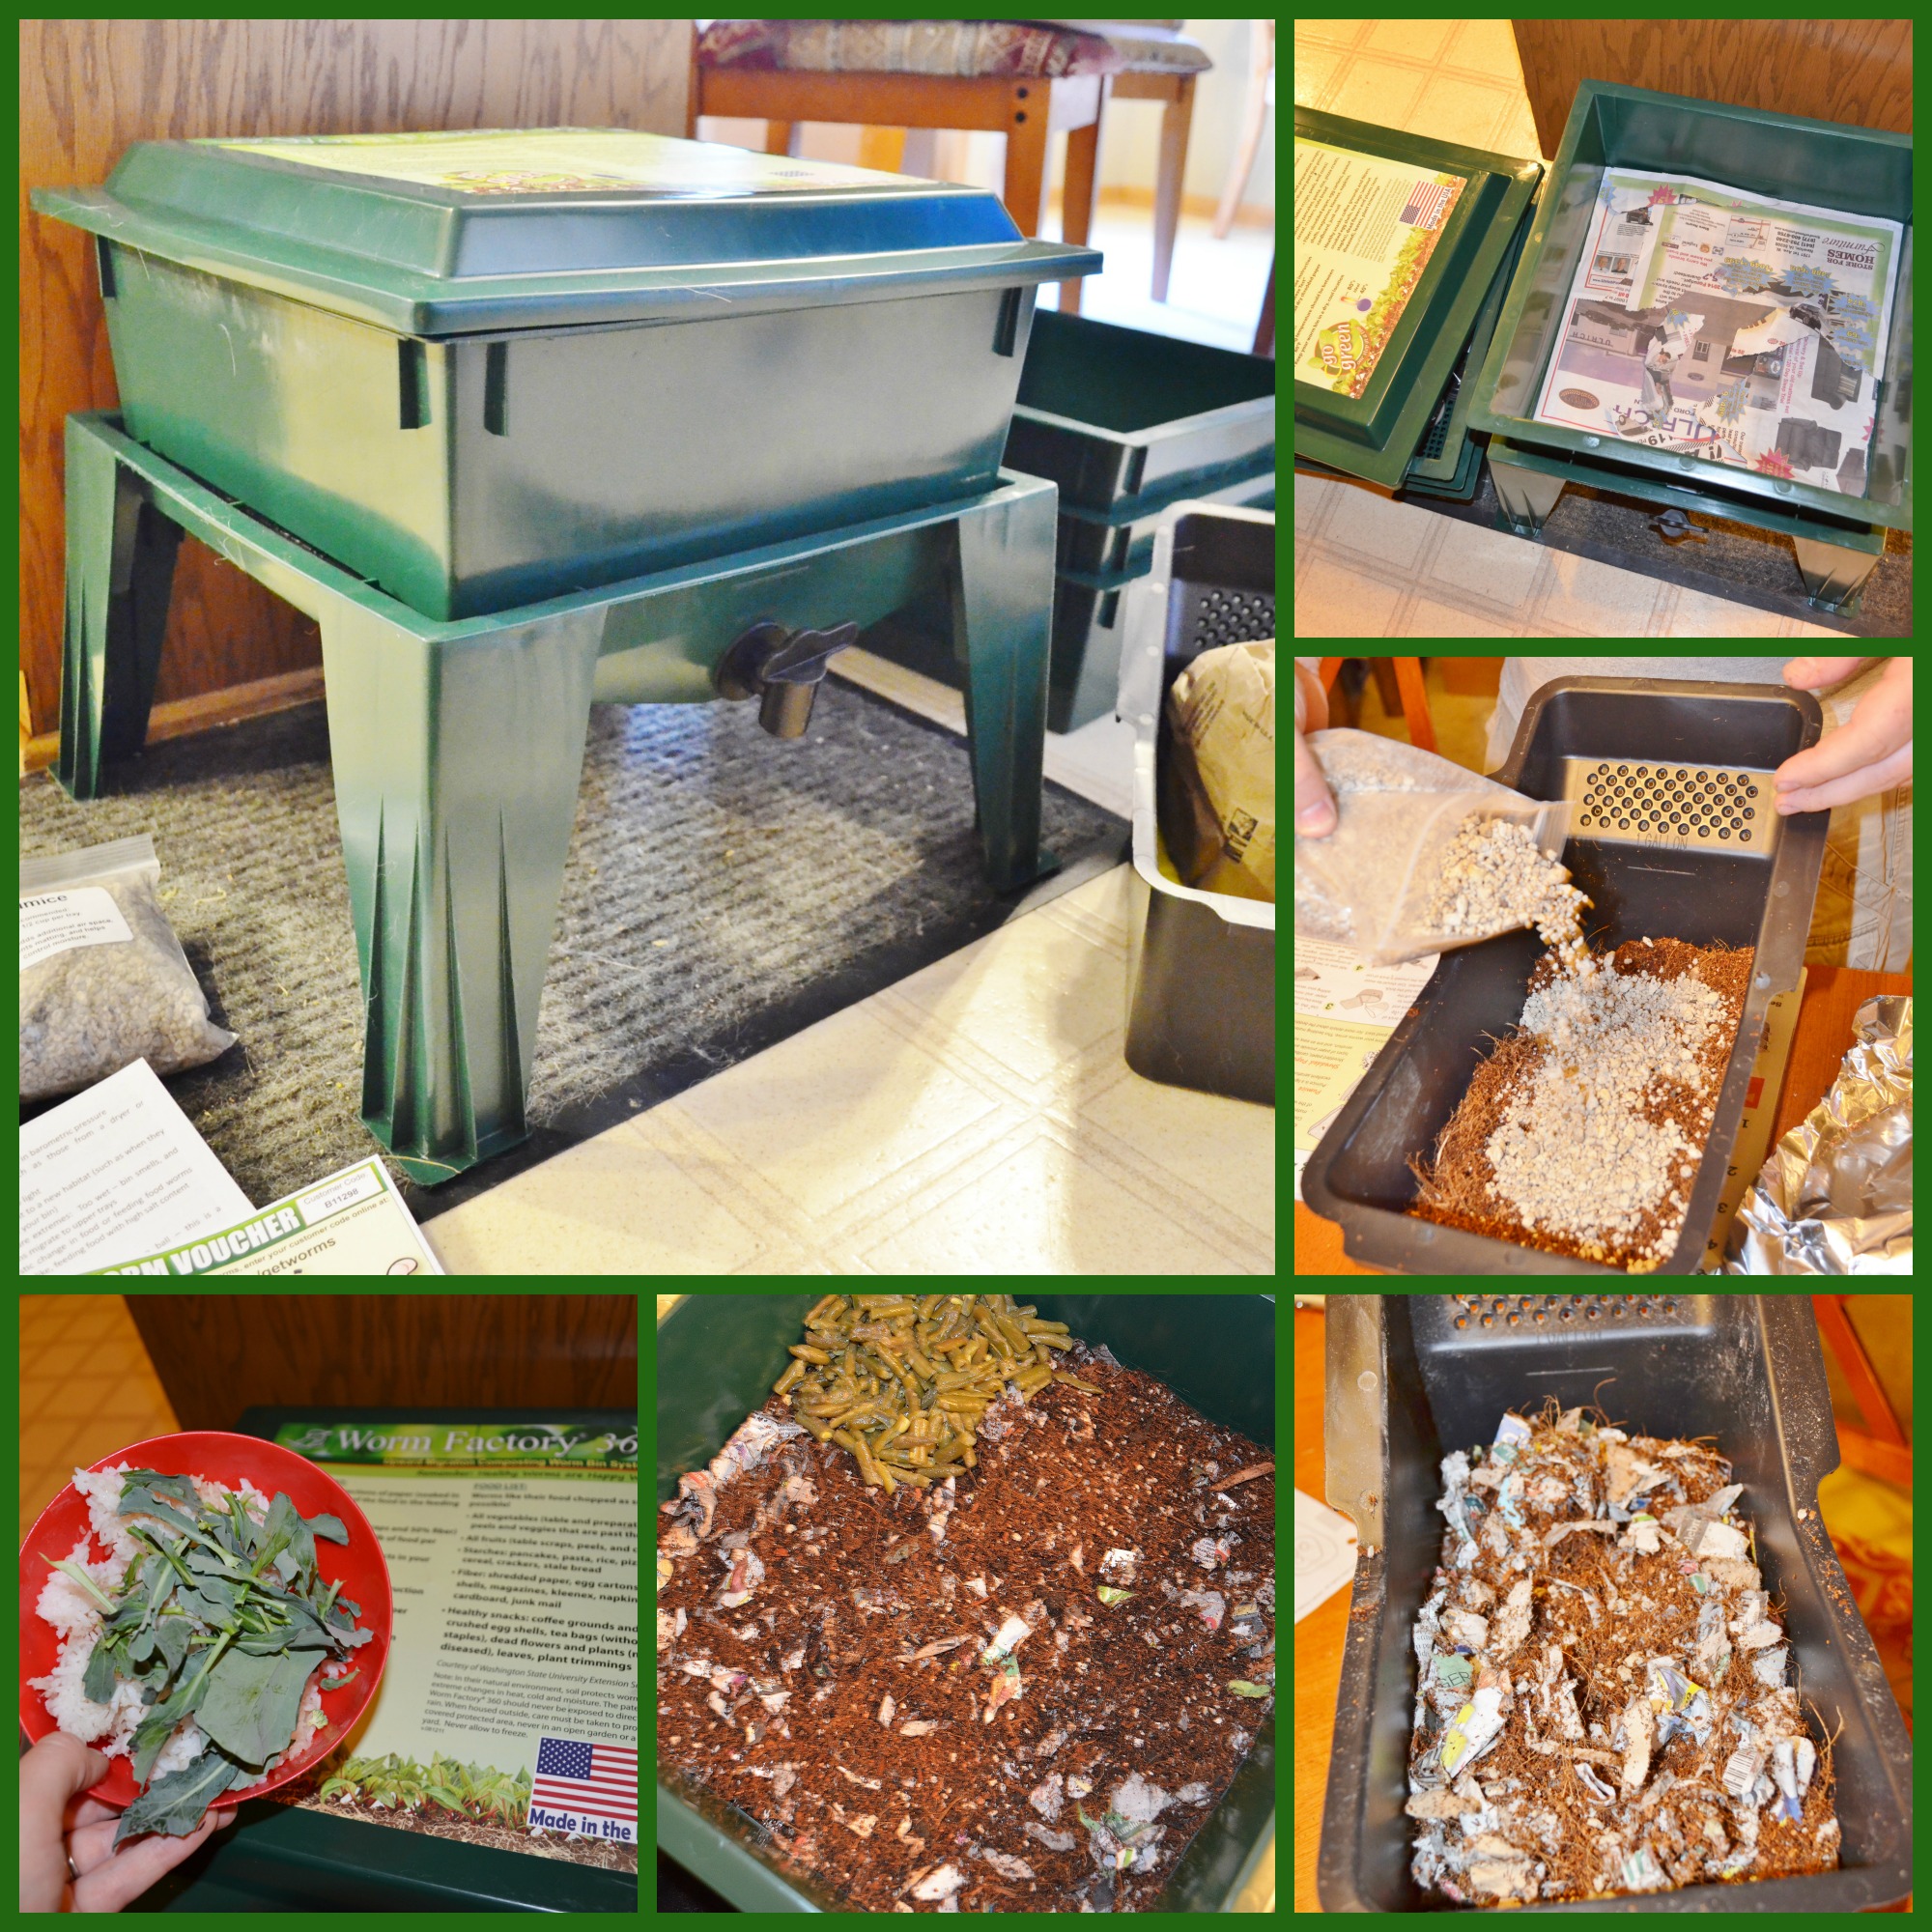
First of all it was very easy to set up! It took a little extra time to complete all of the steps but there was an instruction booklet included that went step by step and was very easy to follow. It would be very simple to have your kids/students help you through the entire process! We chose to start off our worms with some leftover green beans and a nice juicy watermelon rind. Almost everything you need (aside from newspaper strips and leftover food) is included….all the way down to the dirt! To start off you’ll only need one of the four trays so your compost will start rather small until you really get the worms going after a few months.
It’s starting to drop down in the 30s at night here outside so I knew placing our worm bin outside was not an option as it would be too cold for our worms. My husband was not-so-sure about keeping this large container of worms in the house but we decided to give it a try. After harvesting our veggies lately I was really concerned not only about the possibility of the worm bin smelling but also if it would attract fruit flies since we were already struggling with that from my garden.
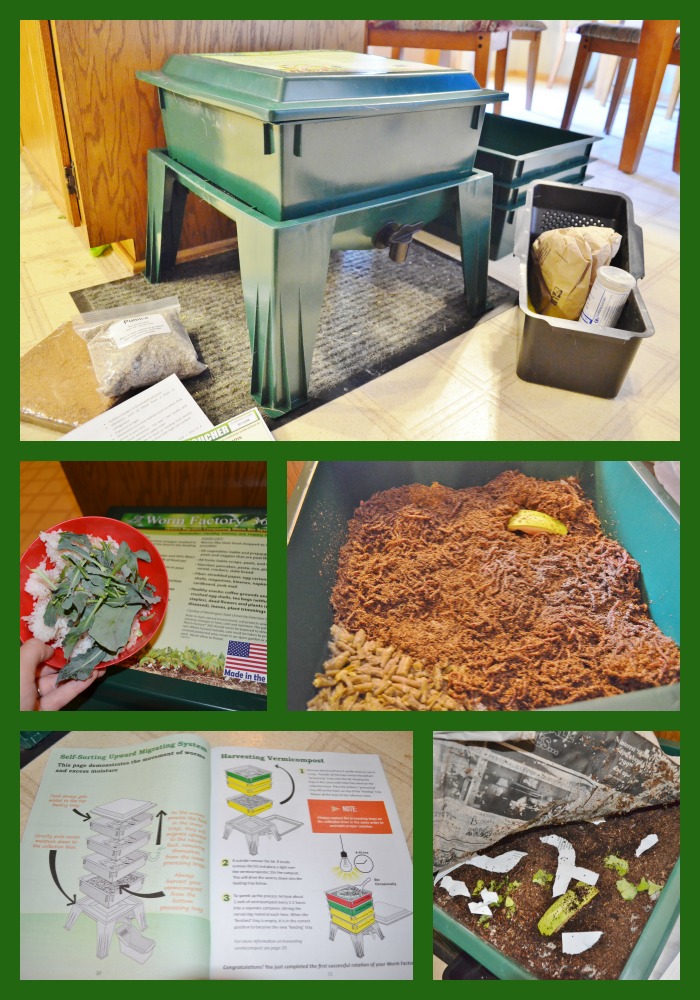
You can see in the picture above I received a LOT of red wiggler worms in the mail to dump in the bin – and I mean a LOT! I can hardly wait until we use all four trays!! As the worms continue to move up towards the top of the bin and create compost you’ll begin adding more trays on top. So far I’ve learned a few key things about keeping a good balance in this worm composting bin:
- DON’T put too much food in it! A half a cup a day max to start with! It really doesn’t take much food to get these guys started! If you put too much it can get moldy!
- DO add in newspaper strips or dry leaves every time you add in something wet. Again, it’s all about balance – you want equal wet and dry materials otherwise it will either get moldy or too dry for your worms.
- It does NOT smell. Not at all. Even when I was learning how much food to put in there was NO smell. Now if you open the compost bin up and pull back the newspaper you can smell an earthy dirt smell but it does NOT smell rotten in any way. I was pleasantly surprised! In fact I can’t tell you how many visitors we have had in our house that had NO clue what we had sitting in our kitchen and never smelled a thing.
- It does NOT attract fruit flies. Nope, not a single one! And I’m telling you that we have atrociously battled fruit flies since I began harvesting tomatoes and veggies from my garden but I’ve never had one anywhere near my compost bin. This was really a big concern of mine but it’s certainly unfounded – no fly attraction here at all!
Stay tuned for more details and updates as we work through this project!