DIY Retro VHS Shelf System Diorama Small World Sensory Play
This post may contain affiliate links, view our disclosure policy for details.
This post brought to you in partnership with DreamWorks Animation.
When DreamWorks Animation contacted me and asked me to come up with an activity idea to pair up with Kipo and the Age of Wonderbeasts as part of their epic Camp DreamWorks series, I KNEW I wanted to make a retro upcycled activity that could double as a diorama display and sensory play set!
Grab a pile of old VHS tapes and check out our DIY retro VHS shelf system diorama below! You’ll notice a nod to some of our favorite Kipo episodes in the diorama via urban destruction, water vs. city, villains, and of course a nod to the throwback vibe by using VHS tapes!
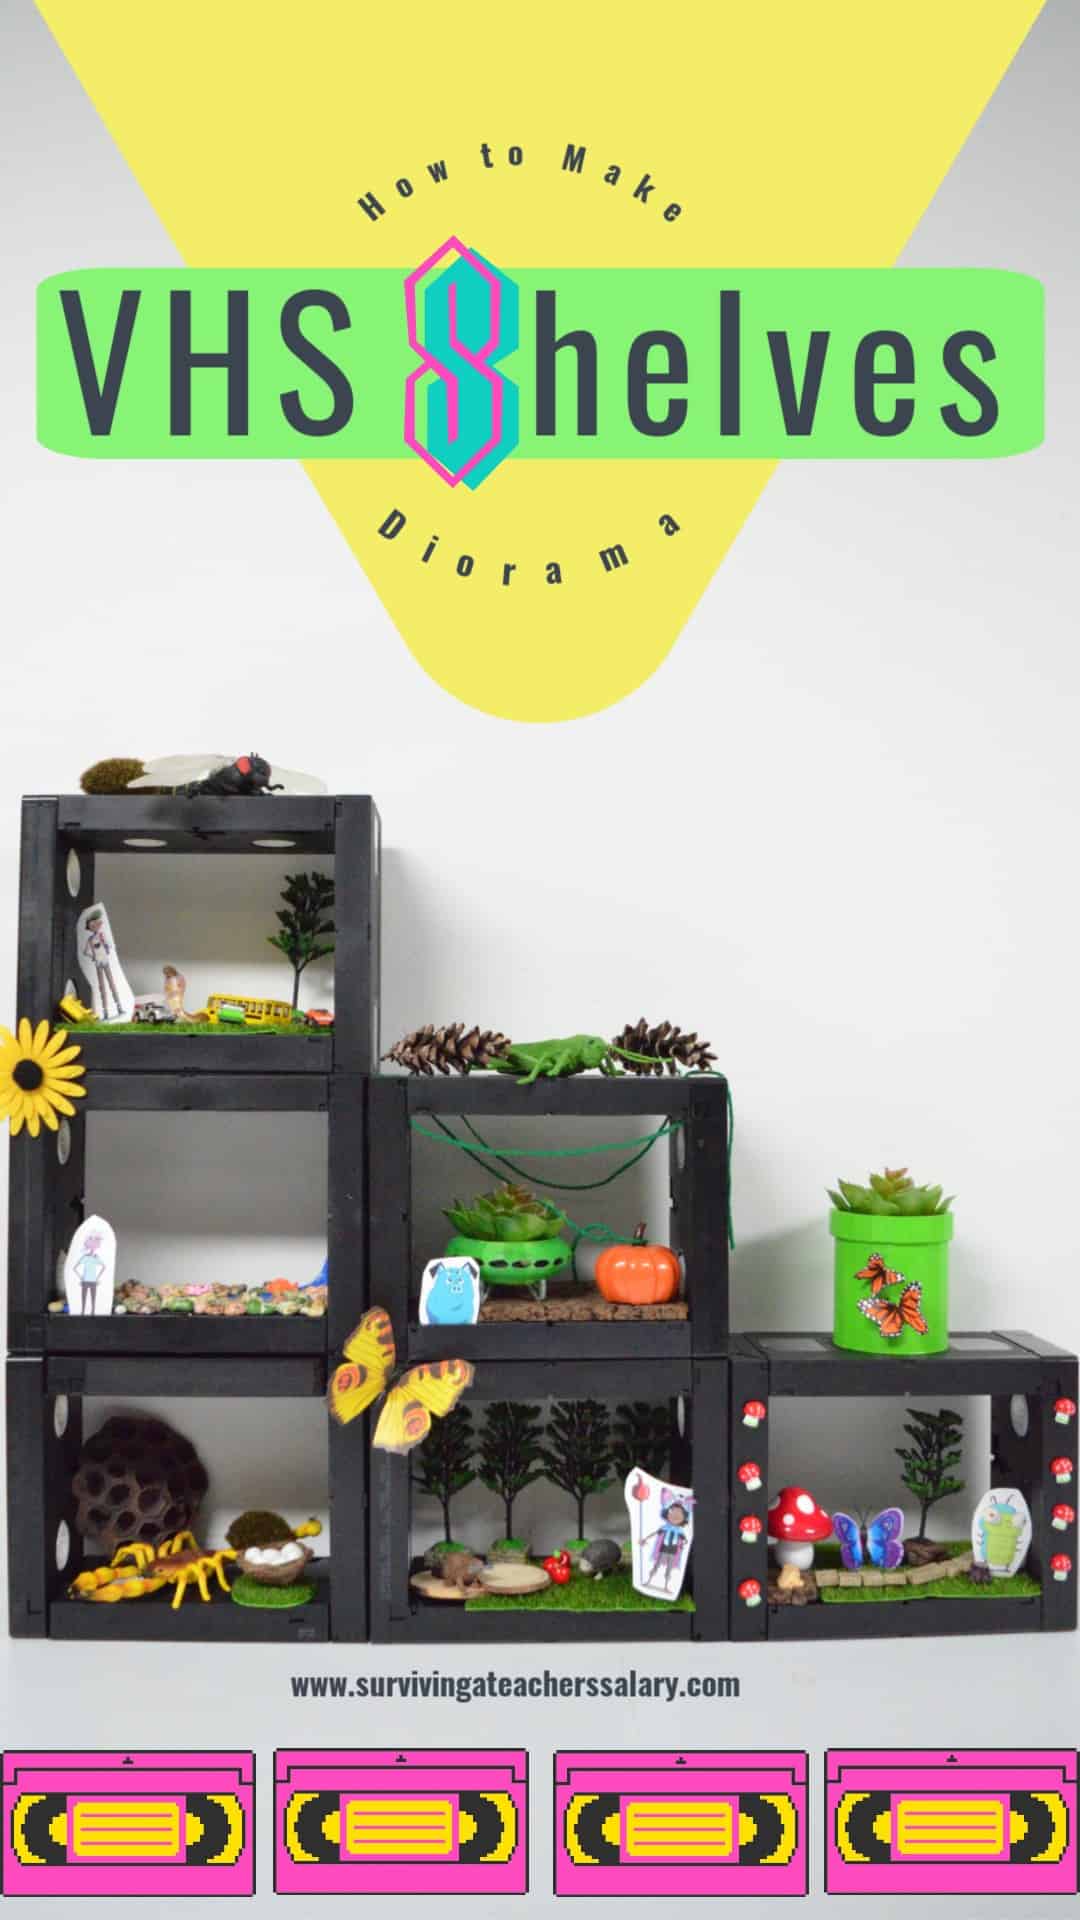
Watch our fun video below to see how simple it is to make your own VHS shelf system! Feel free to steal some of my creative ideas for our diorama scenes! You can change it up to any theme or style you want to make this for! Display your quirky curio cabinet collection or turn it into a small world play area for your kids!
Video Tutorial:
Materials I Used:
-
VHS Tapes
-
Hot Glue
-
Faux Grass

-
Faux Trees & Moss
-
Paint
-
Small Animals, Vehicles, Bricks, Fairy Garden Accessories, etc.
-
Printable Kipo characters
-
Yarn


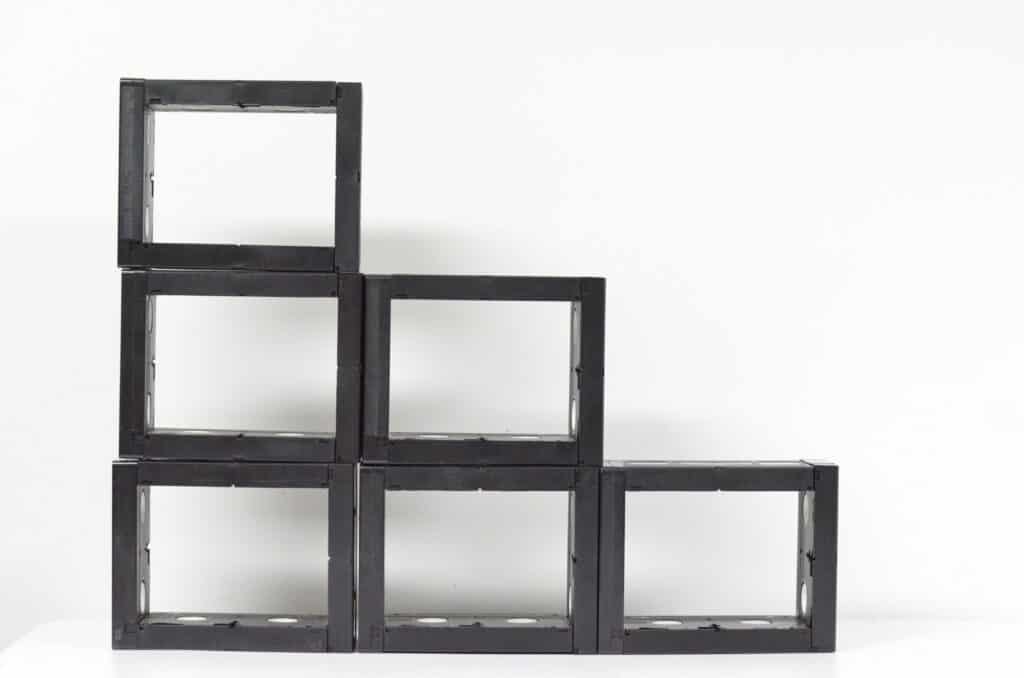
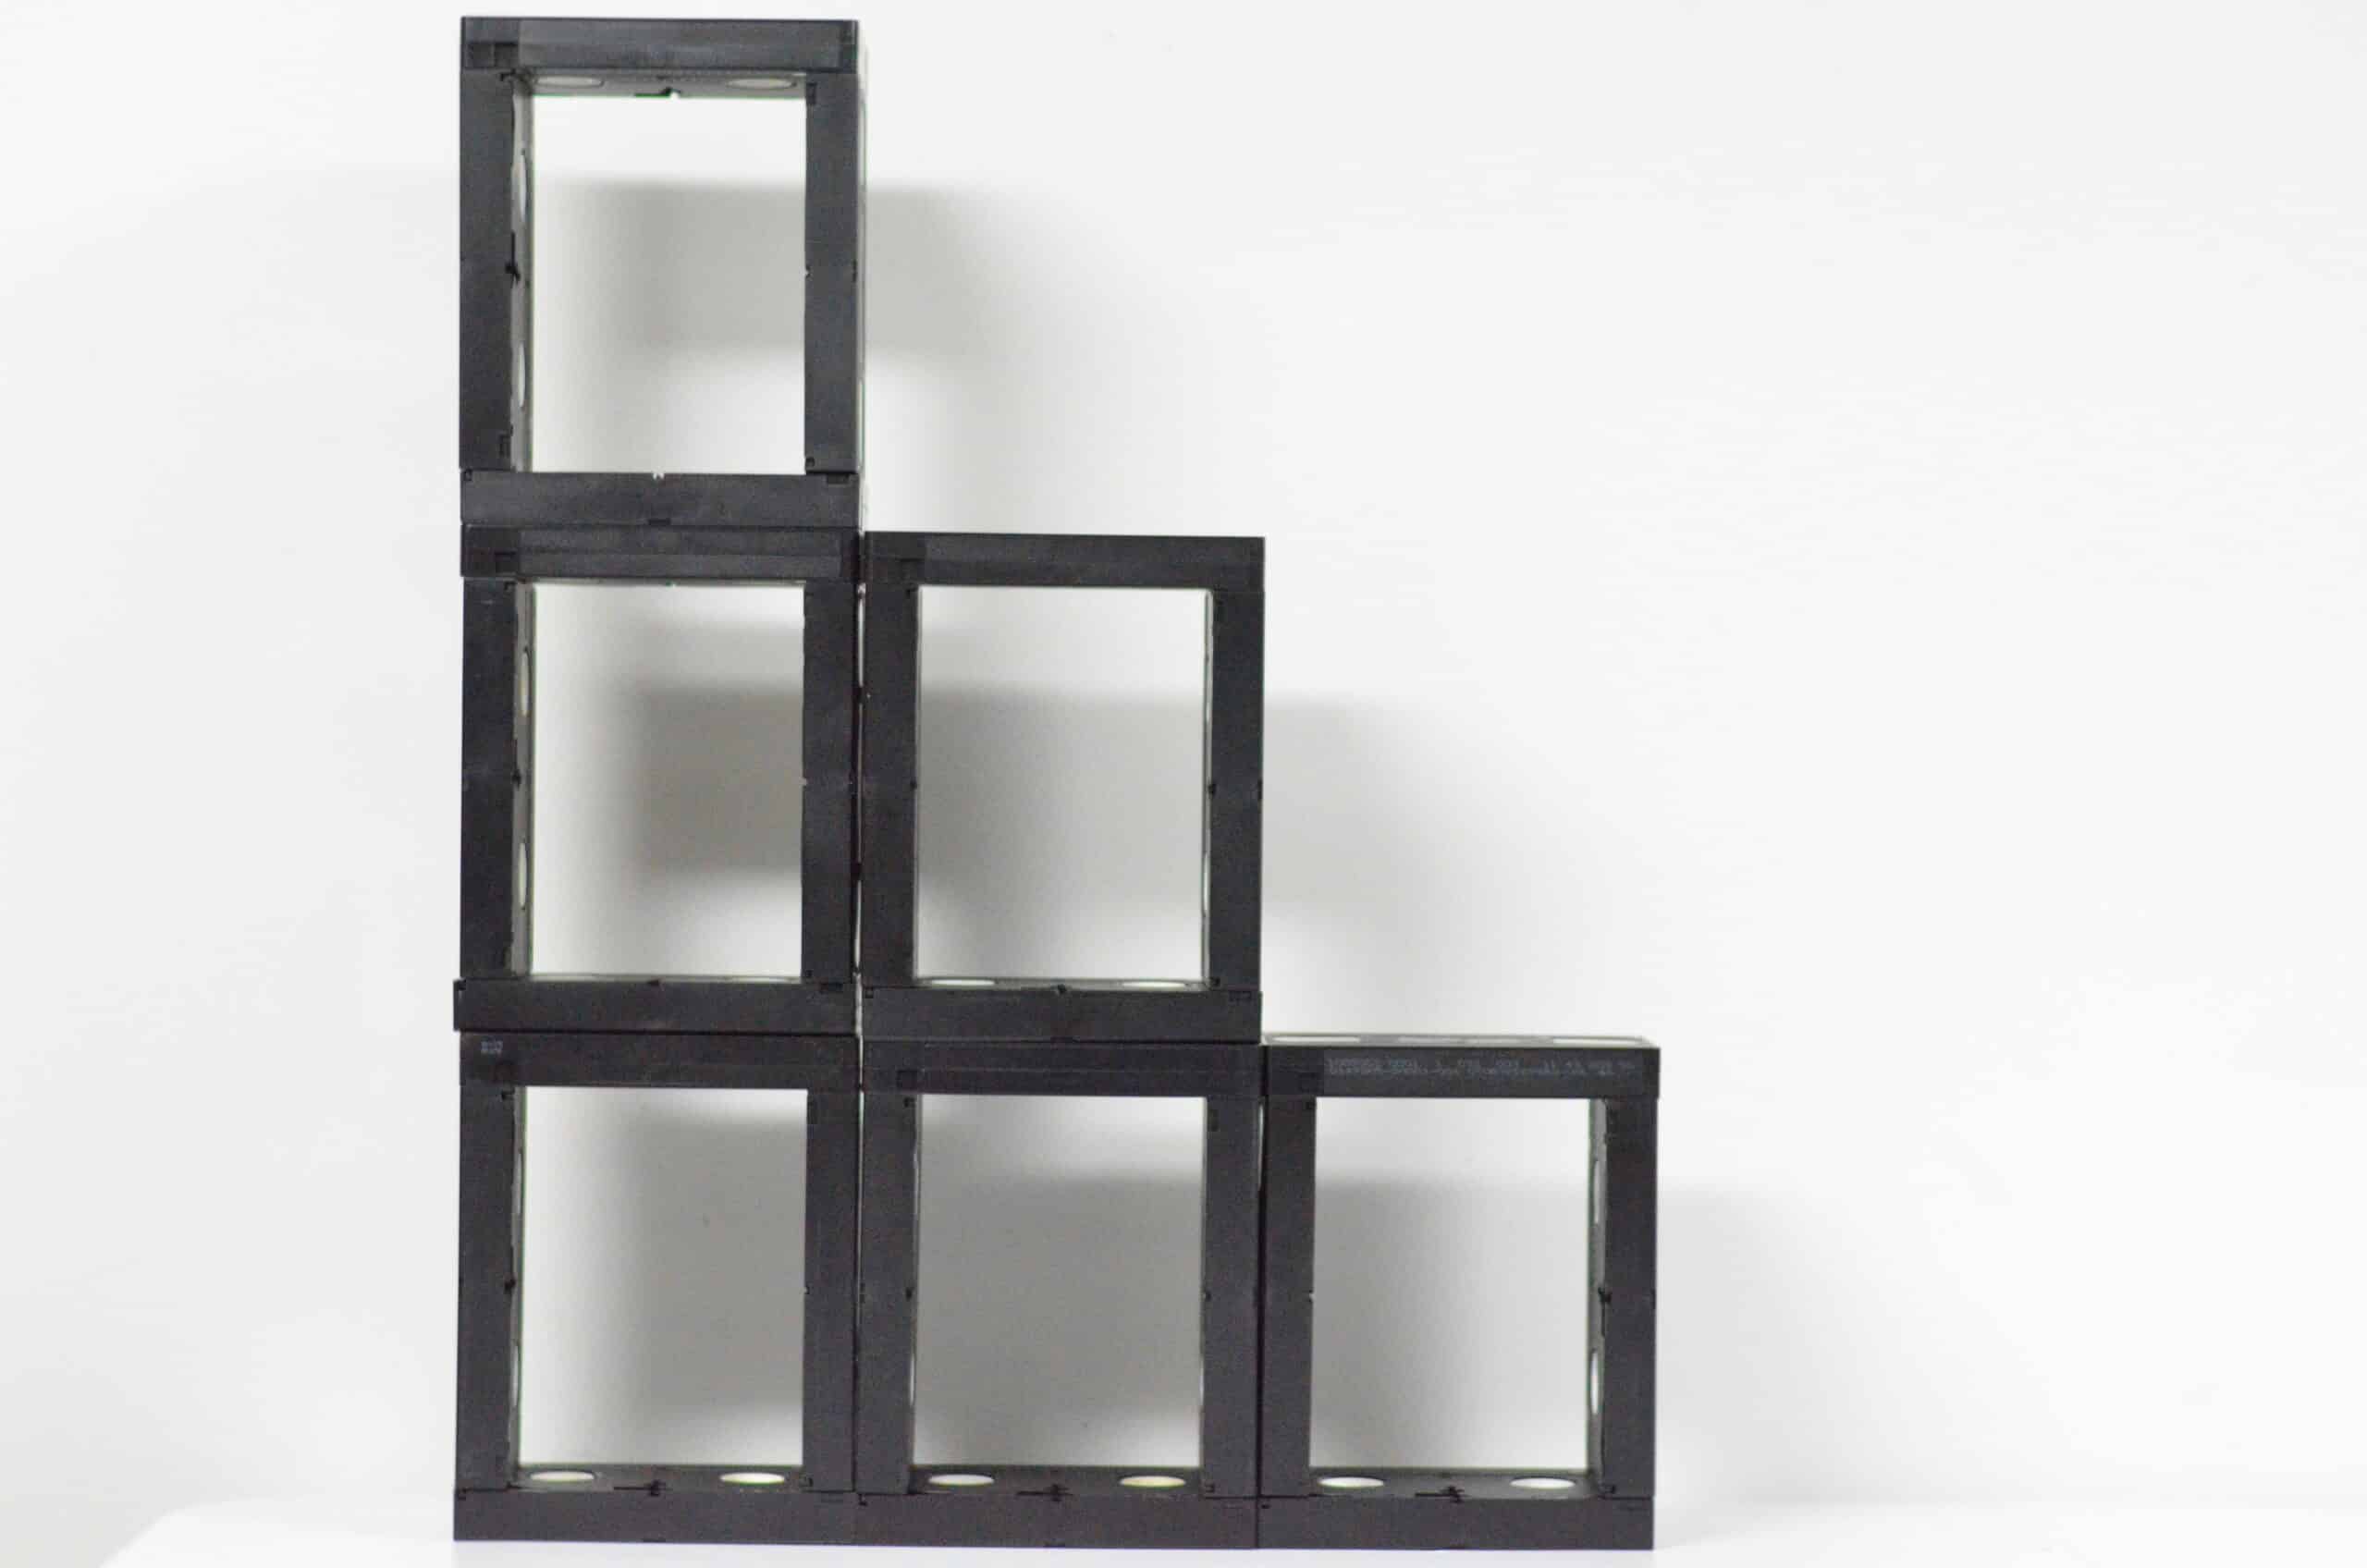
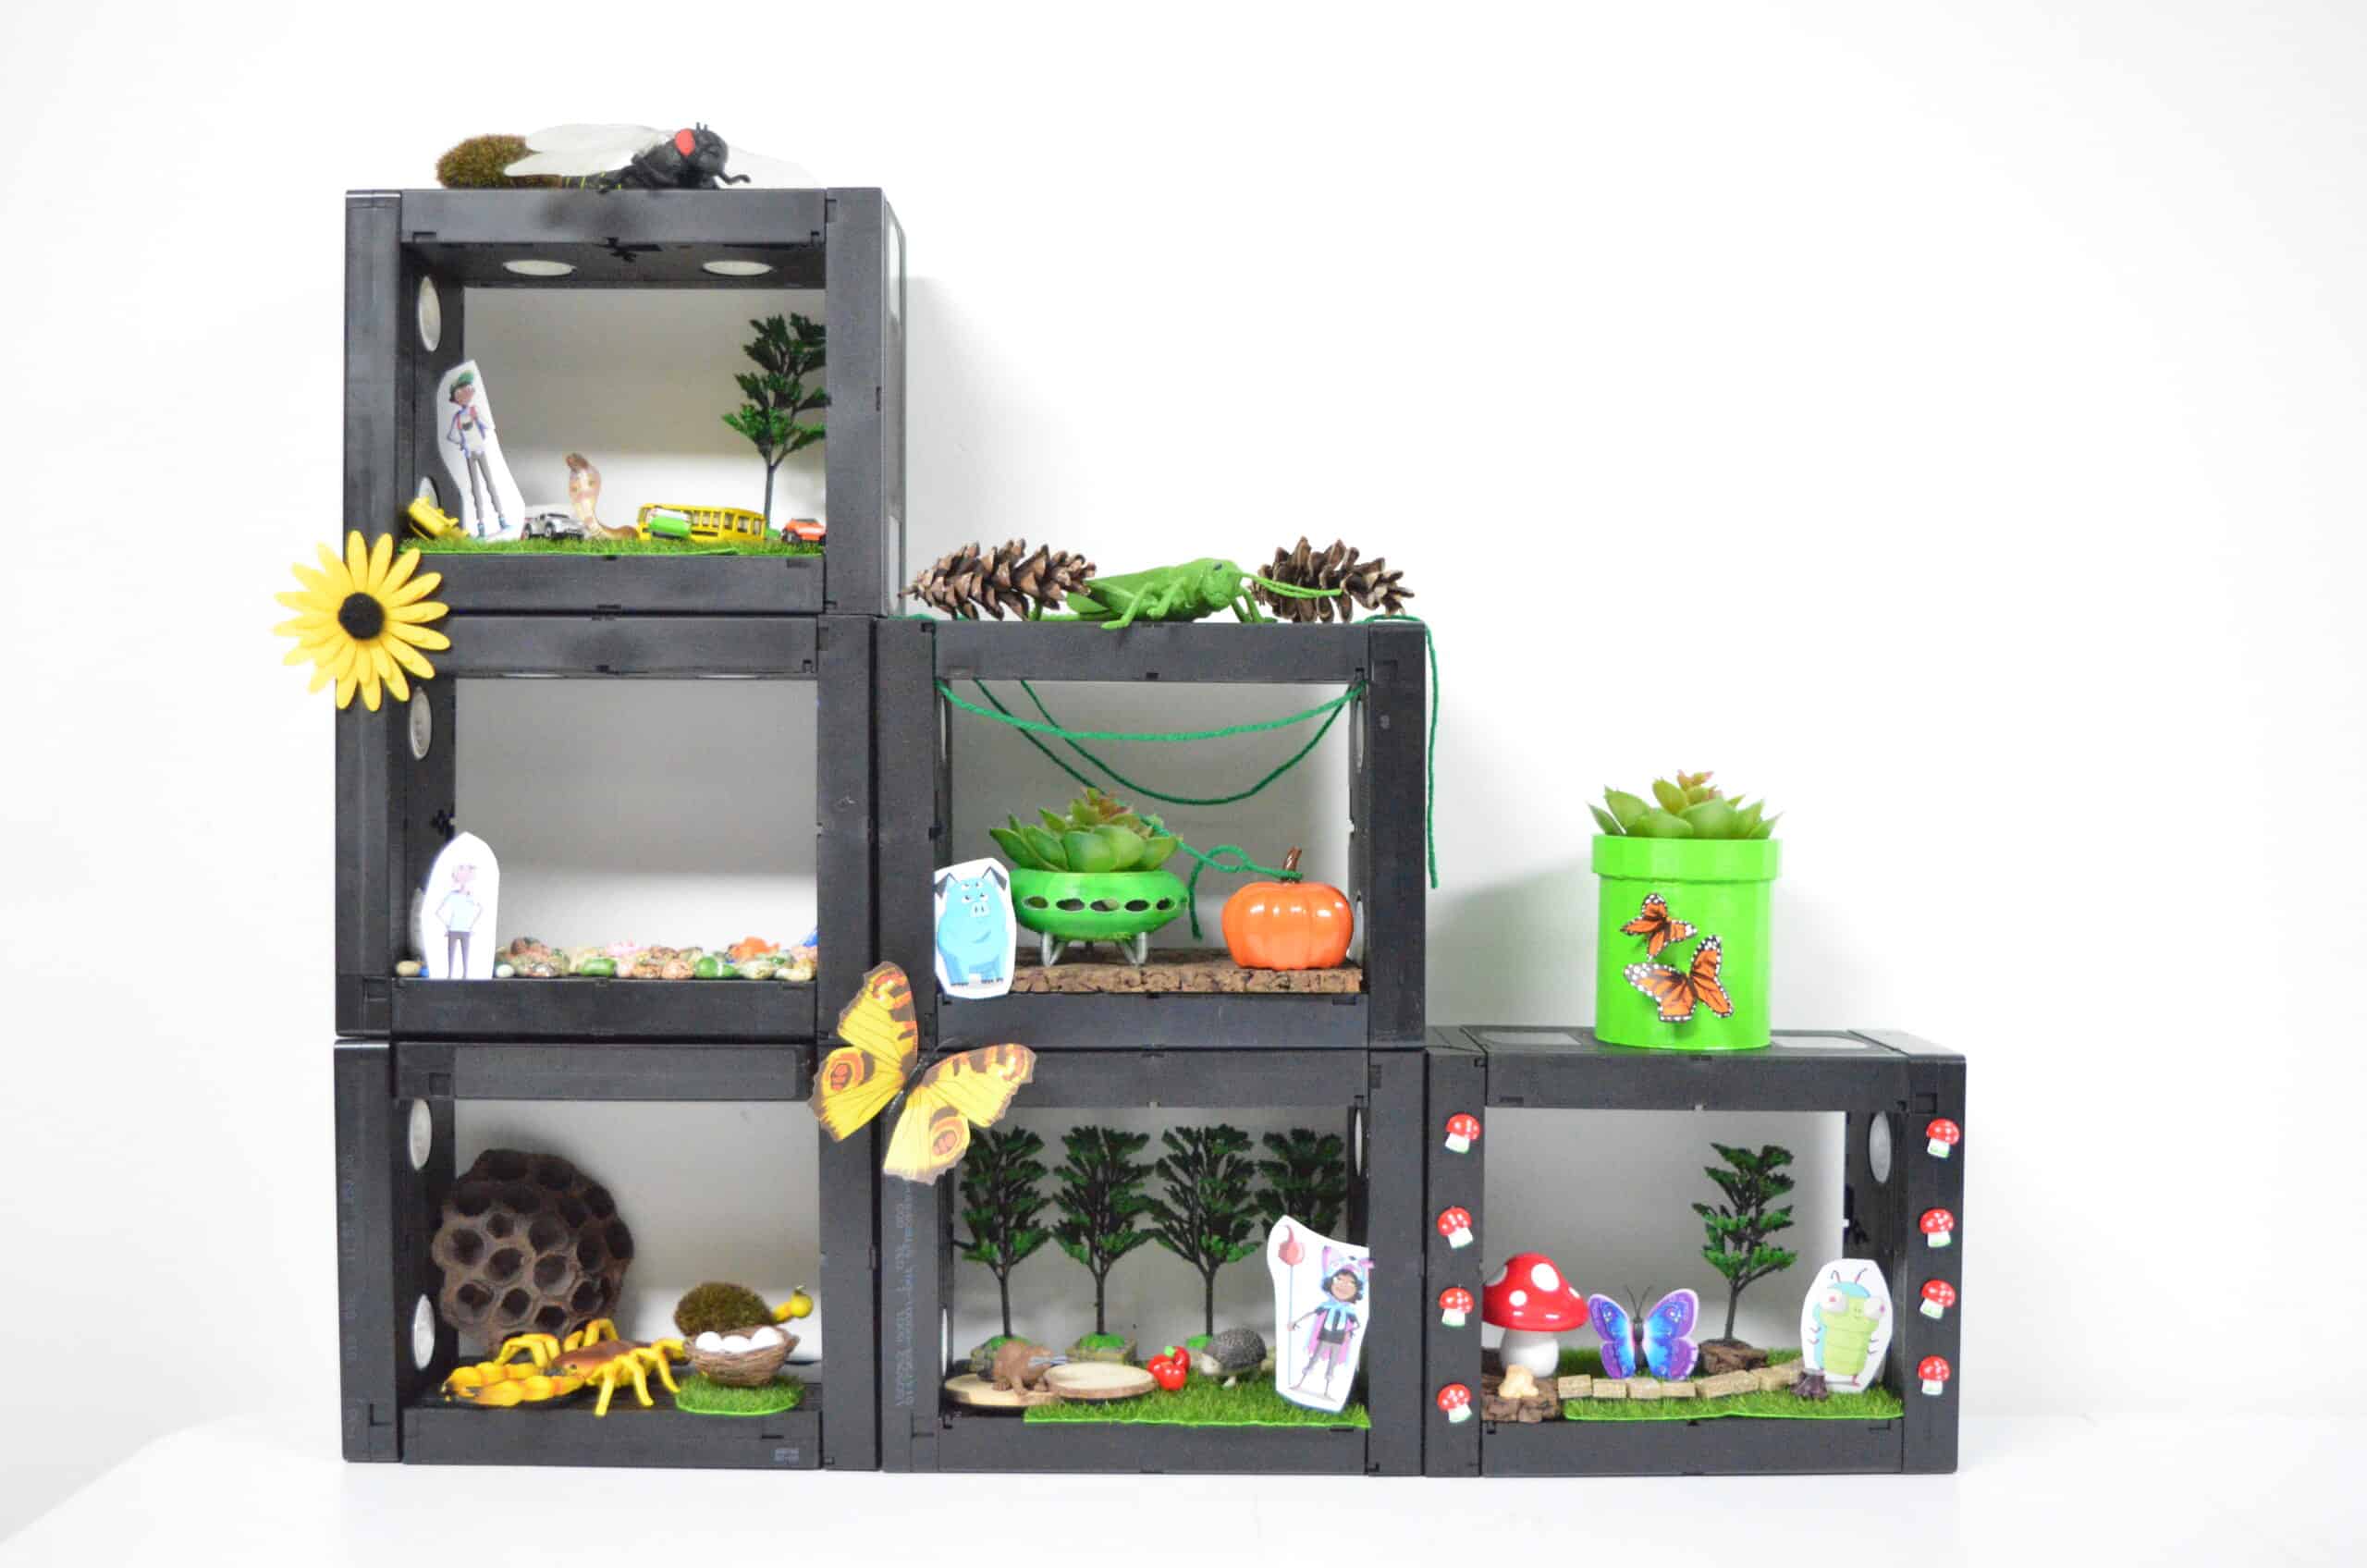
The most important part of getting started with this diy VHS shelf system is building the shelves to start with! And it’s the EASIEST part!!! Each “box” diorama is made with four VHS tapes. To build a shelf like I did above or below you’ll need 24 VHS tapes.
Begin by hot glueing the top edges of your VHS tapes and stacking them together to form a box. You can choose to leave each diorama “box” individually or glue the entire set together!
Be forewarned – once you’ve attached the VHS together with hot glue it will NOT come undone! Trust me – I tried! The hot glue will pretty permanently stick the VHS tapes together!
This is what our VHS shelves would look like if you rotated the diorama “box” vertically! I chose to put mine in a trendy “stair” shape but you can arrange your VHS shelf system however you want! Check your local thrift stores or Facebook groups to find old VHS tapes.
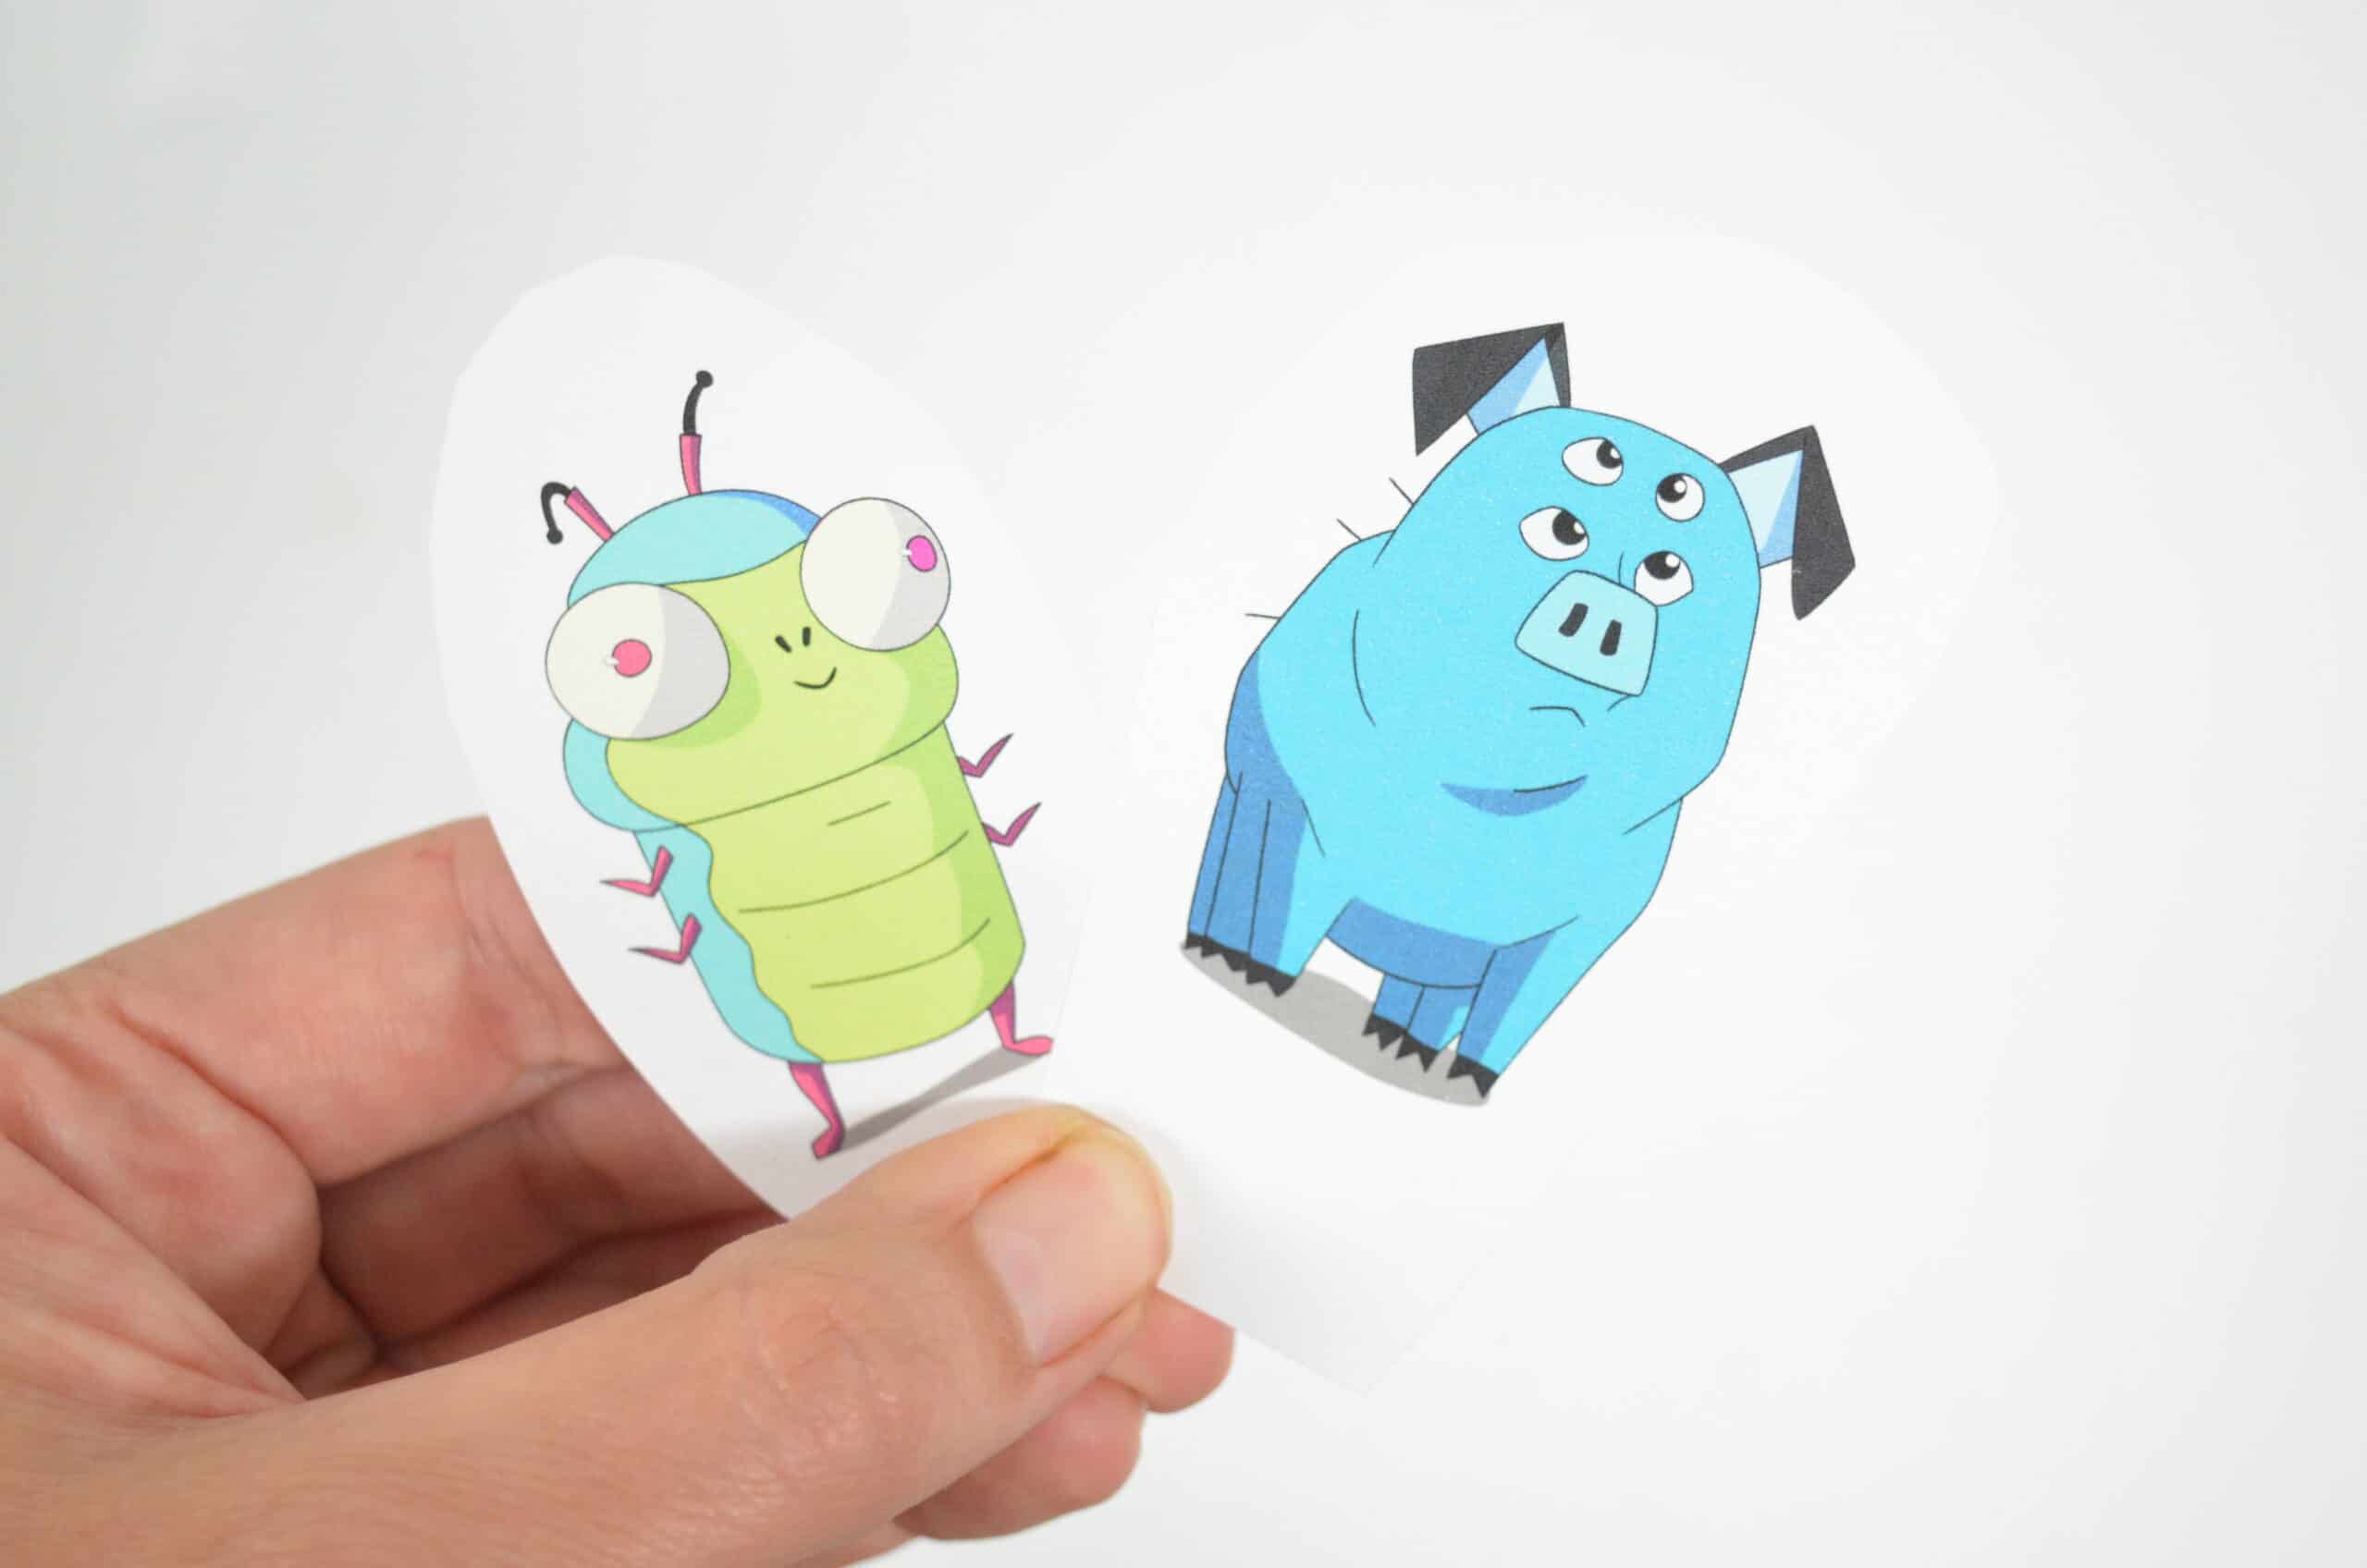
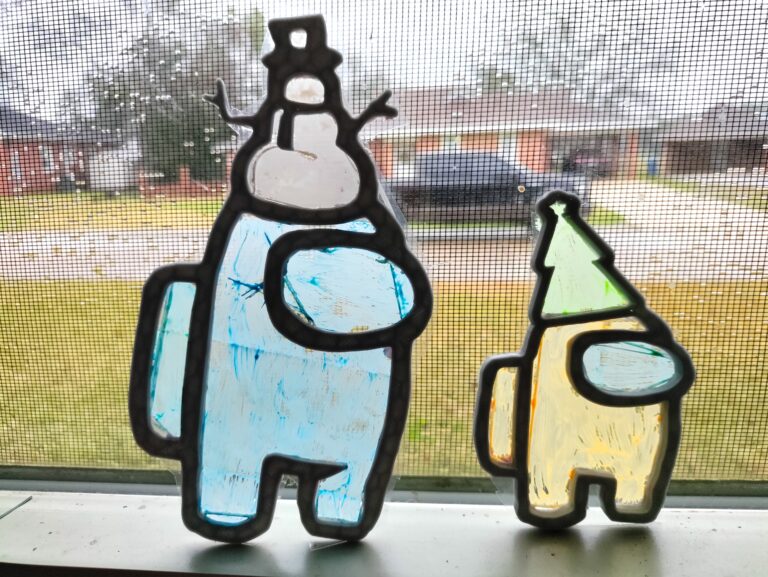
Since we wanting to build a Kipo and the Age of Wonderbeasts play set I printed out pictures of some of our favorite characters! Above you can see Dave and Mandu. Just add a toothpick or craft stick to the back of your character.
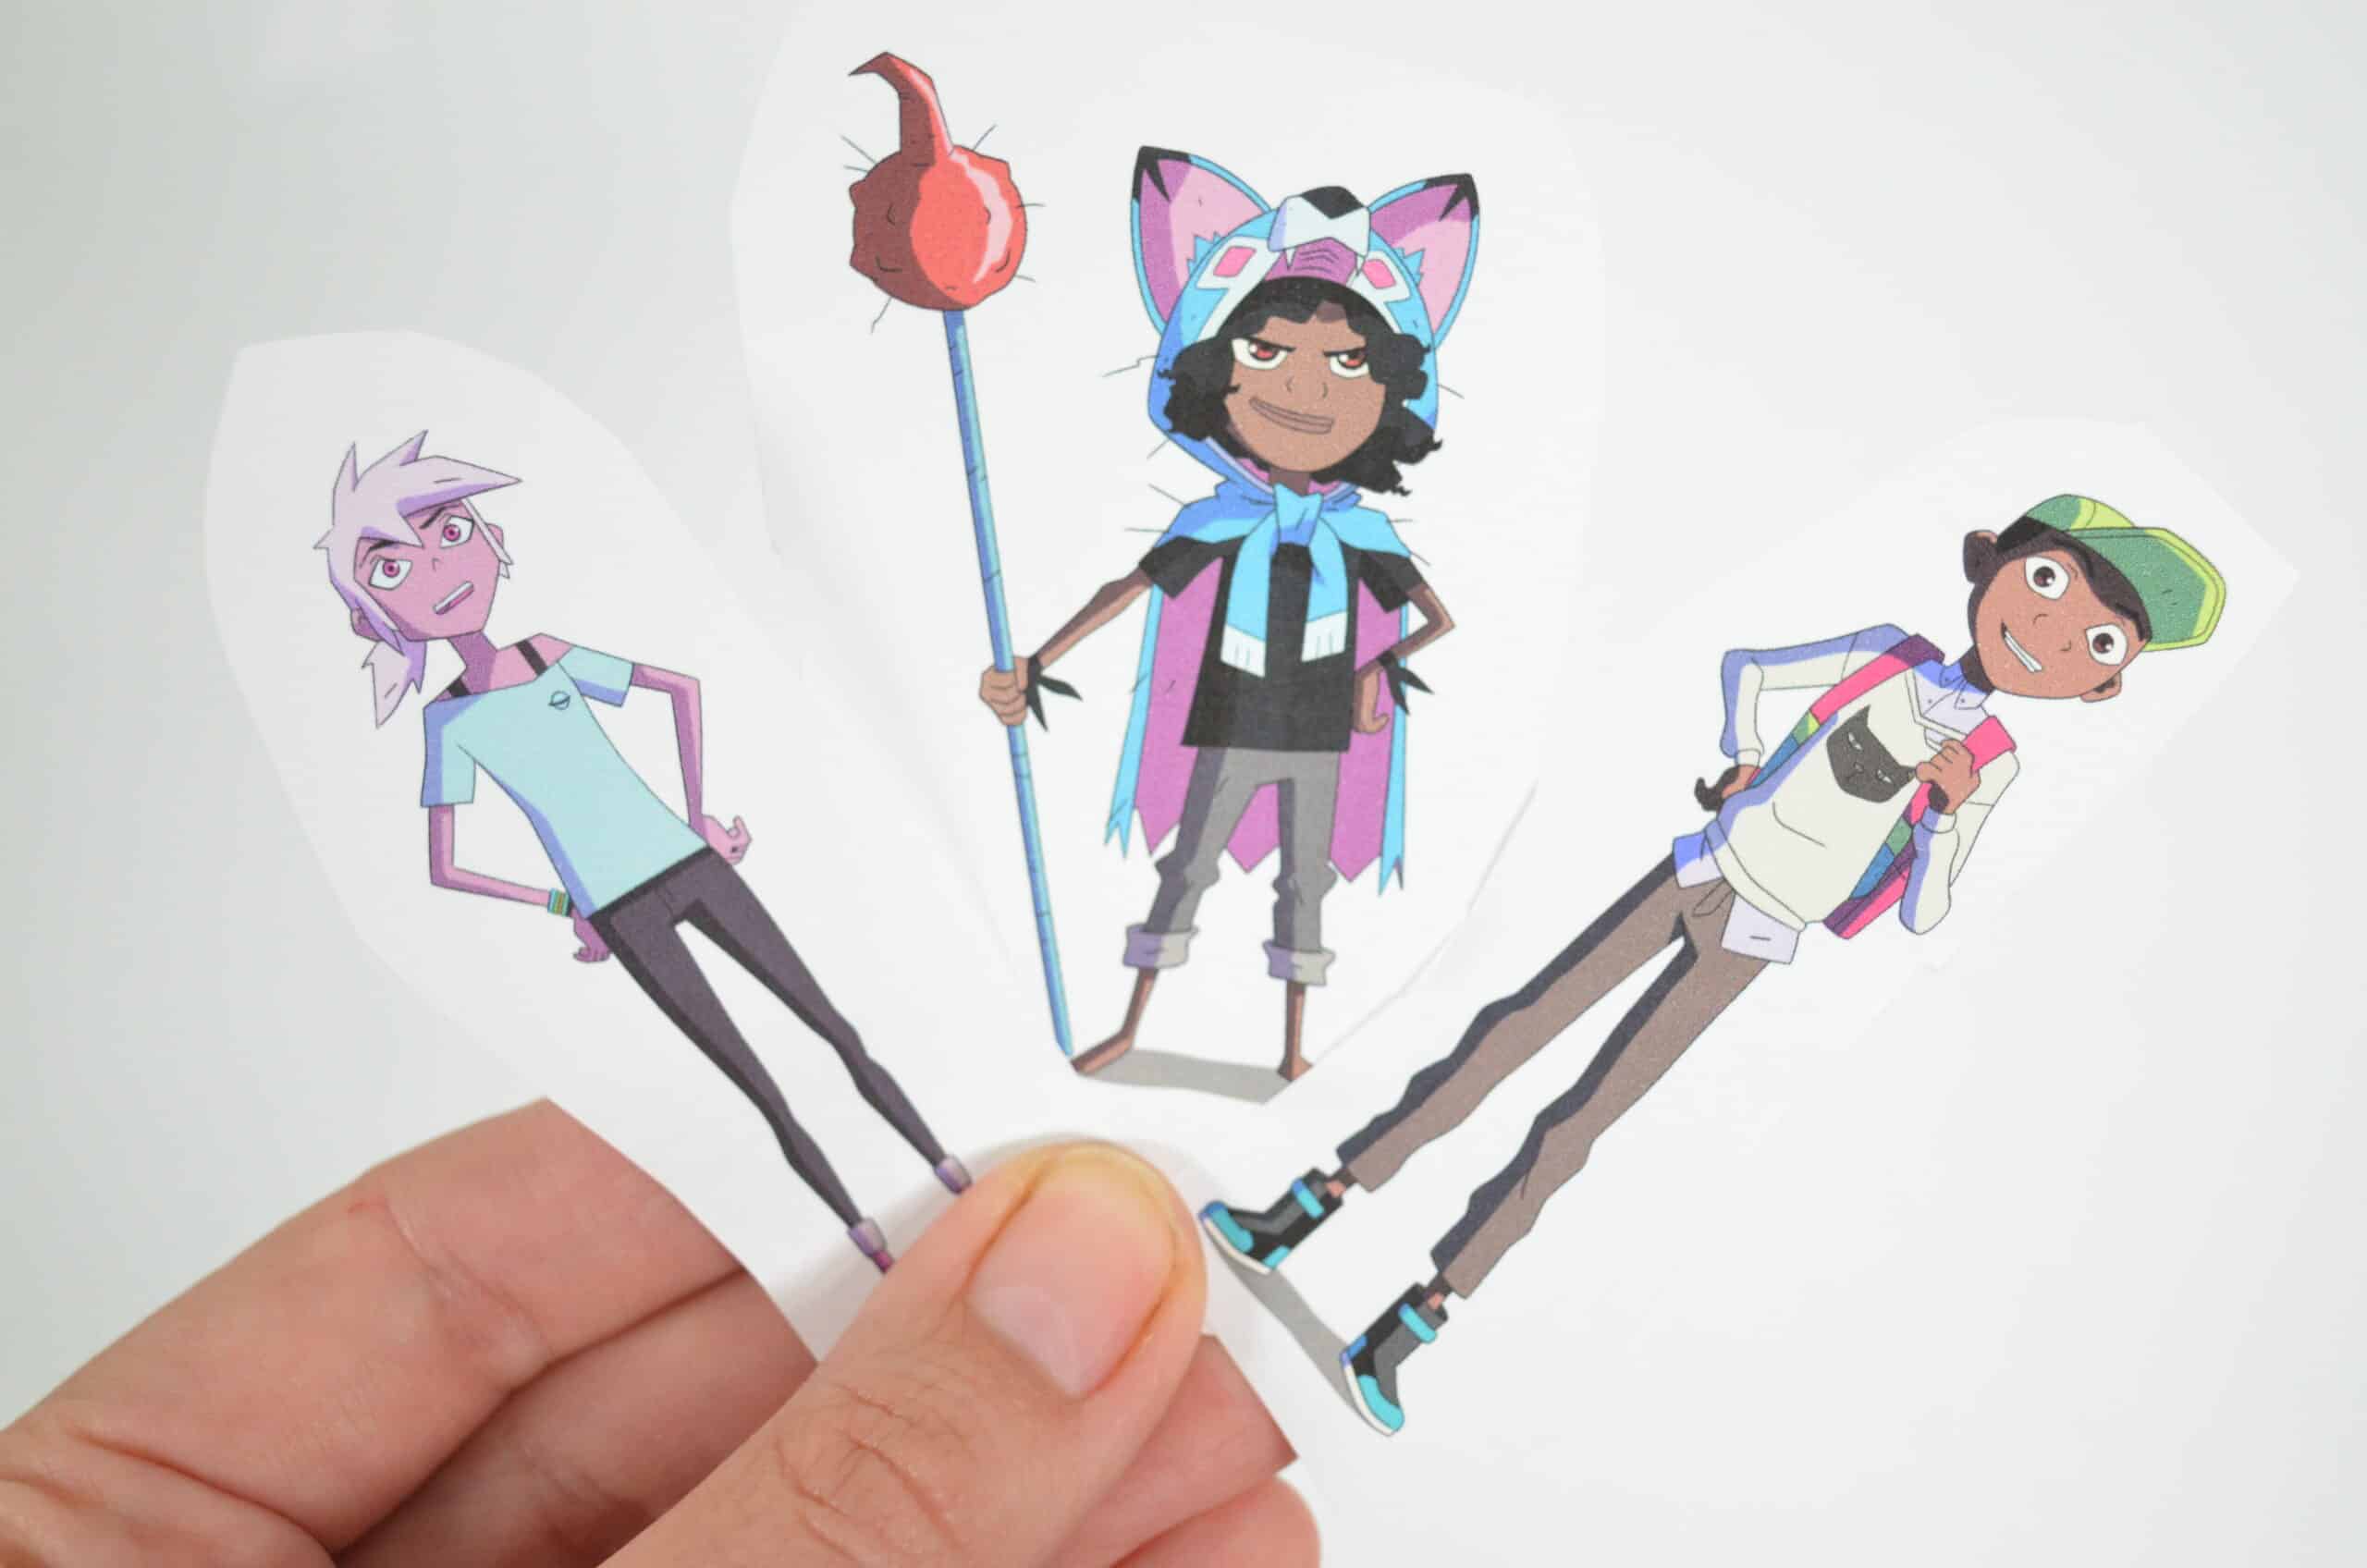
We also printed Kipo, Wolf and Benson!
You’ll notice animals featured in our diorama give a nod to the various mutants and villains in the show – a dragonfly, snake, etc.
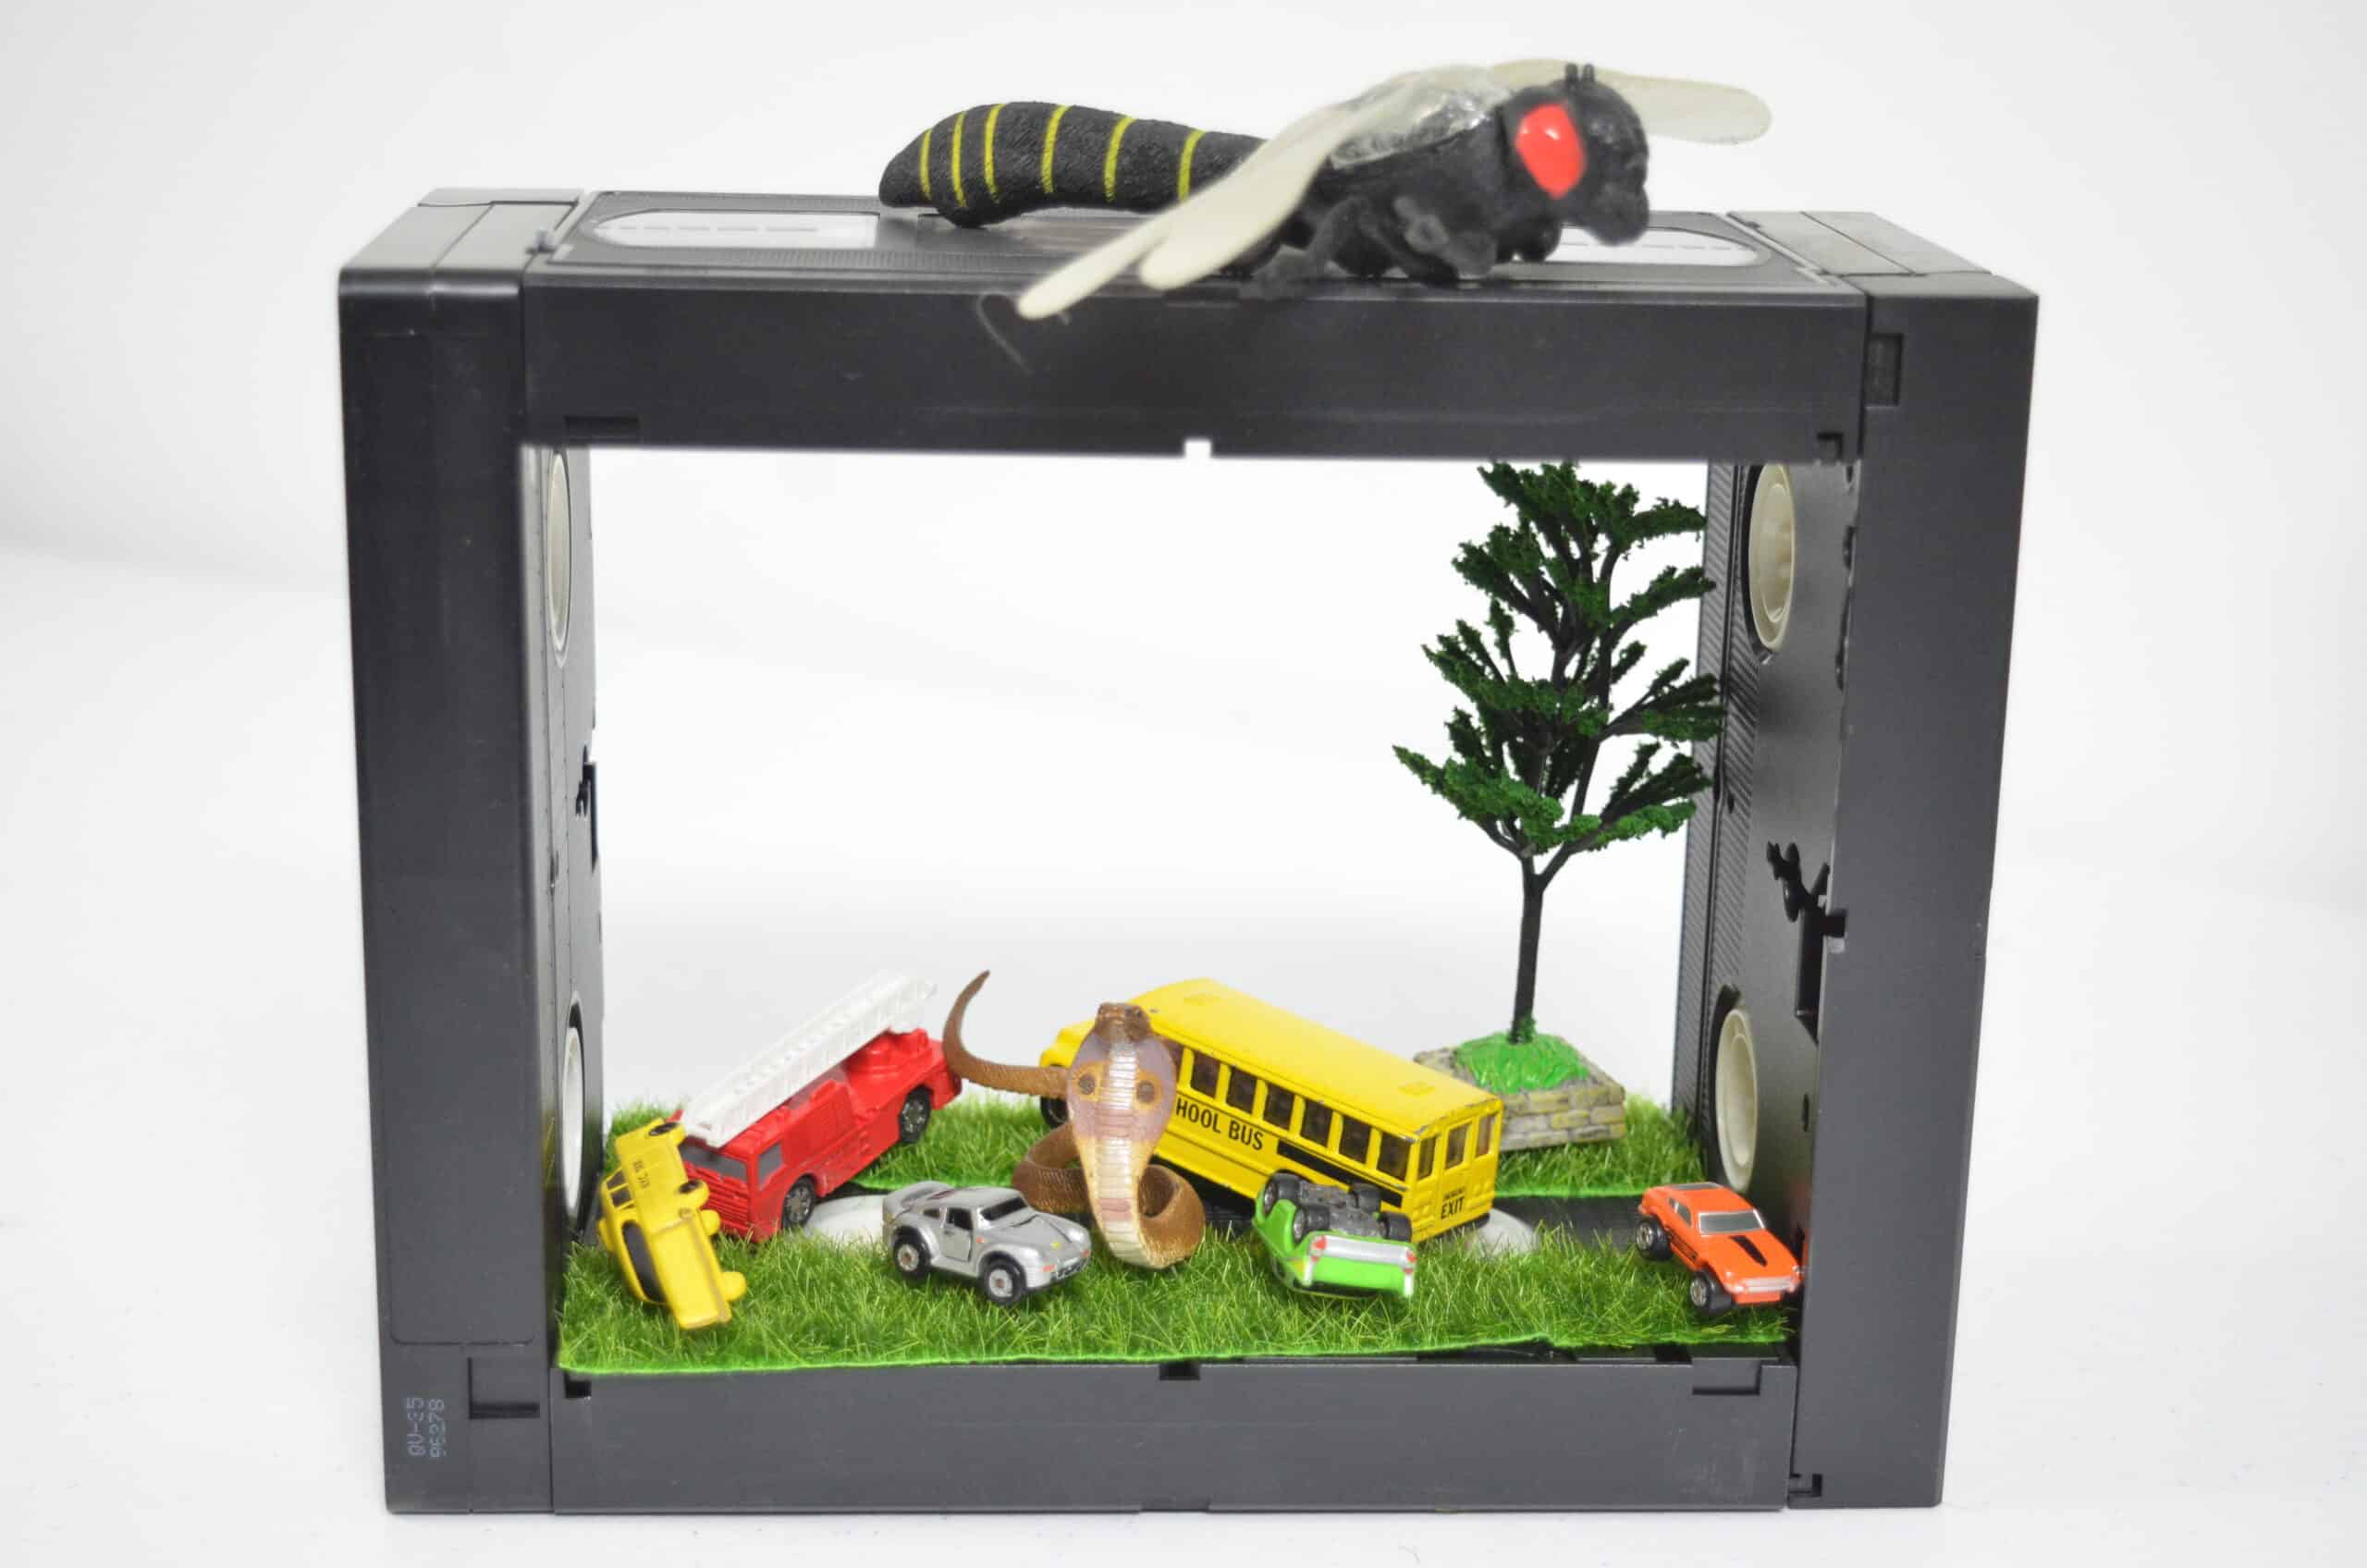
The fun part was designing the diorama for each VHS “box”! Much of the beginning of Kipo and the Age of Wonderbeasts shows the characters exploring the “urban jungle” so this diorama is a nod to the beginning of the series.
I used small swatches of faux grass, faux trees, and small vehicles overturned.
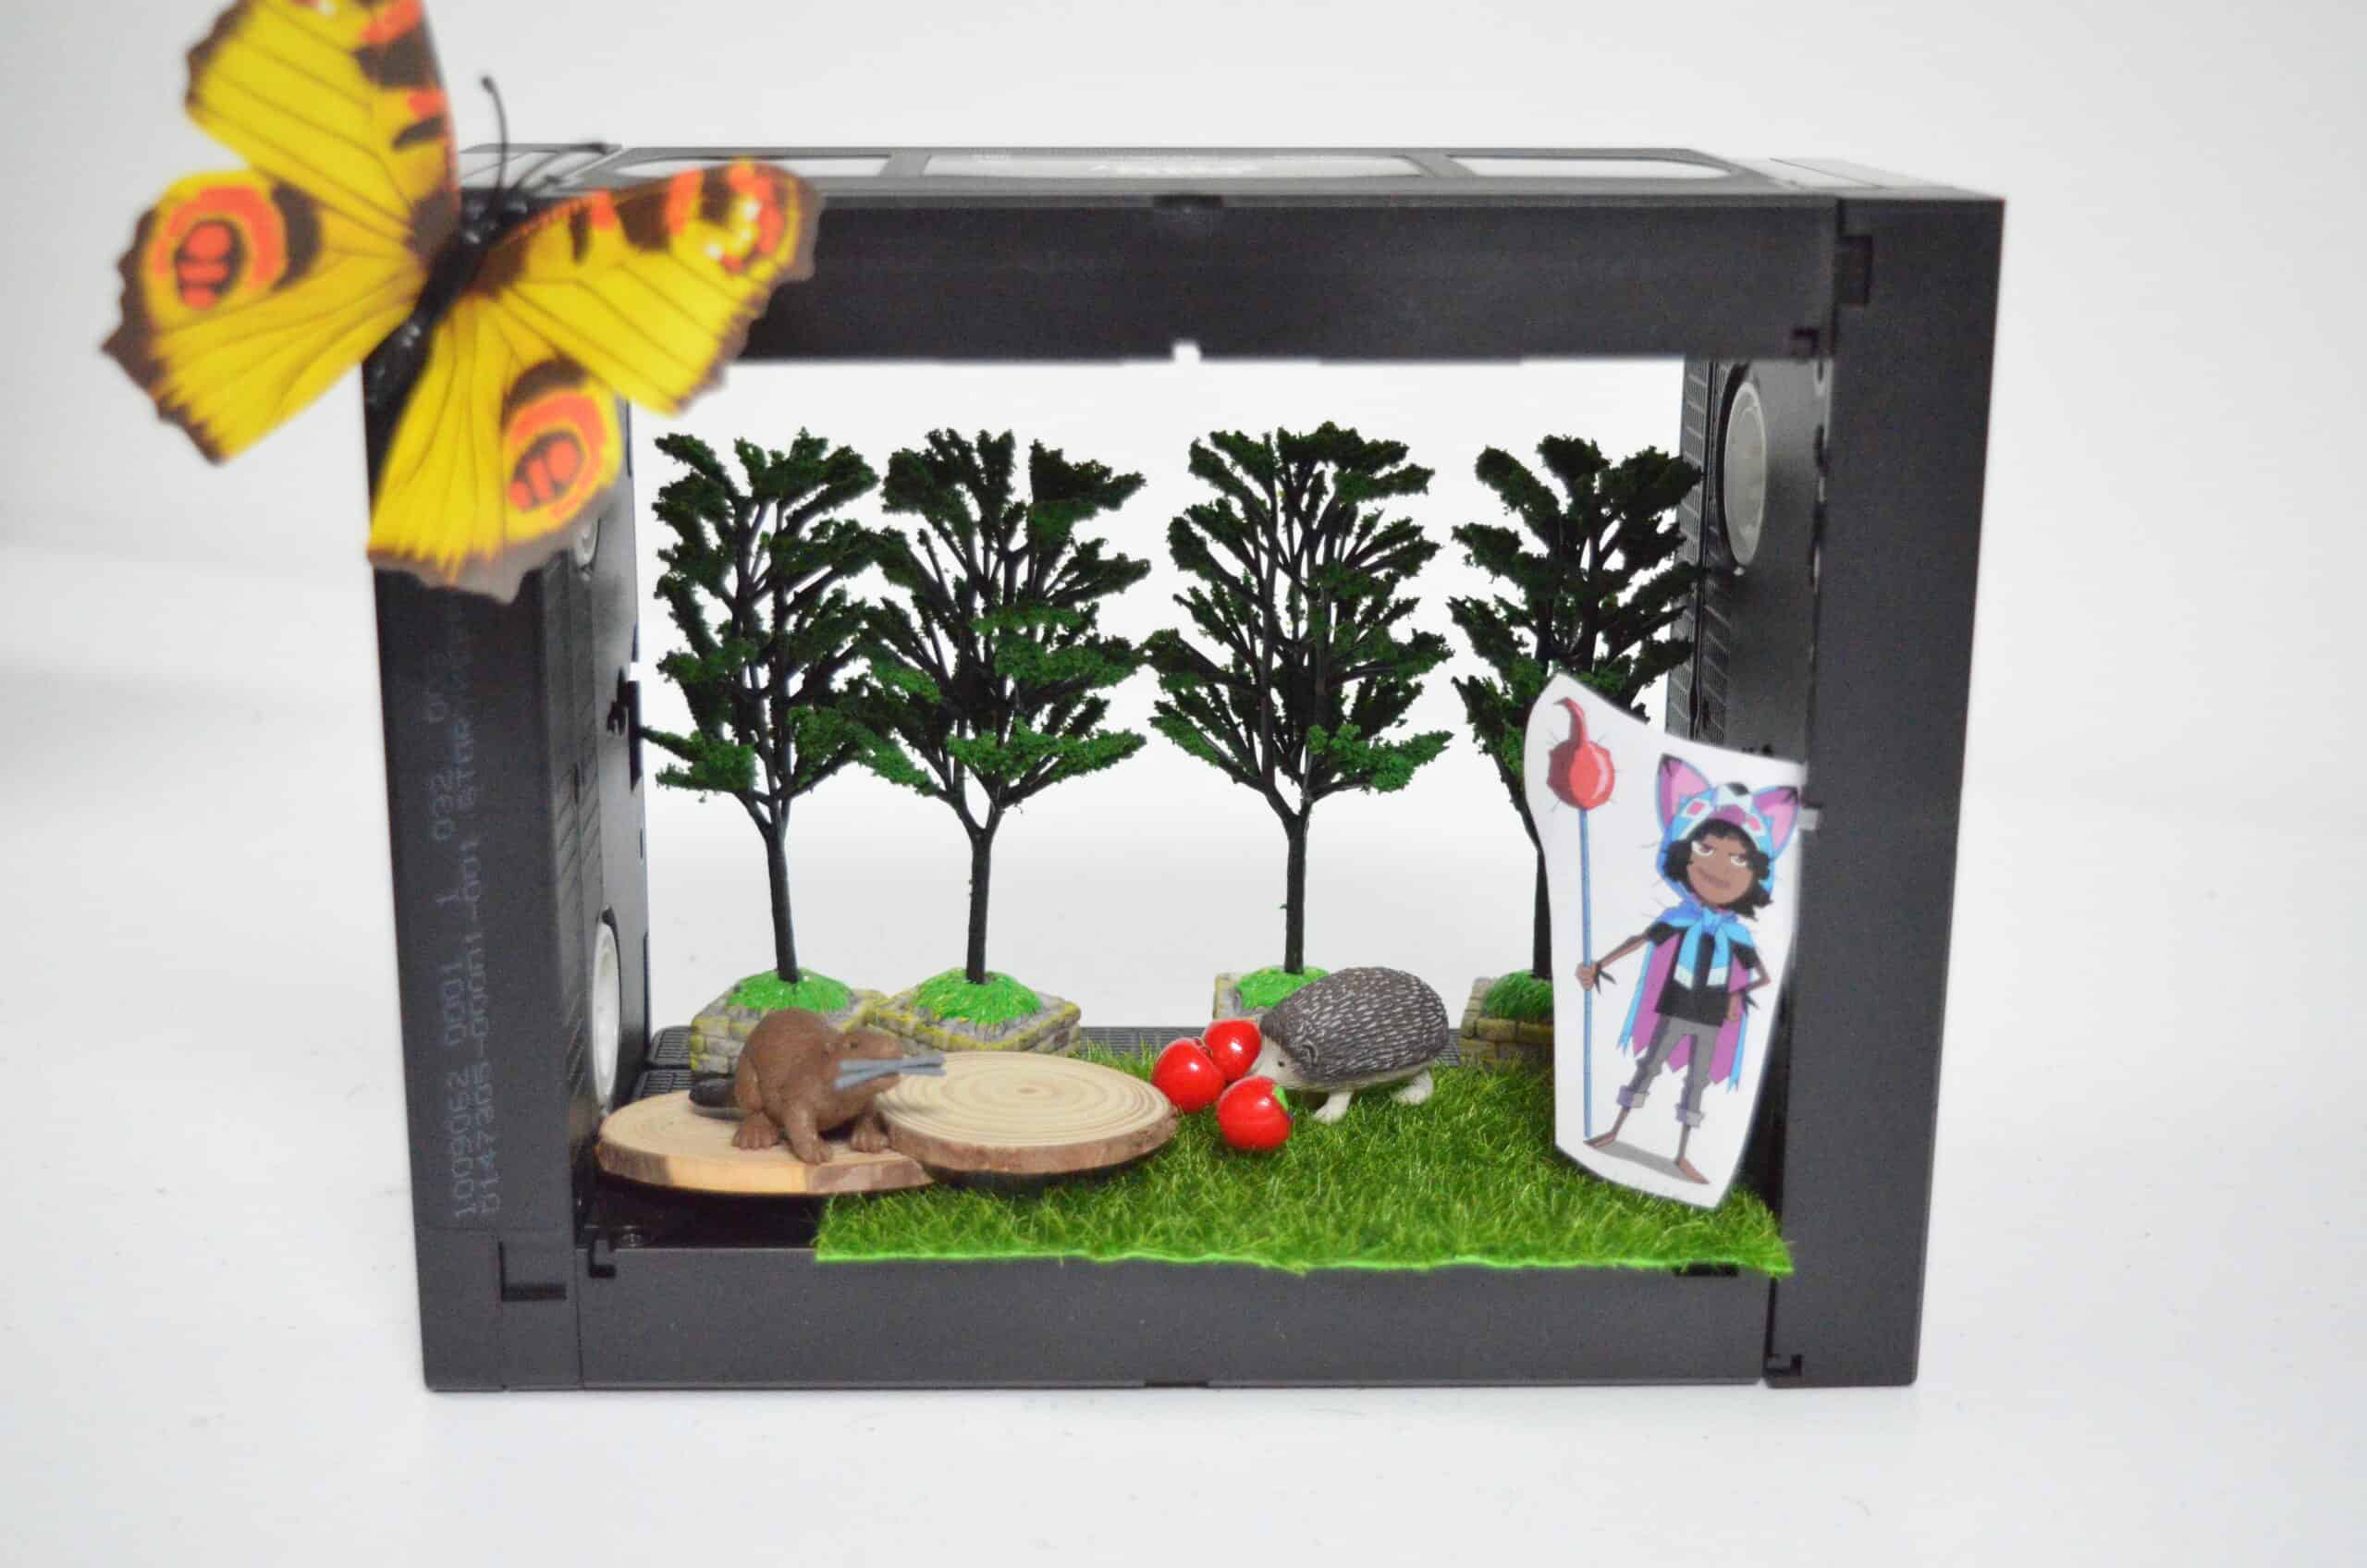
I really love the magical butterflies and wanted to weave that naturally into our diorama scenes. This nature scene is built with Wolf in mind.
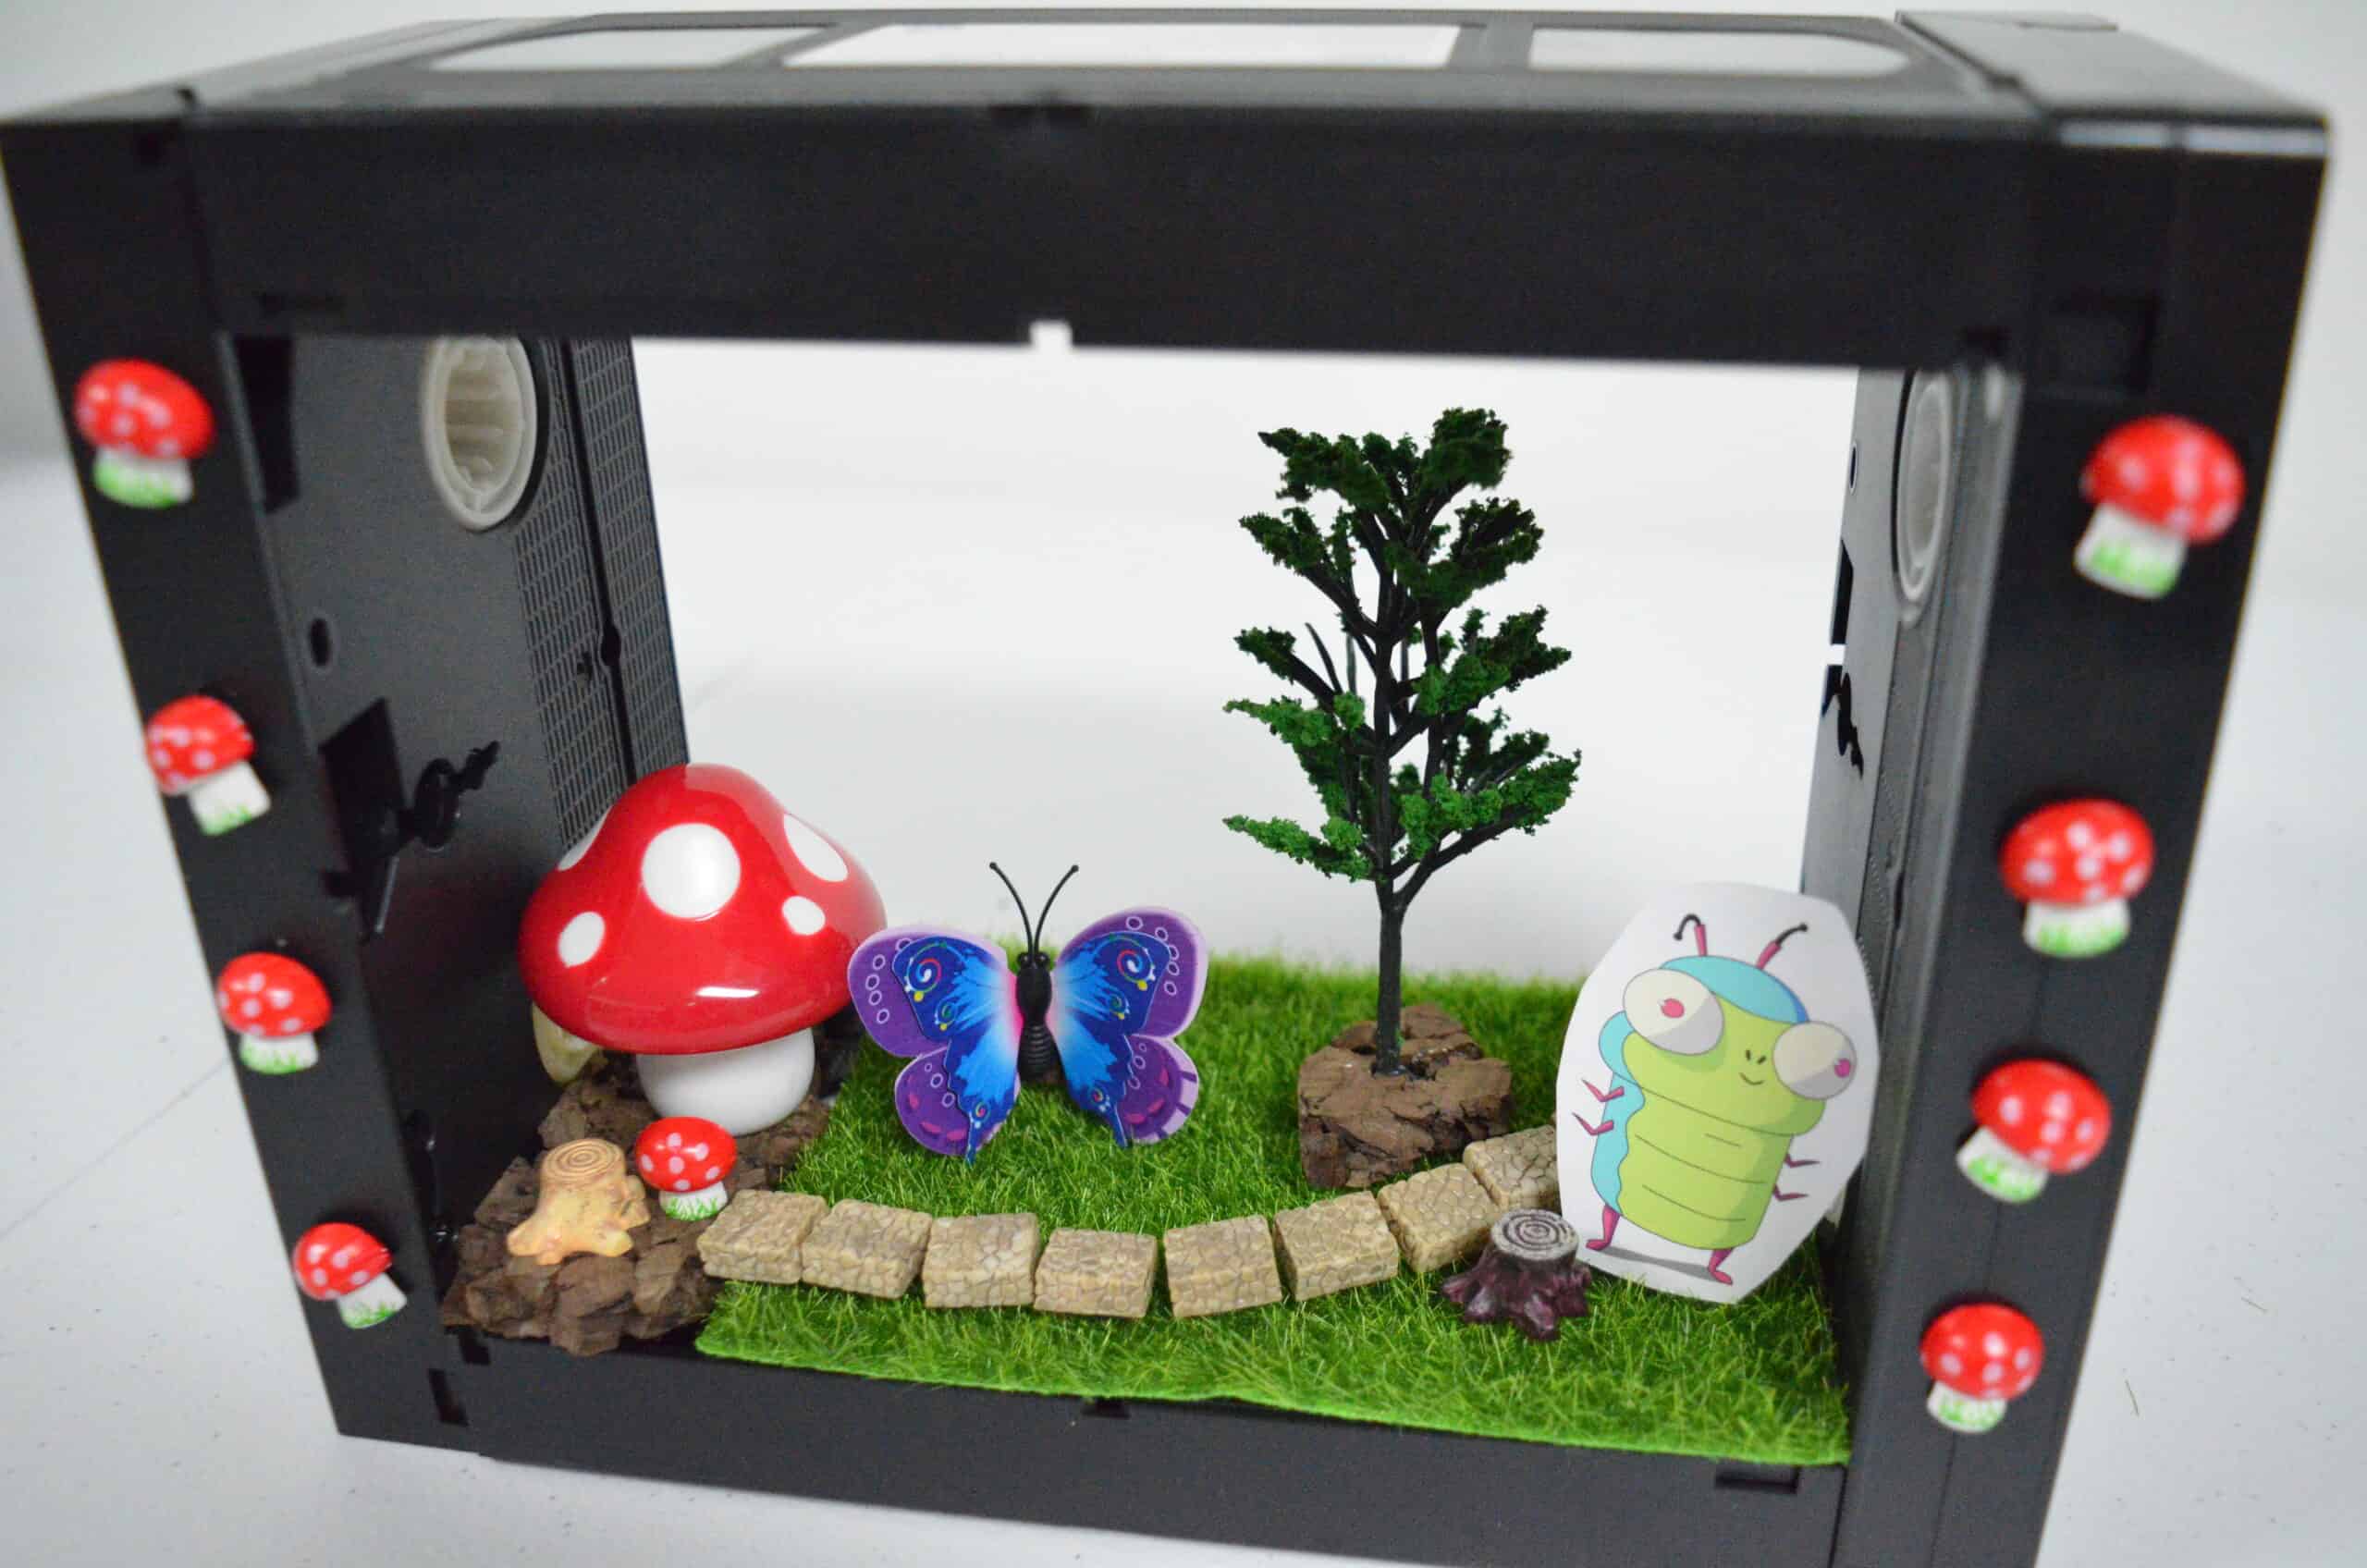
The fun thing about dioramas is that you don’t have to keep all of the scenery INSIDE the “box”! Don’t be afraid to add 3D stickers to the outside like the mushrooms we added here in our scene with Dave! The small fairy garden bricks offer an additional interactive feature in this scene.
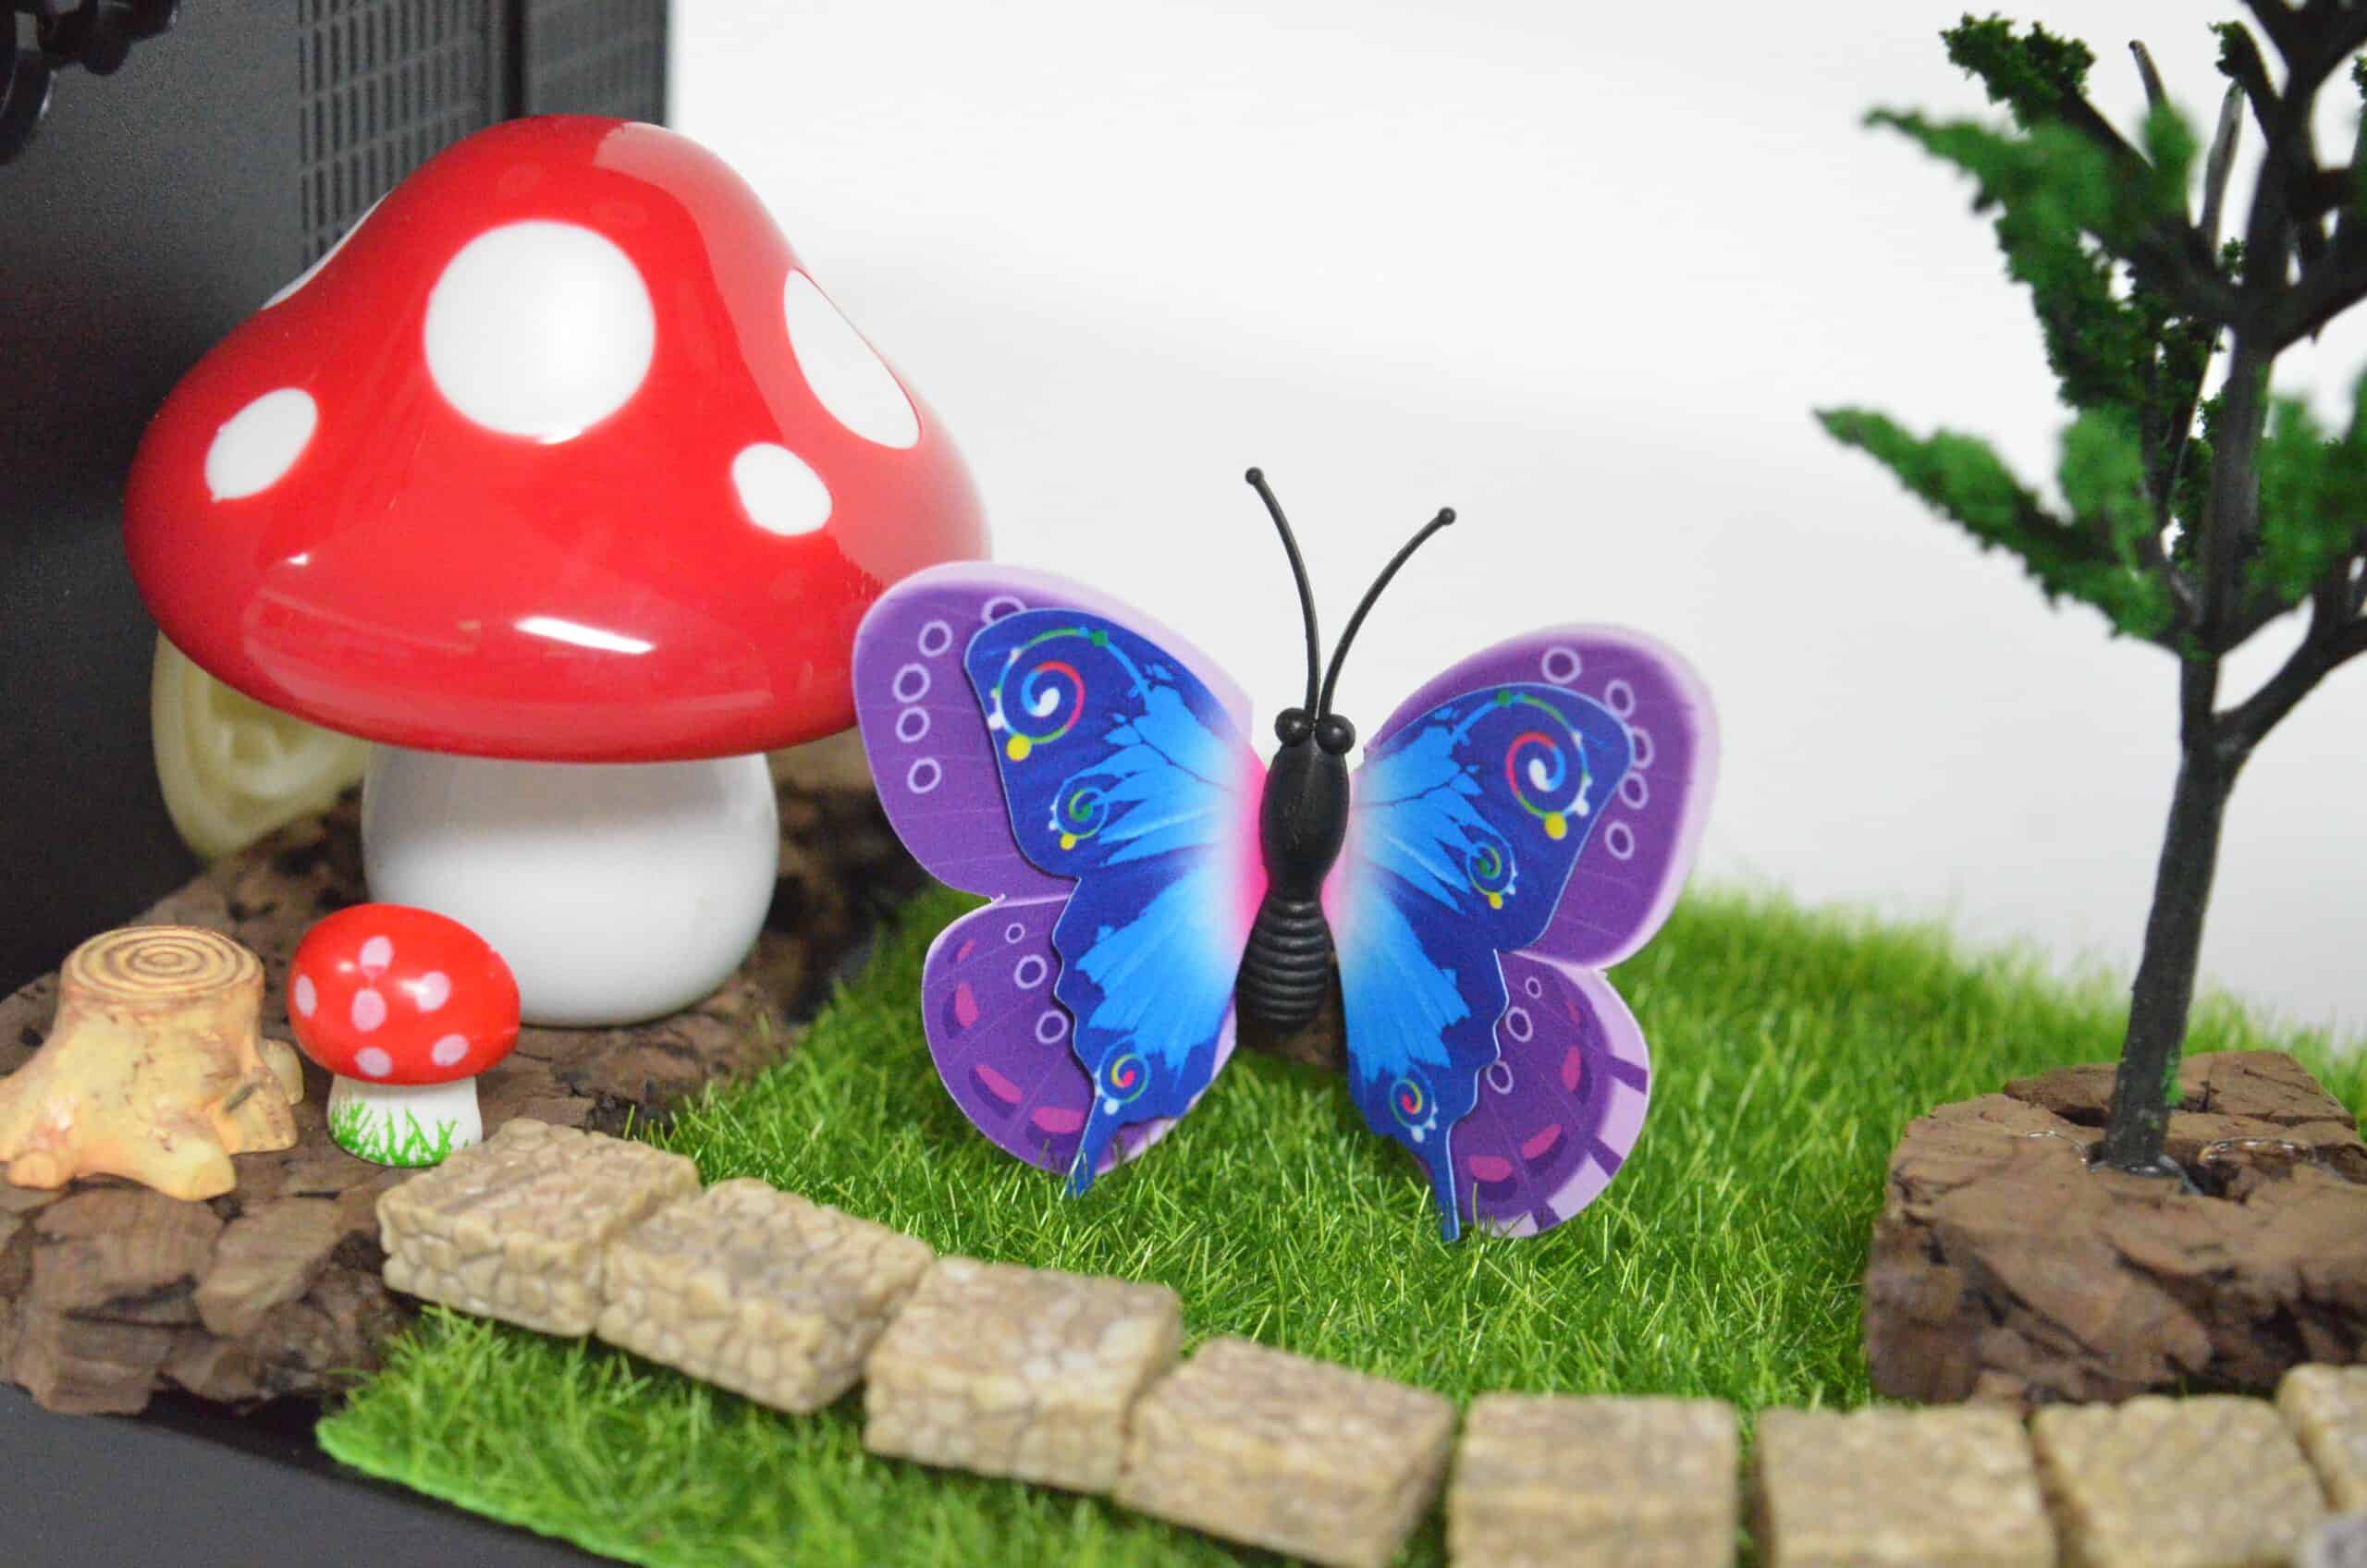
Wanna hear something cool?? Our giant mushroom is actually a PEN! Yes! A writing pen posing as a mushroom!
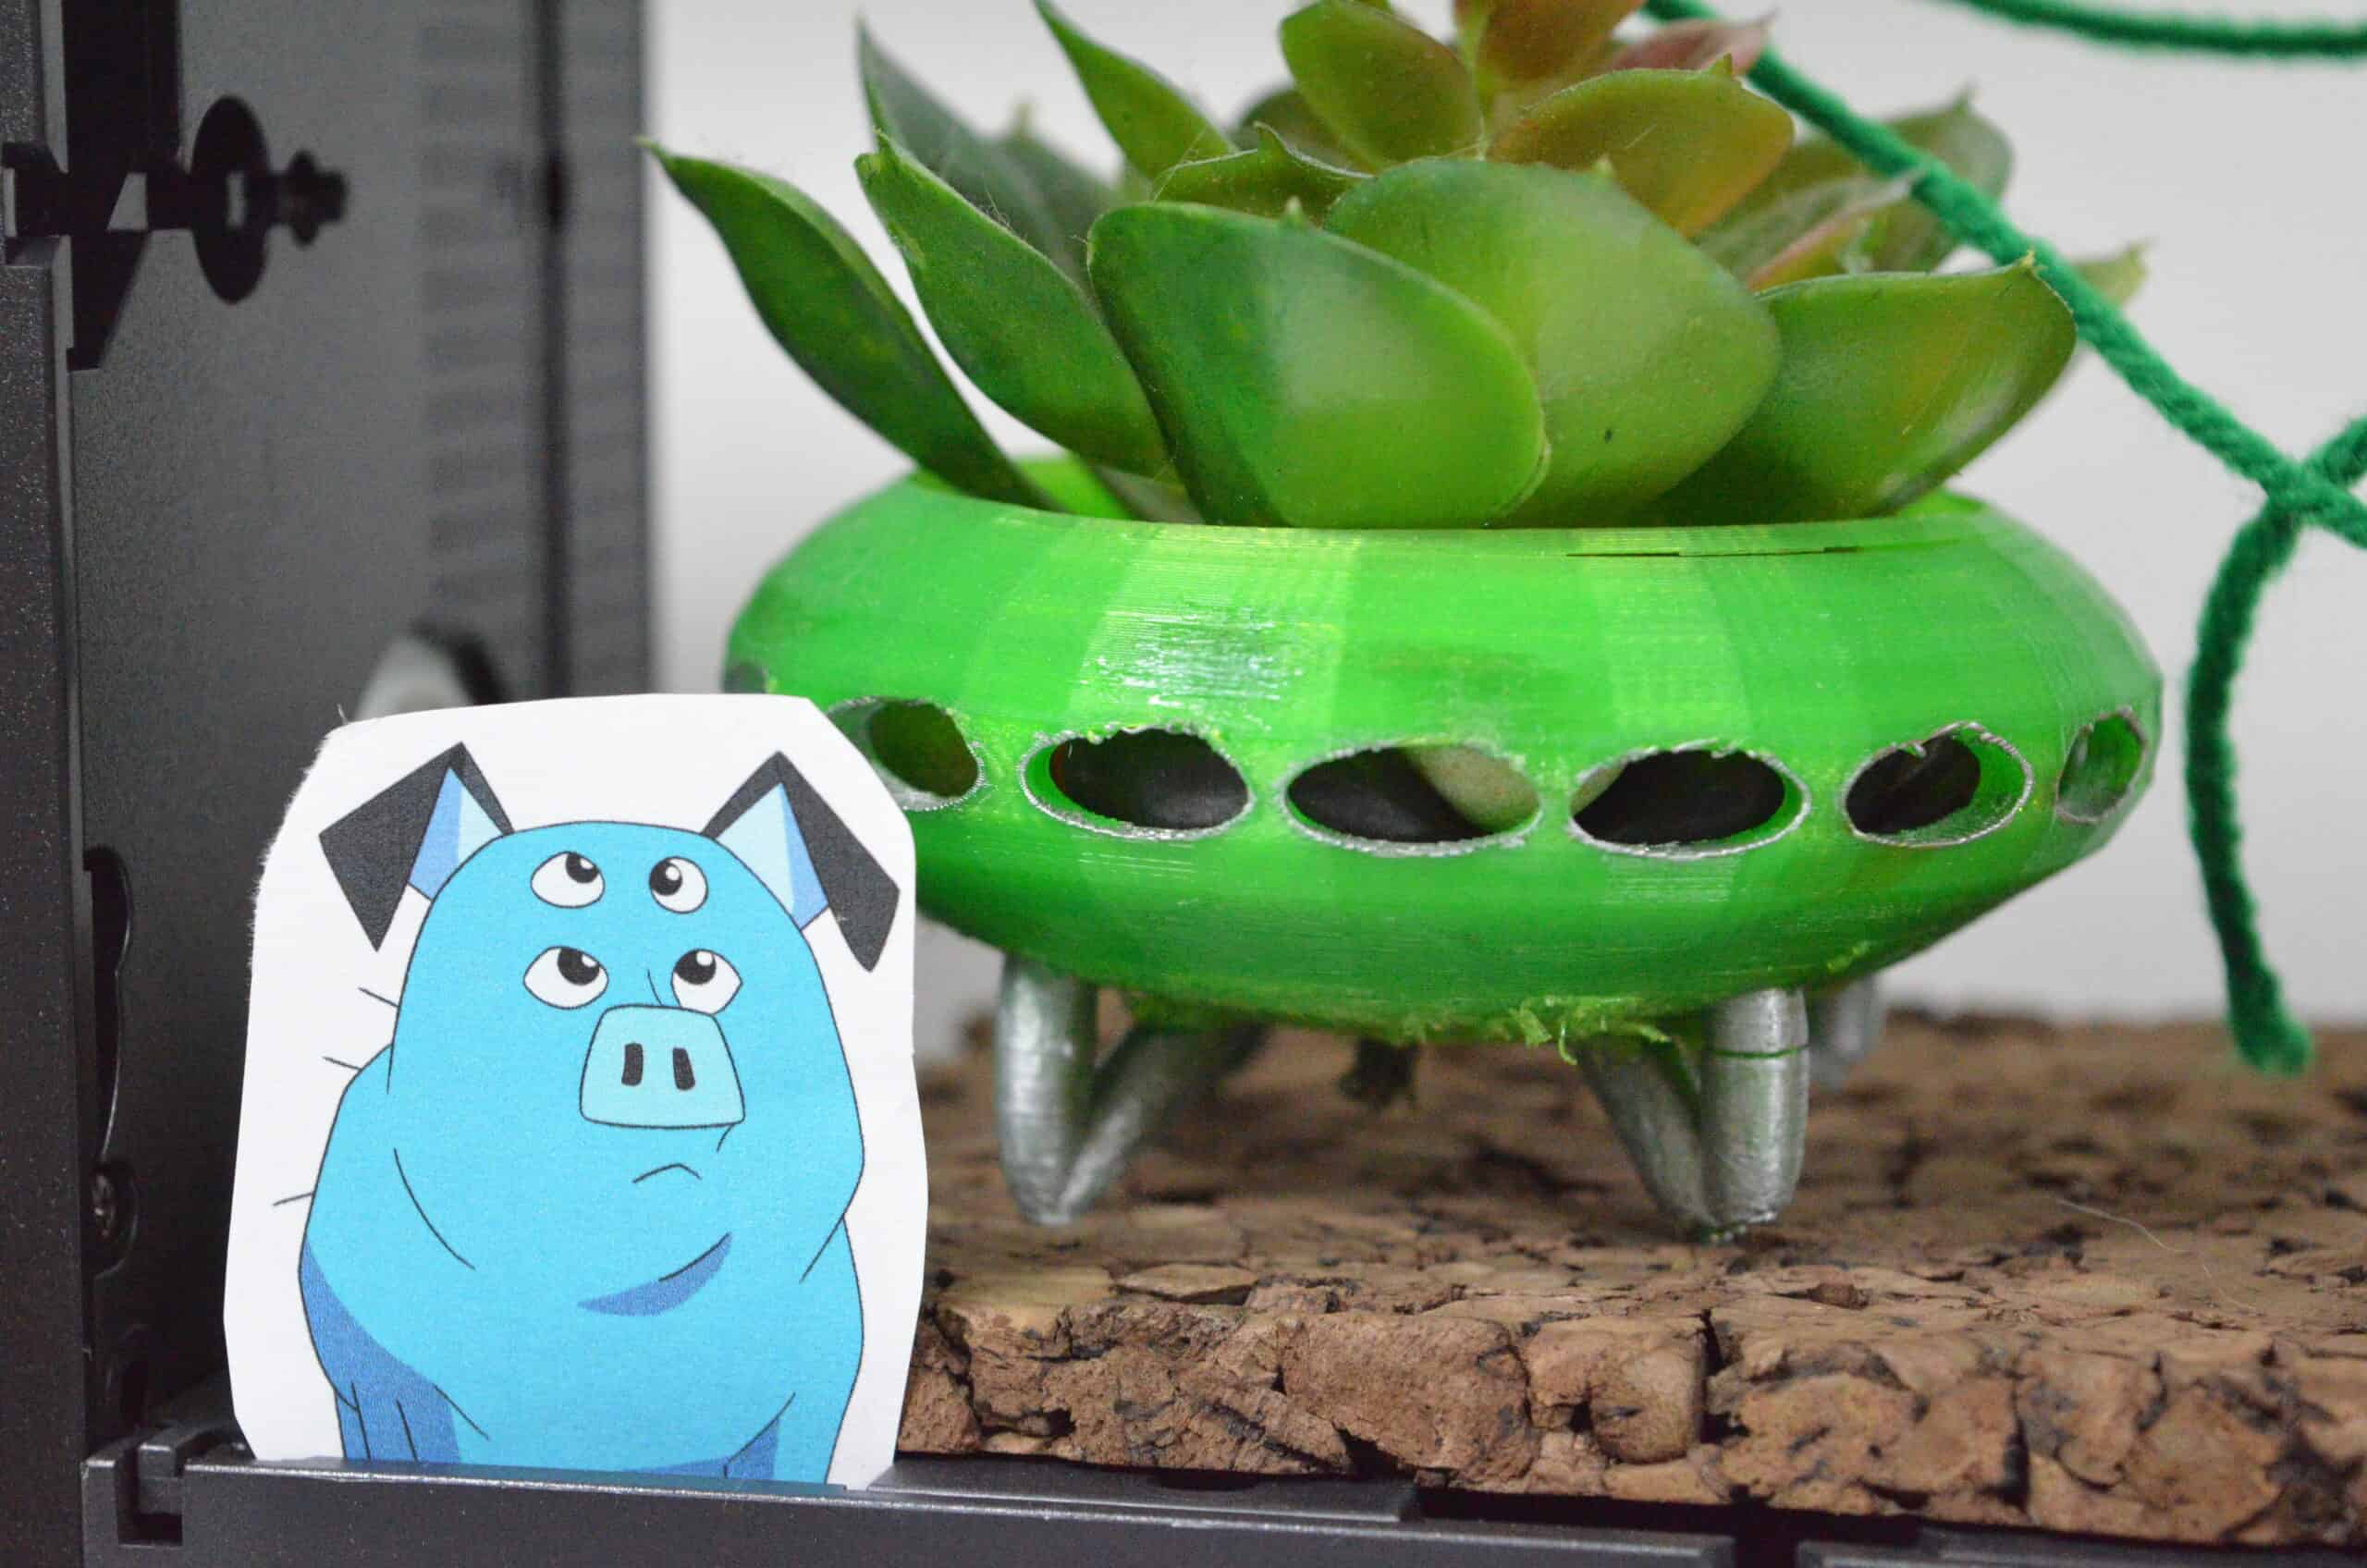
I absolutely love Mandu! He is all over the place. To add some simple “overgrown” vine looks I simply hung green yarn across this diorama shelf as well as a piece of cork board for the flooring.
I glued all of the VHS tapes together and it’s incredibly simple to just pick up the entire diorama shelf system and move it. It stays together so don’t be afraid to move it!
If your kids are using this diorama as a sensory play set you can chose to set it up for them and then let them play, or just offer them a basket of supplies and let them build their own scenes!
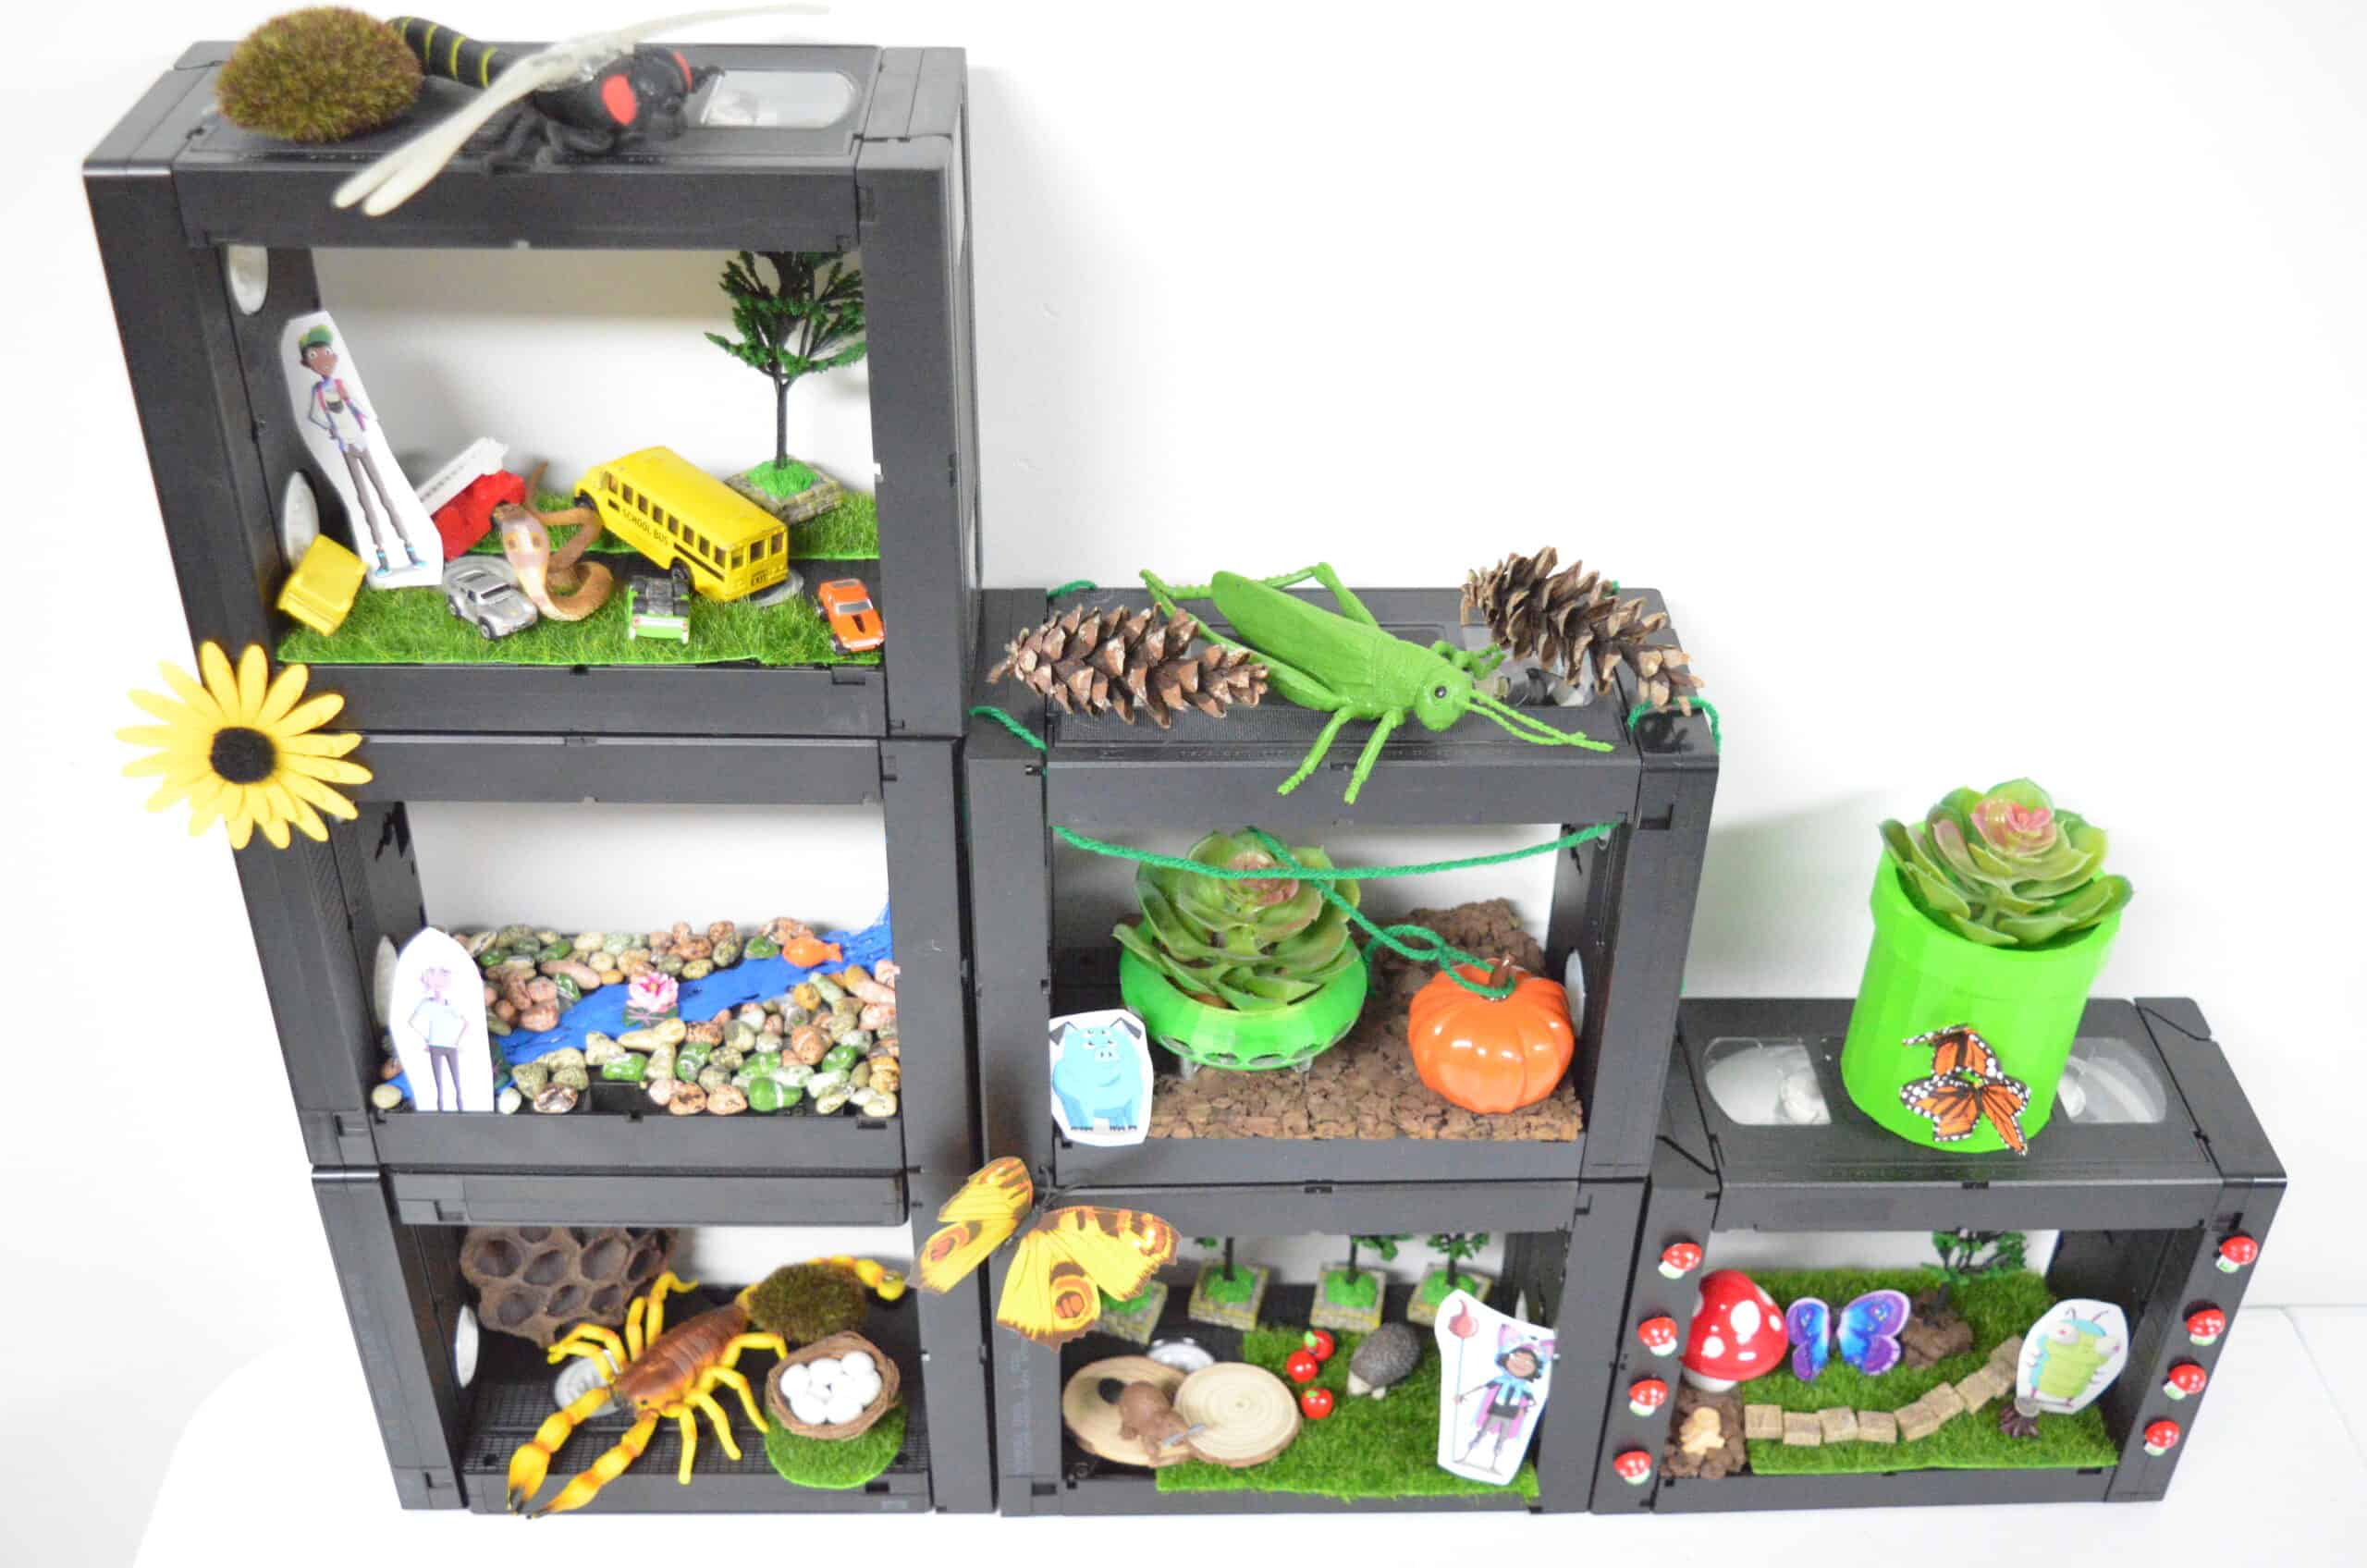
I LOVE how this VHS shelf diorama turned out! Make sure to watch the video in the beginning of this post to see how I put each section together!
How to Make a Waterfall with Hot Glue:
Creating a waterfall, river, lake, or any other body of water is VERY easy to do with a hot glue gun and some acrylic paint. If you want to make a waterfall, however, you’ll need plenty of time and patience!
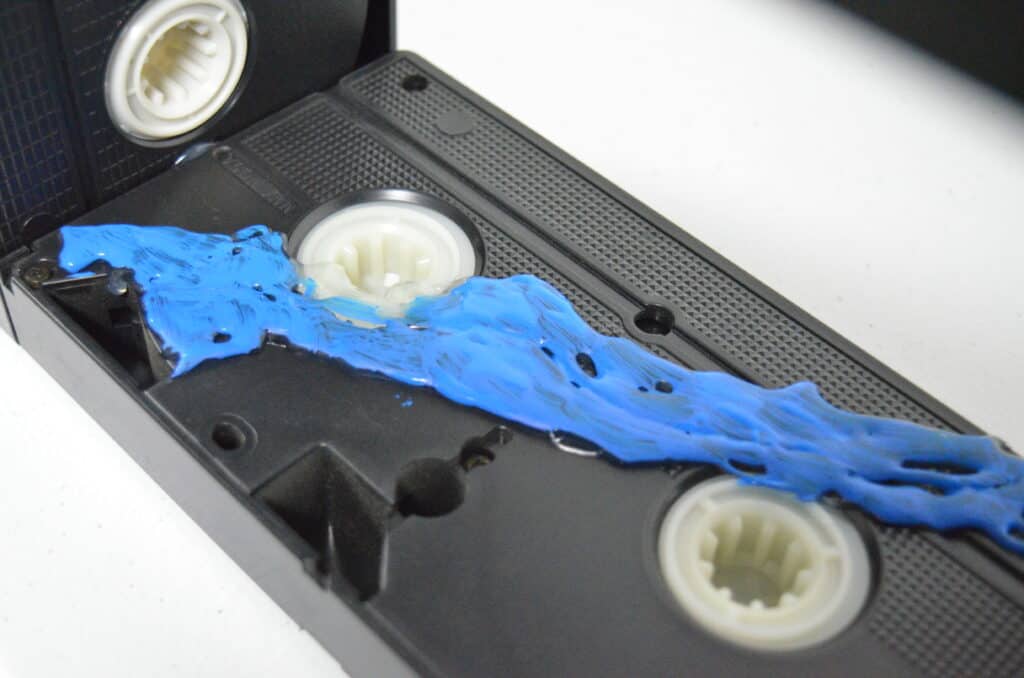
For lakes, rivers, etc. all you need to do is place hot glue in the shape you want your body of water to look like! Hot glue dries pretty quickly which is great! Fill in hole with small amounts of hot glue that will melt down and form to your creation.
If you need to make a waterfall or add texture to your “water” (like creating rapids), you’ll need the patience of adding hot glue and letting it dry over and over and over again until you have your shape desired. For the waterfall I delicately worked with the “string” of hot glue over and over until it overlapped and held to the shape I wanted.
Once all of your hot glue has thoroughly dried just brush on a coat of acrylic paint! It’s as simple as that!
Search for #CampDreamWorks or checkout the DreamWorks Animation Facebook page for MORE fun ideas and activities with your favorite characters!
Other Epic Activities to Try:
 |  |
 |  |
 |  |