

DIY Mod PodgeTravel Memory Boxes & Travel Memory Map Project
This post may contain affiliate links, view our disclosure policy for details.
Our family LOVES traveling and pretty much any extra money we might save goes in a fund for traveling. I was absolutely thrilled to partner with Oriental Trading for this project. They sent me all the materials that I needed to make a Travel Memory Map and Travel Memory Boxes so that I can creatively store all of our traveling memories. I have been wanting to make these for ages and finally had some extra time over the holiday break. But please feel free to pin it for later when you have some downtime for crafts!

I was absolutely thrilled with the options for travel crafts on Oriental Trading – there were SO many things I had a hard time picking! I still want to buy their Roadtrip License Plate sign to hang in my office too! This was a HUGE project to make all of this and I’m going to try to squeeze it into ONE post – so FIRST I will share with you how I made the Travel Memory Map and LASTLY I will share with you how I made the Travel Memory Boxes!


Travel Memory Map Materials:
Canvas 4 pack
Mod Podge
Travel Scrapbook Paper
Wooden Alphabet Tiles
Gold tone Eye Pins
Glue Dots Craft Pack
Vintage Postcard Stickers
Map of the World, USA, or other continent you want to track
hot glue gun
paint brush
Travel Memory Map Directions:
Place all 4 canvas pieces face down on a flat surface and use a hot glue gun to attach them to each other as shown above into one large square. You can also choose to look for one large canvas or corkboard but this was easy to order with all of my other supplies and worked well for the project. Make sure that you firmly squeeze each side together and hold for a few seconds to let the hot glue harden and cool.

Once you have all four canvases attached use the hot glue gun to squeeze hot glue into all of the creases in the back as shown above to strengthen the bond together as you work. Eventually you will be mod podging on the front so it will be even sturdier but for now you don’t want them falling apart!
Now here’s where it got a little tricky for me. This was my very FIRST mod podging project so I was kind of going at this blindly! I first applied mod podged with a paint brush over the entire canvas. I quickly mod podged the entire back of the scrapbooking paper that I chose for this project and then laid it directly onto the wet mod-podged canvas. You will need at least 3 of the same scrapbook papers to cover the entire canvas. Unfortunately I only had 2 so I had to get a little creative and cut mine up to cover all the spaces. It actually worked out great because I didn’t want a completely pristine canvas – I wanted it to be bubbly crooked and “used” to give it a more authentic travel look. (Which is why I didn’t mind using this project for a guinea pig as I delved into the world of mod podge!) I let that dry for 20 minutes, then mod podged over the top of the scrapbook paper – don’t worry! It dries clear! Then I let it dry for 24 hours.
The next VERY tricky thing I came across was finding the perfect world map. WHO KNEW that it would be so hard to find what I wanted!? I of course needed a map that would fit on my canvas, but I also wanted a world map that labeled all of the countries as well as states in the USA. I literally searched for hours and weeks but didn’t find just what I was looking for so I changed my game plan up a bit! I decided to think outside of the box a little and print off a copy of each continent with it’s countries labeled and make it more of a collage look. I found this amazing crafty looking printable map of the USA that I fell in love with that I just HAD to use! I also bought some similar looking continent maps from PaulaKimSxtudio on Etsy. The others I just printed from a google search.
Once I had found all of the continents and laid them out like I wanted I mod podged the back of them, mod podged the canvas again and let it dry for 20 minutes. Then I mod podged the top of the entire thing and let it sit for 24 hours. Mod podging is a lot of being patient and waiting!
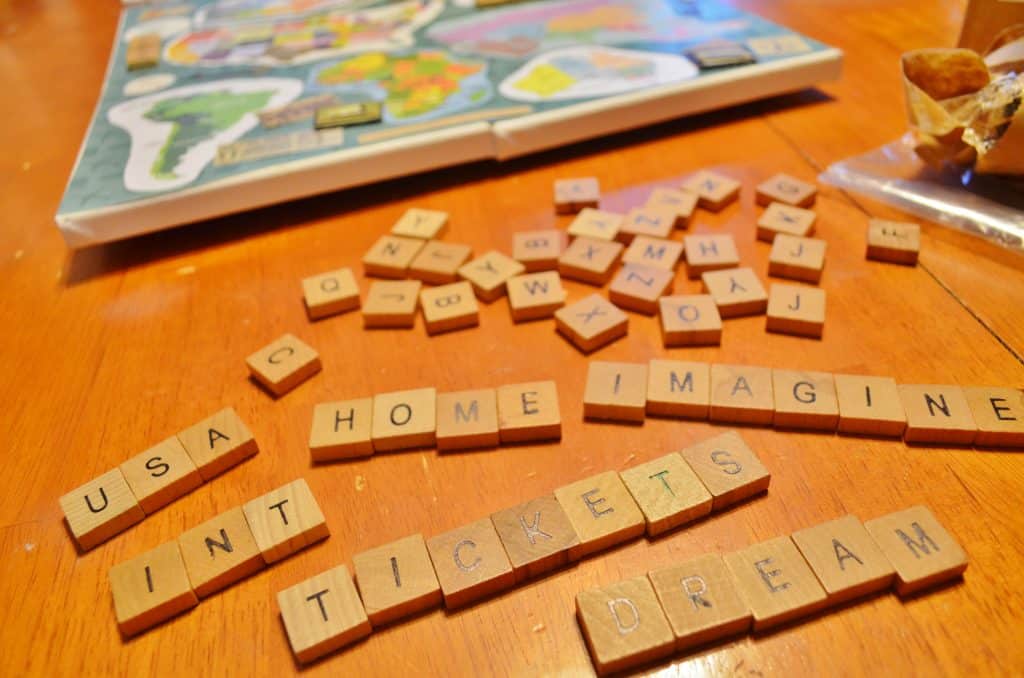
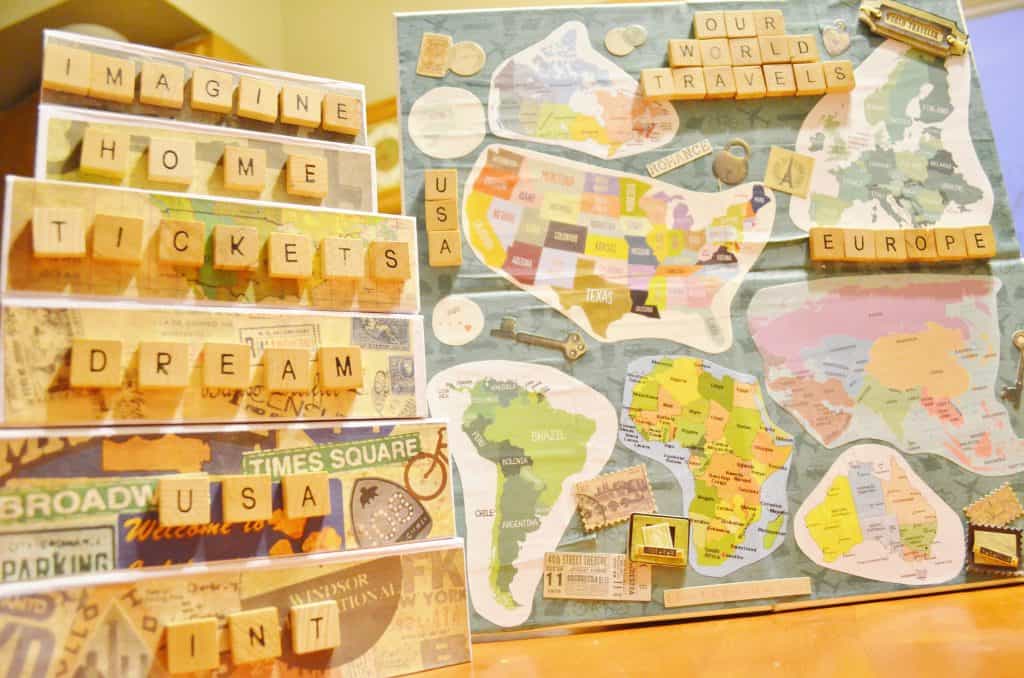
While I waited for everything to dry I pulled out the wooden alphabet tiles which I TOTALLY fell in love with and wanted to use on everything! I created lots of words with the letters that I had left and figured out where I wanted to place them.

Once the mod podge was dry I attached the letters by using Glue Dots.
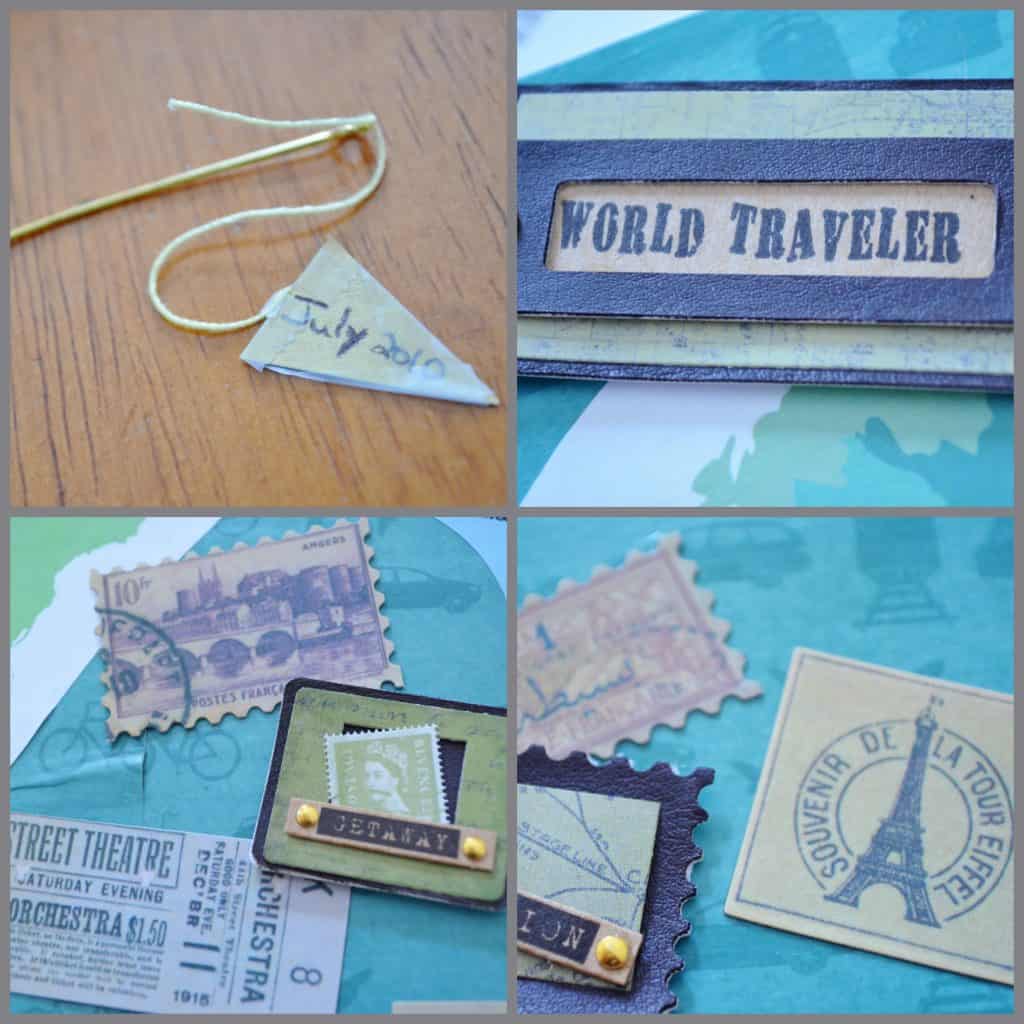
I then added the vintage postcard stickers for more of a “travel” touch – these stickers were PERFECT! I also cut out small pieces of papers, attached them to string, and then tied it onto the gold tone eye pins so that I could mark our map with special dates during our travels.

Because the mod podge made the canvas stiff I used a push pin to prick a hole in each location then inserted the eye pins to mark each location that hubby and I have travelled together!

When I was finished we just hung it up using 2 nails on the wall!

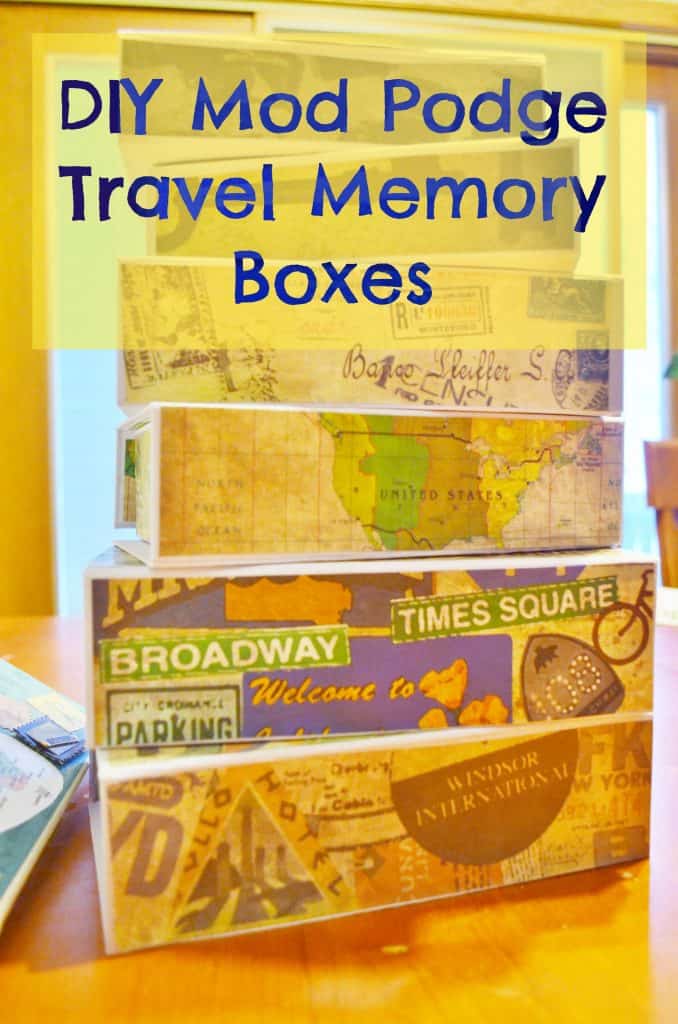
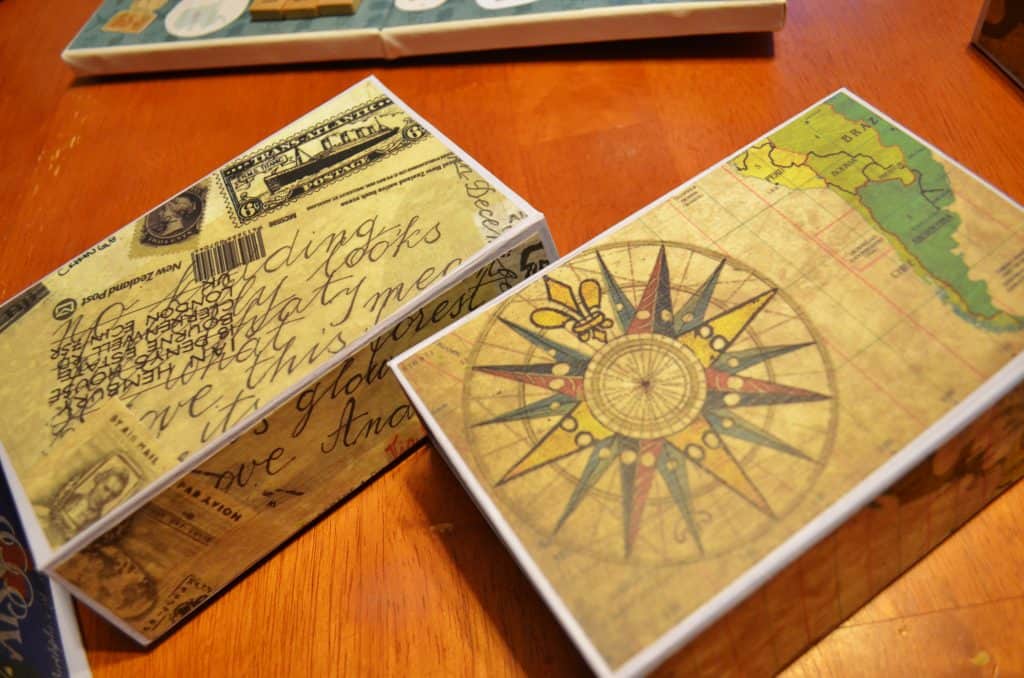
The Travel Memory Boxes that I mod podged turned out absolutely PERFECT! They were SO easy and I had a blast making these!! You can of course create them for any occasion but I wanted to store our travel memories, tickets, brochures, etc. in these. I was able to share many of the supplies that I used for my first project.
Travel Memory Box Materials:
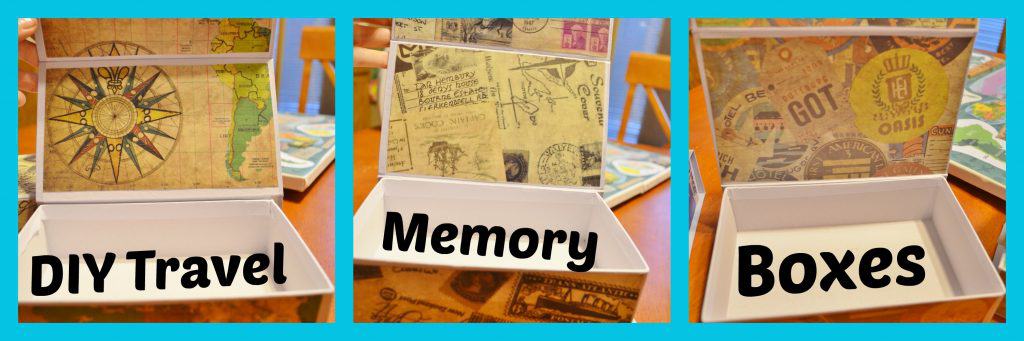
Travel Memory Box Directions:
The very first step is to cut your paper exactly how you want to use it. Since this is my first mod podge project I didn’t want to try anything too fancy like folding paper over edges so I decided to cut strips of the travel scrapbook paper to fit each side – inside and out – to the plain memory boxes. Then I “painted” mod podge directly onto the memory box and onto the back side of the travel paper and pressed them together firmly. After drying for 20 minutes I added a layer of mod podge over the top of the paper (remember it dries completely clear!) and then let it dry for 24 hours.

After I completed all sides doing this, mod podge and drying, I added an additional 3 coats of mod podge on each side waiting 24 hours in between each coat. These boxes were SO easy – it just took a long time to wait for everything to dry!
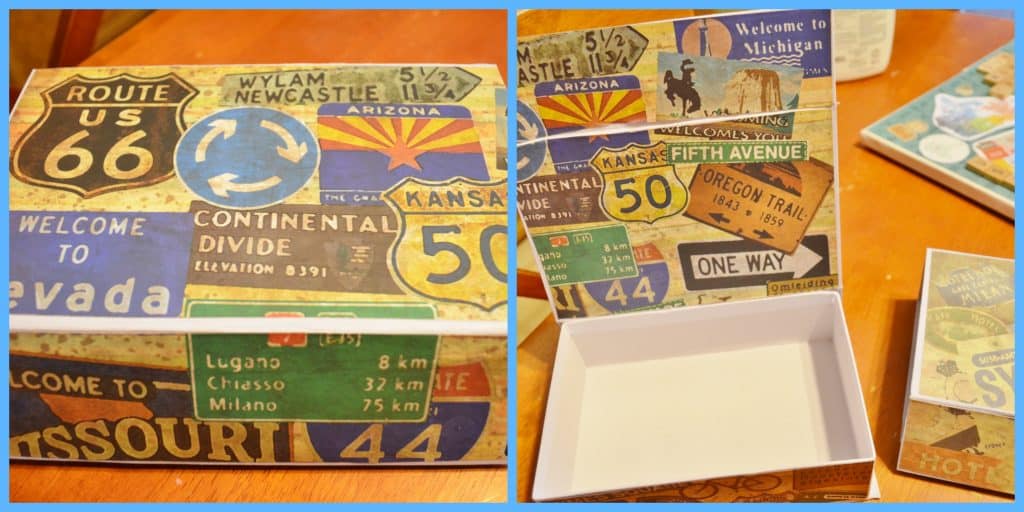
I came down with a really good system to complete all 6 boxes. I did all of the outside, let it dry, then rotated to all of the inside like a mini-assembly line.

I couldn’t be happier with the boxes! They have small magnetic flaps on the front to hold the box down. You can tie all of the boxes together with some twine or a strip of burlap if you want.
I decided to take my leftover wooden alphabet tiles and attach them to the outside of the box using Glue Dots to designate certain boxes for local travel, international travel, tickets, dreams, and more!

Hi Crystal! I am a new follower of yours here and on Instagram! I found your blog through the SITS Girls community on Facebook. I am a former teacher myself. 🙂
Hope you’ll come by to visit my little blog sometime too – http://desertmomma.blogspot.com
Thanks!
I always wondered where people got those wooden alphabet tiles! I have about a million projects I want to do now, lol.
What an incredibly creative and special idea. I love this!
Love this!! What a fun, special reminder of past trips!
I think this is one of my favorite things. I am so intrigued and loving it. You are so clever and thank you so much for showing us. I have done an old “toiletry” suitcase in a similar manor, but not with an entire travel theme. I did use scrabble letters on scrabble cardstock and I am thrilled with my results. I had to keep it for myself and it graces my TV room filled with old craft magazines. Once again, thanks bunches. By the way, I have the deepest admiration for teachers. I think a majority of you are angels. God bless.