Miniature Map Magnets Craft Tutorial
This post may contain affiliate links, view our disclosure policy for details.
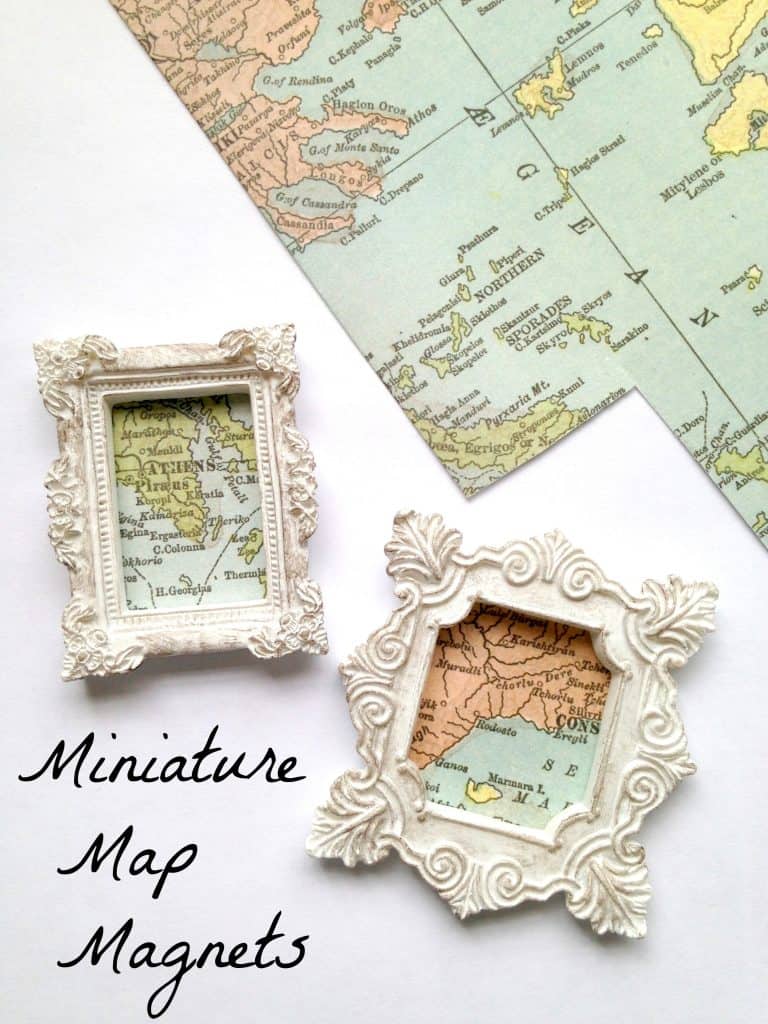
If you love all things map related or are simply travel obsessed like I am you NEED to make these miniature map magnets – you can make them in just minutes and totally customize them to your heart’s desire! Making your own miniature map magnets is easy, and all it takes is about $3 worth of supplies. Showcase a favorite location, where you live, or places that you want to go! You can even adjust this to feature your favorite phrases from classic books!
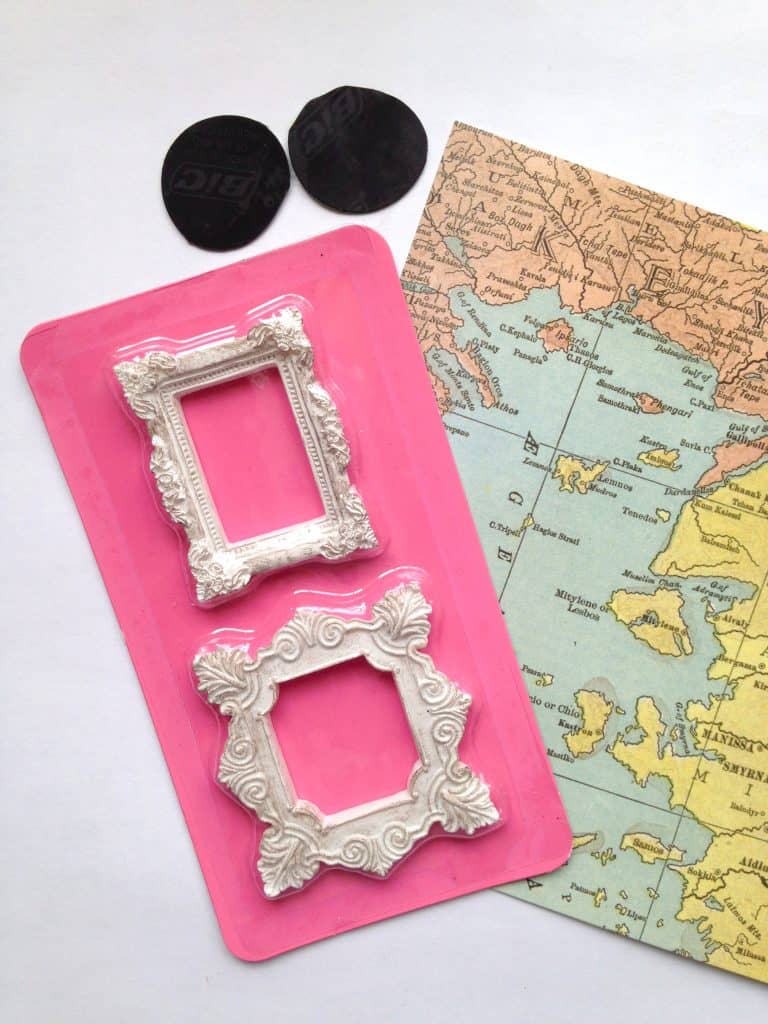
DIY Map Magnet Supplies needed:
Mini picture frames (sold at Michael’s in the dollar section, 2 for $1.50 or sometimes at the Dollar Tree)
Old map or map scrapbook paper
Scissors
Pencil
For our magnet strip we just used an old advertising magnet we had on hand. We simply cut it into a shape that would fit the frame, but you can also purchase a roll of magnet tape.
DIY Map Magnet Directions:
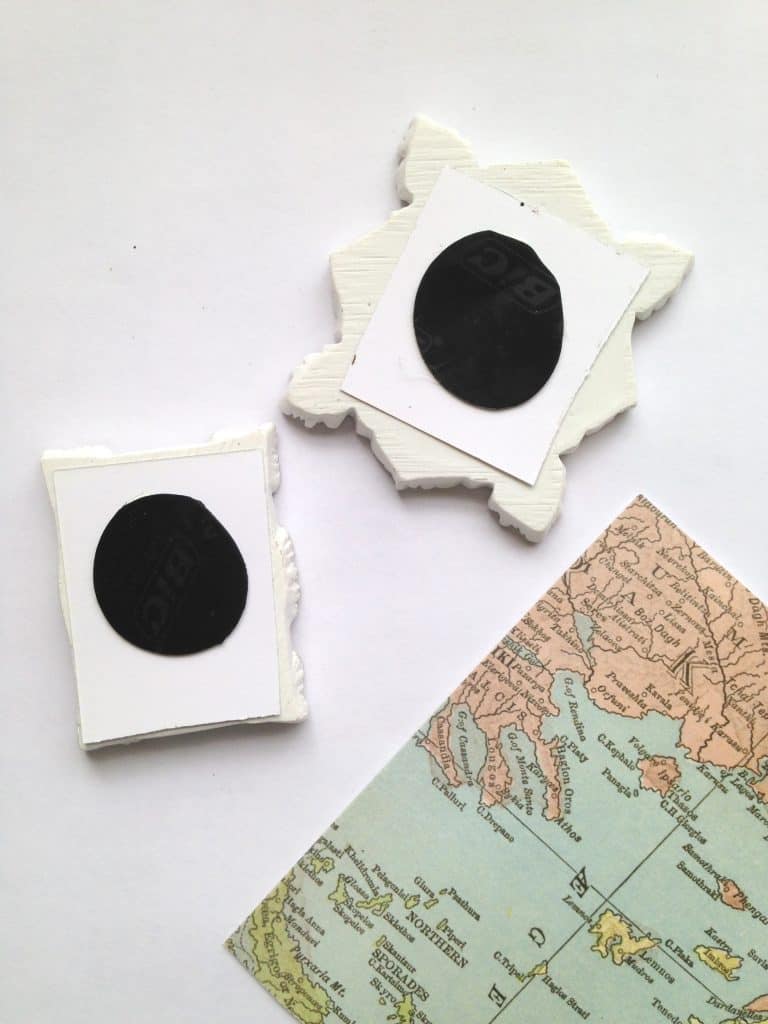
1. Begin by placing the frame on top of the map paper. Use your pencil to trace around it.
2. Cut out the map using the pencil lining as your stencil.
3. Apply some glue to the back of the frames and press the paper to it. Hold in place until secure and dry.
4. Once the paper is in place, add a generous amount of glue to the magnet strip. Press it to the back of the paper. Hold in place again until secure.
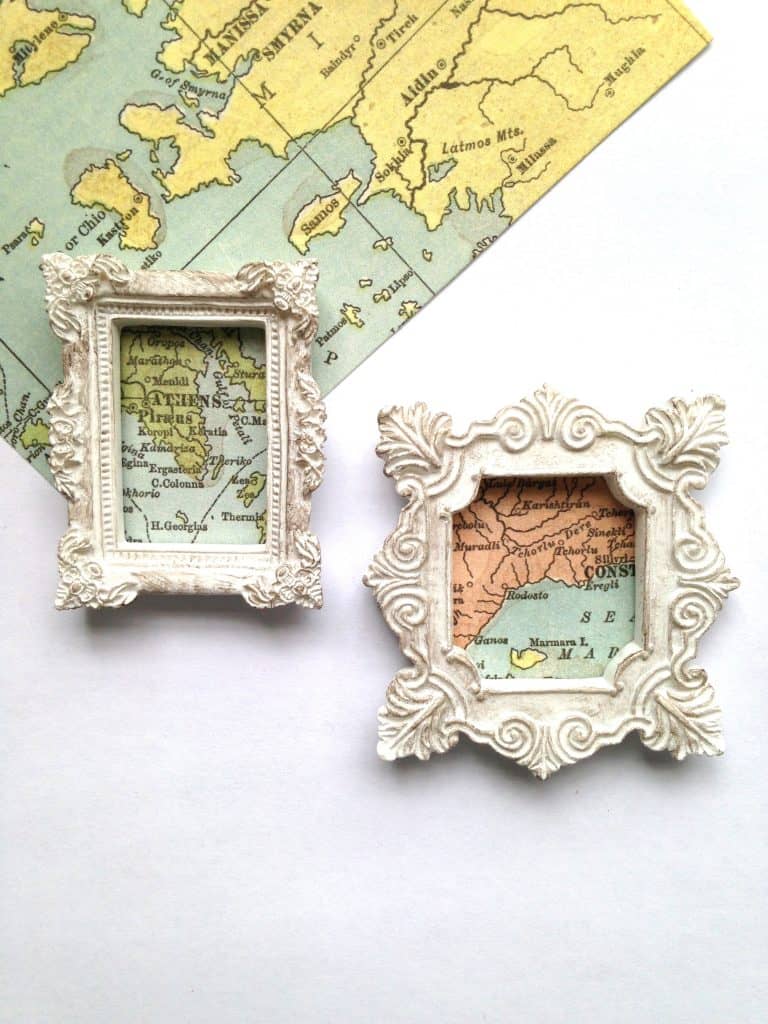
Your miniature map magnet is now ready to be enjoyed. It looks great on the fridge, in your office, or even in your homeschooling space. Gather your supplies and give it a try!
Other DIY Travel Posts:
 |
 |