Back to School Apple Cookies Recipe Tutorial
This post may contain affiliate links, view our disclosure policy for details.
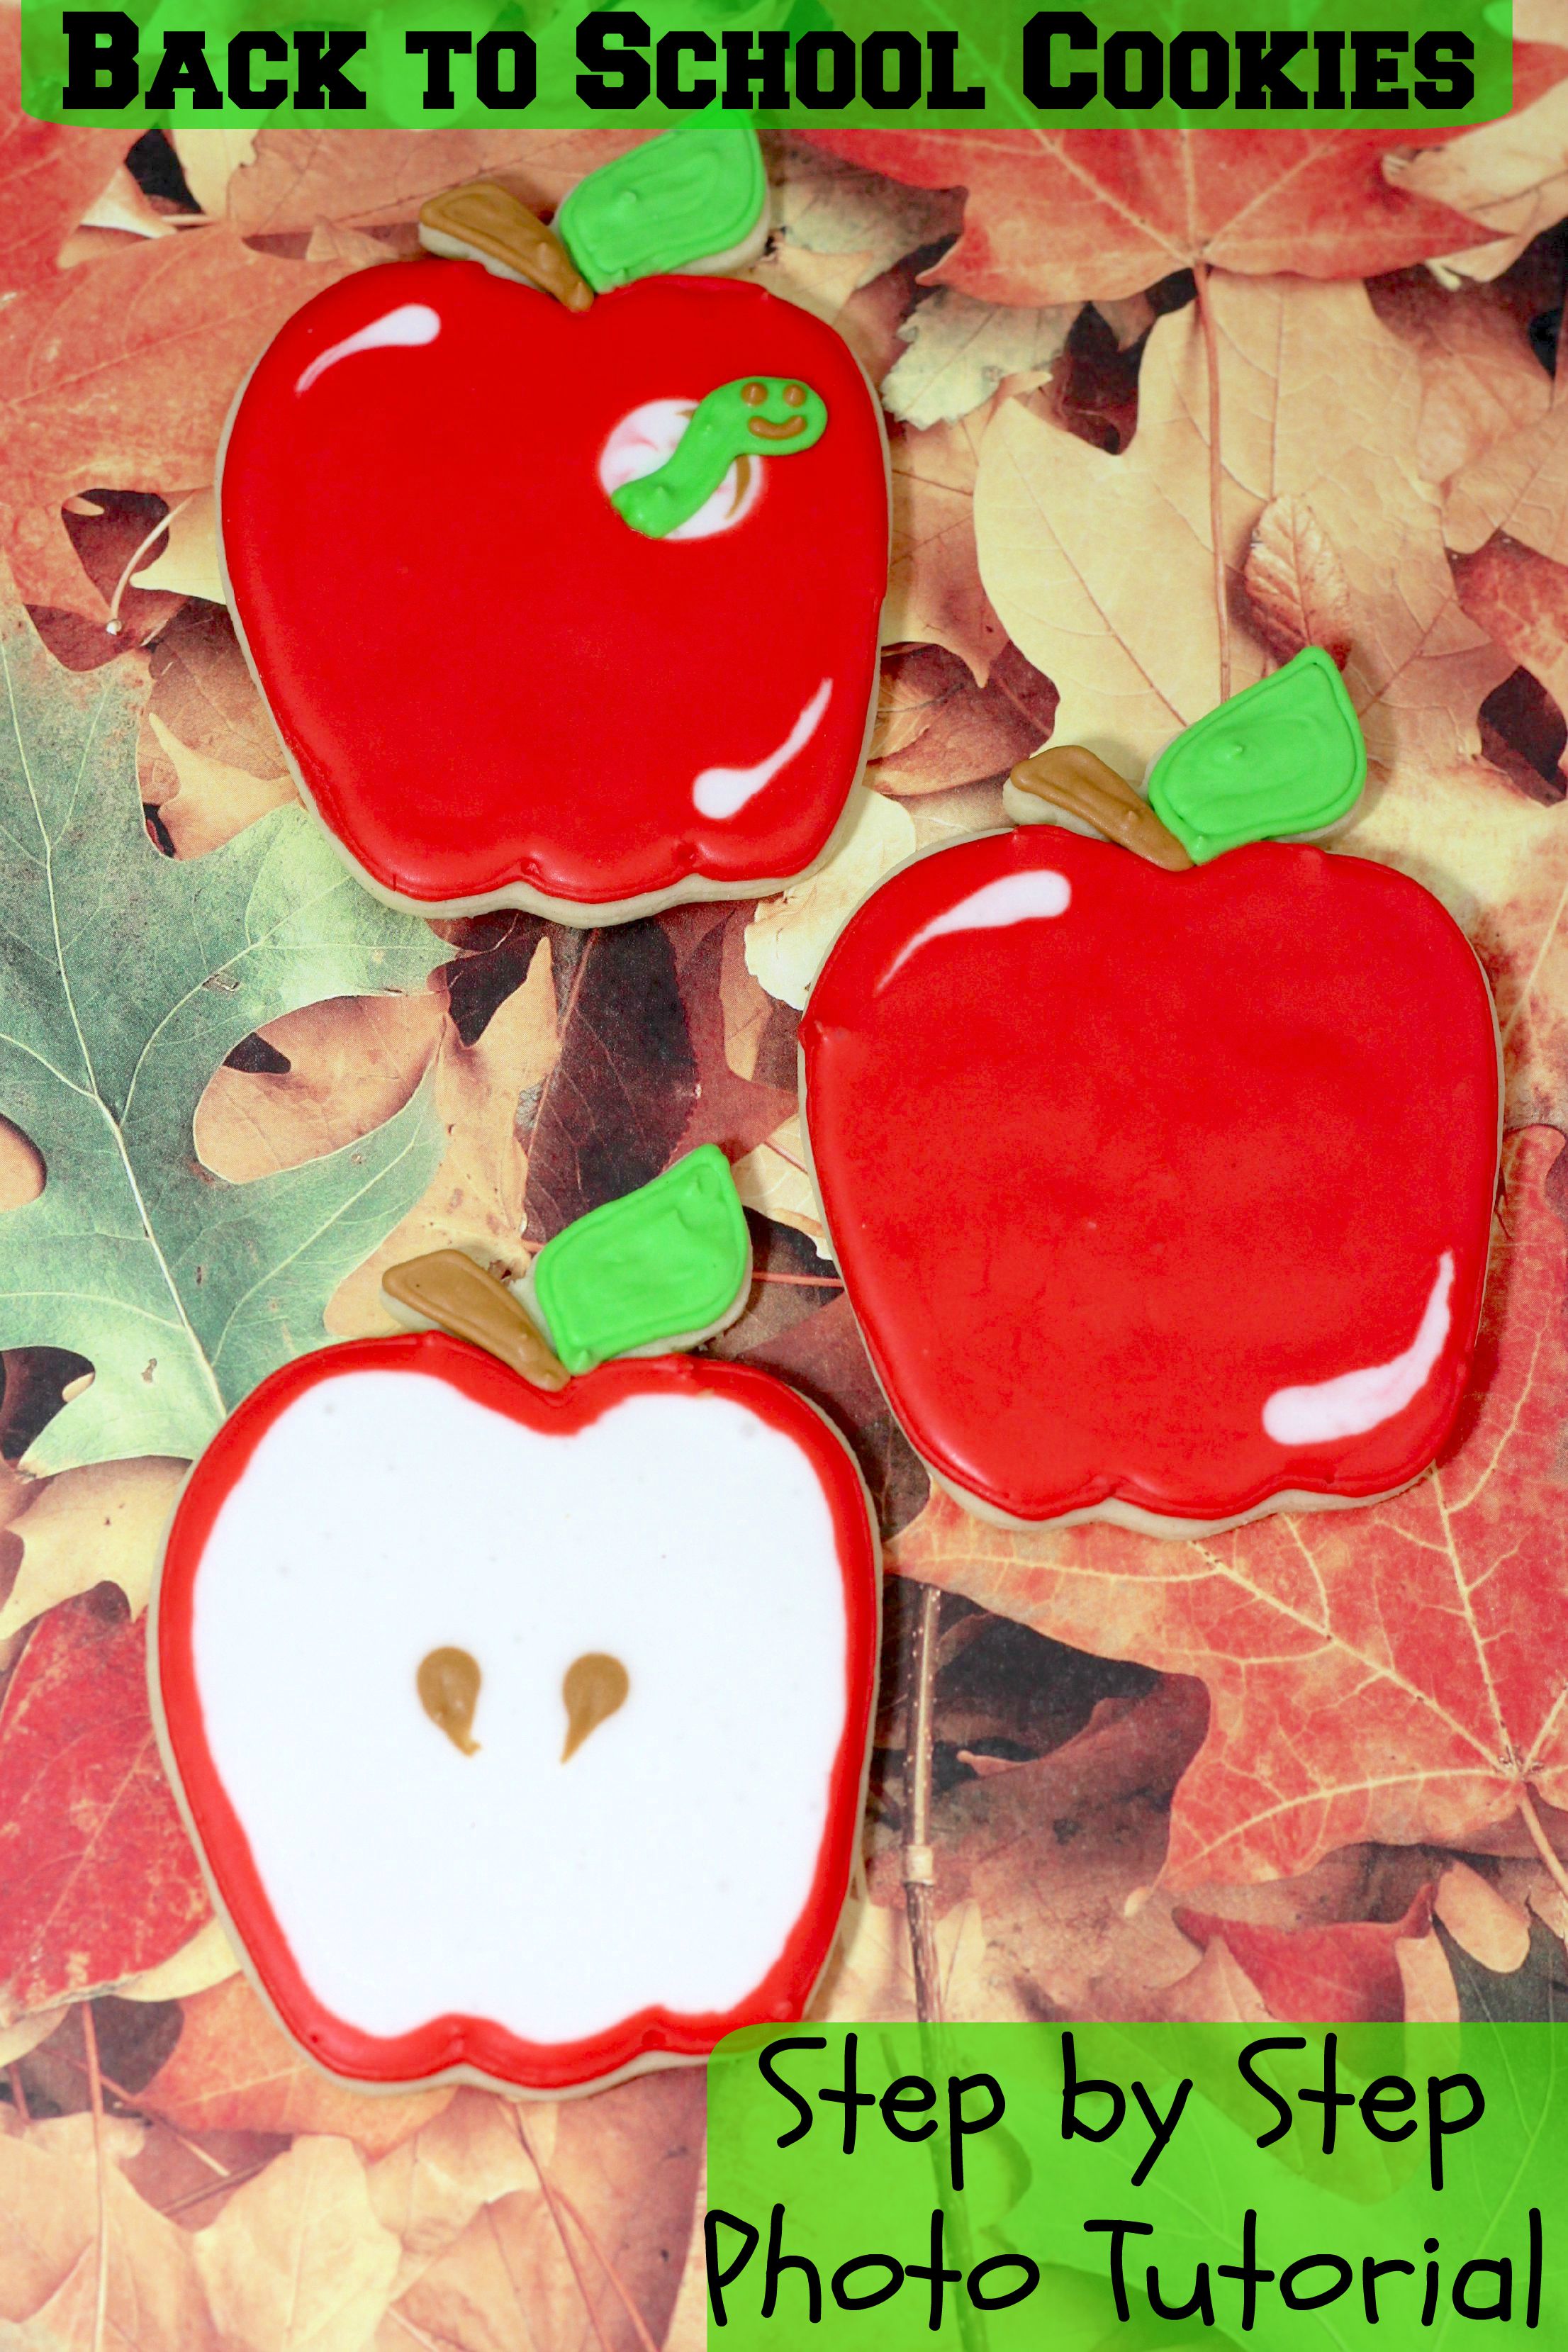
Back to School Apple Cookies recipe – this one is SO fun for the back to school season and the recipe is pretty simple to make! Below we’ve included our recipe (great for baking with your kids!) and a step by step instruction on how to decorate each of the above apples!
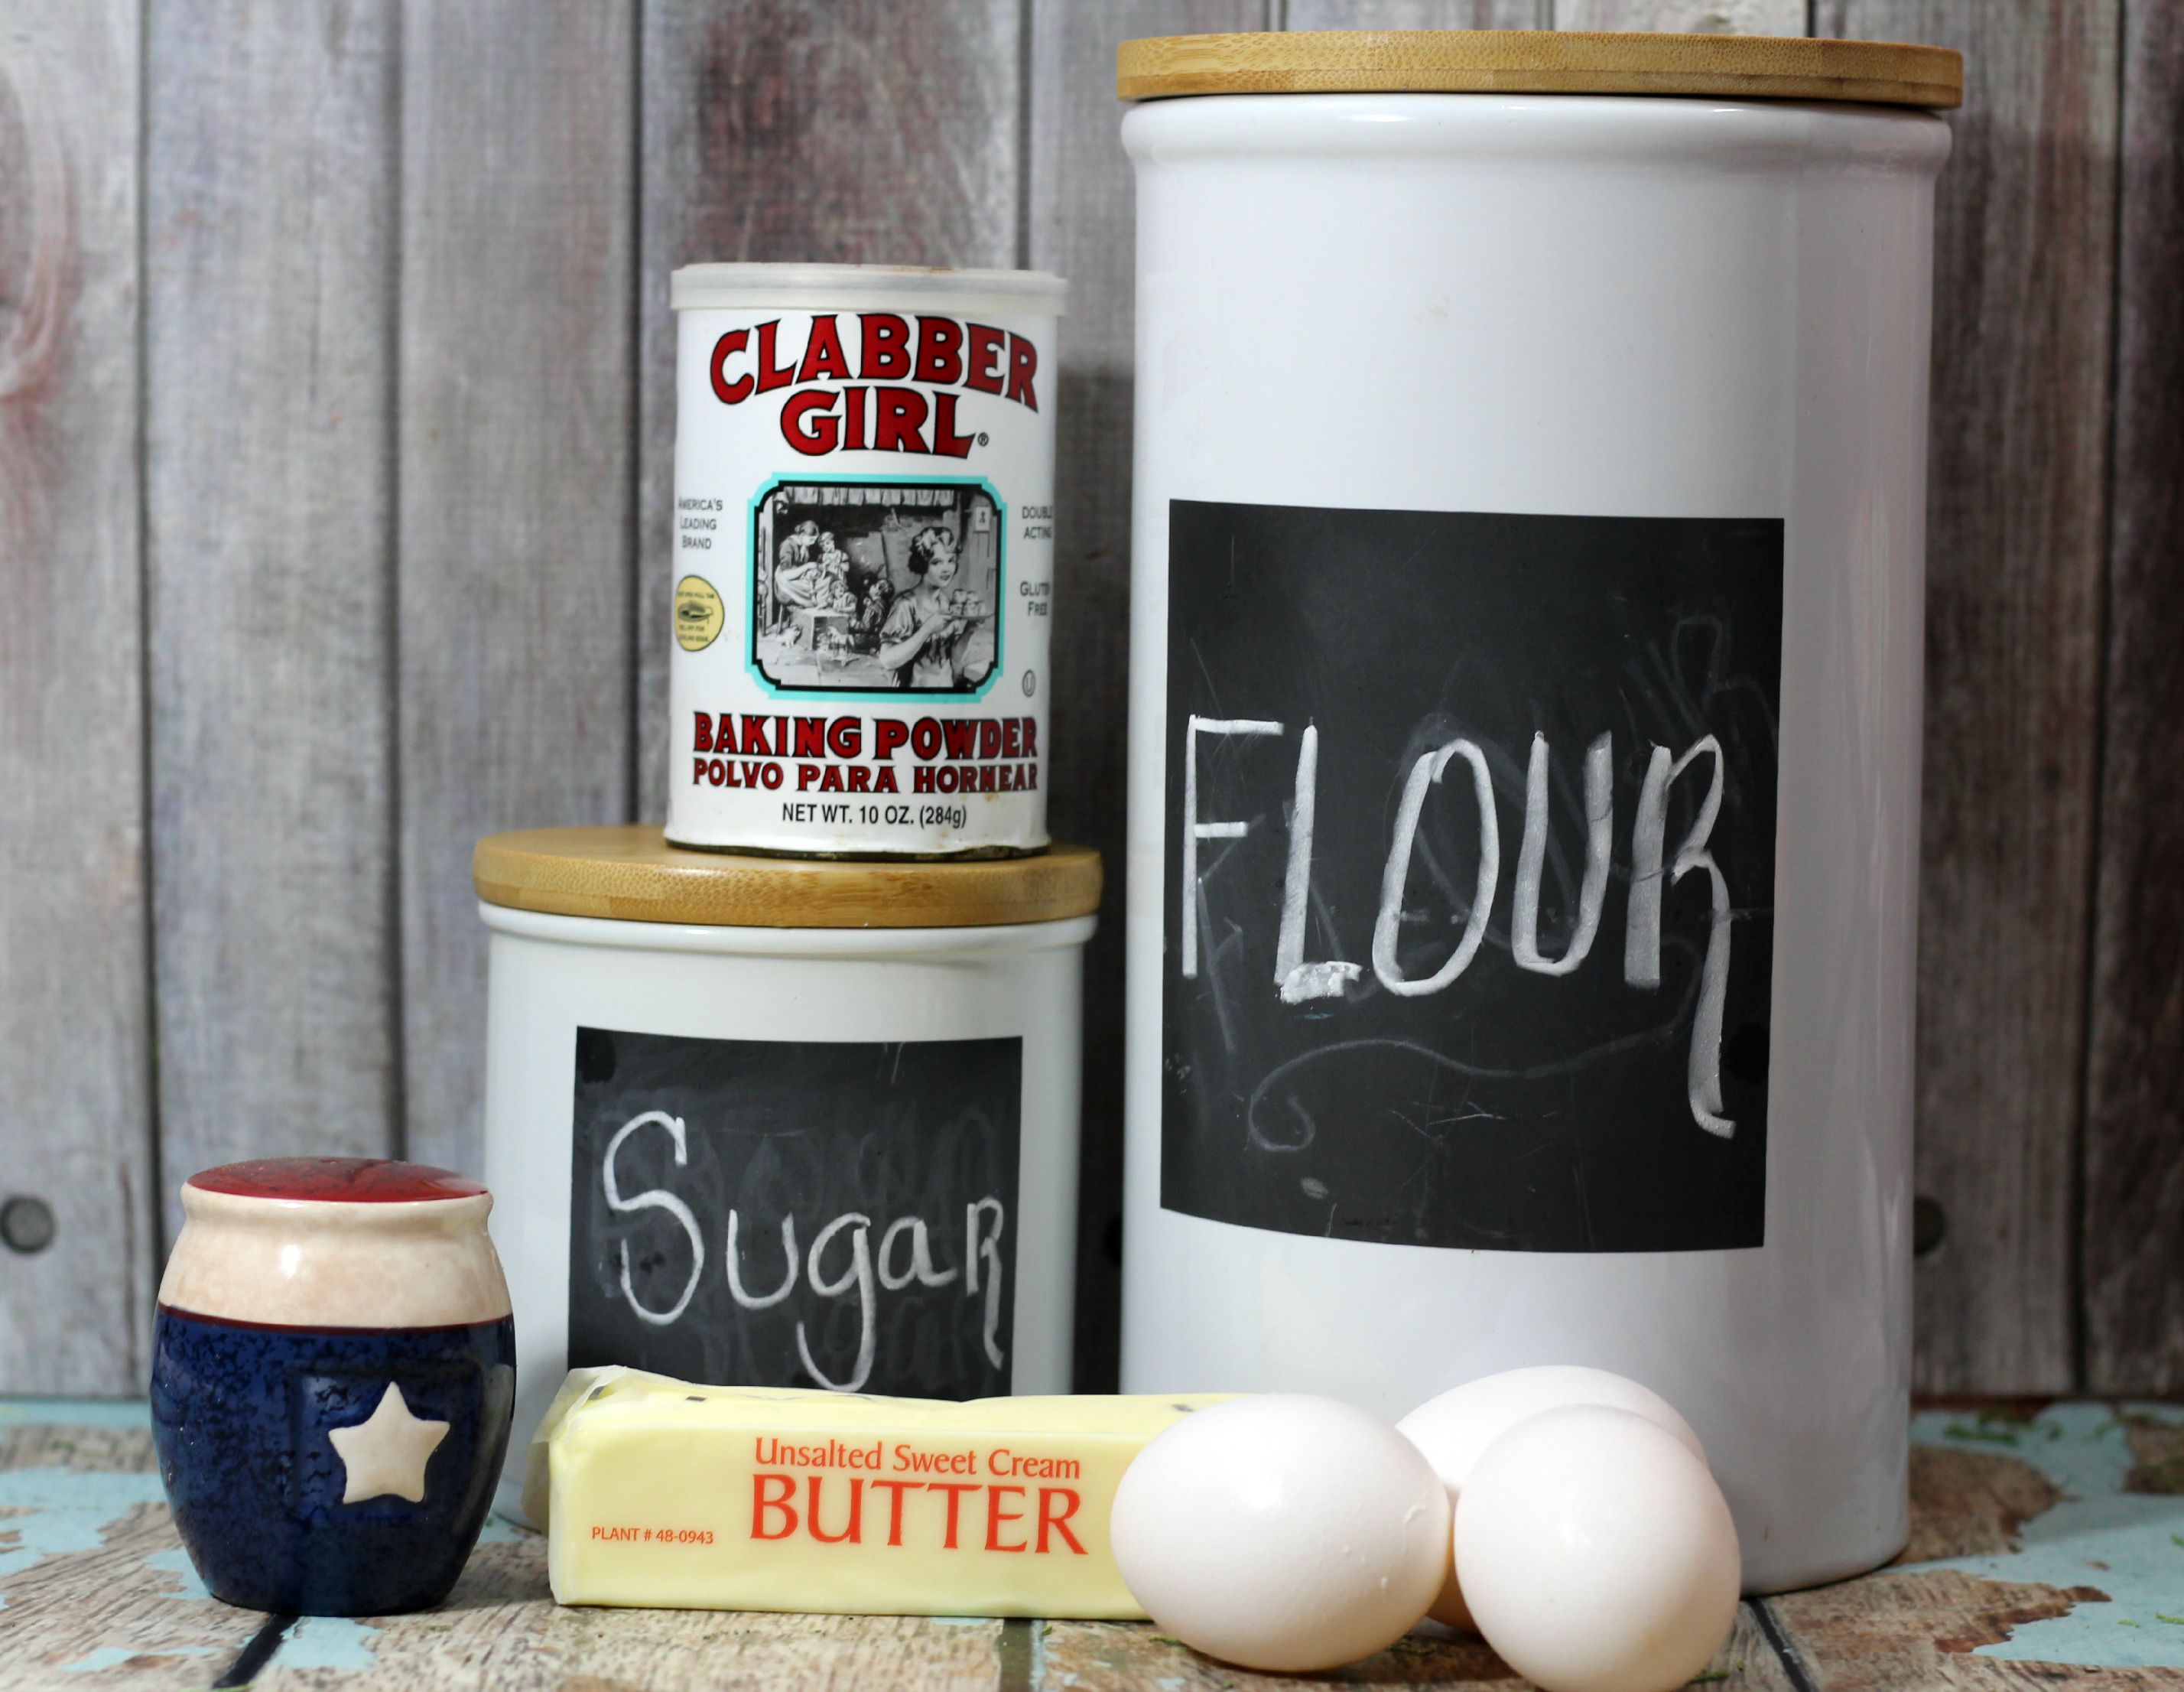
Cookie Ingredients:
5 C flour
2 tsp baking powder
1 tsp salt
1 1/2 C soft unsalted butter
2 C granulated sugar
4 eggs
Cookie Directions:
– Cream the soft butter with the sugar until the combination is smooth not grainy to the touch in a mixing bowl.
-Add all 4 eggs at one time…Continue to mix. -Add the vanilla.. Continue mixing.
-Sift the four, baking powder, and salt together.
-Add the dry mixture to the wet mixture.
-Continue mixing to make sure all ingredients are thoroughly blended.
-Make the dough into a ball, wrap it in cling wrap completely covering the entire dough ball.
-Put in the refrigerator for about 6 hours or overnight. Check to see if the dough is firm.
-Preheat oven to 325 degrees.
-Pull the cookie dough out of the refrigerator and sit it out to soften up a bit.
– Put flour out on the wood cutting board, rub flour on the rolling pin, and work some flour into the batter.
-Roll the dough out on the cutting board and using your APPLE cookie cutter begin to make your cookies.
-Line the cookie sheet with parchment paper.
-Using a metal spatula move the cut cookie to the parchment lined cookie sheet.
-Bake at 325 degrees for 8 minutes. Check to see if the cookie are thoroughly baked.
-Take the cookies off of the cookie sheet and put on a wire rack to cool completely. (About 10 minutes).
Royal Icing:
Icing Ingredients:
2 egg whites
1 C powder sugar
1/2 tsp cream of tartar
Red, brown, green gel food coloring
(For these cookies you may have to make two bowls of icing).
Icing Directions:
-Combine all ingredients in a mixing bowl mixing on medium speed for 4 minutes. (except your food coloring)
-If icing is not stiff enough add 1/4 C powder sugar.
– Leave icing in large bowl. Take out 4 bowls, put 1/4 C of icing in three bowl and the rest of the icing in the fourth bowl.
-Bowl #1 remains white, bowl #2 , add several drops of brown gel food coloring stirring well until all of the color is blended. Bowl #3, add several drops of green gel food coloring stirring well until all of the color is blended.
-As for the largest amount of icing add several drops of red gel food coloring in the bowl of icing … stir well to mix the color. (Red is a difficult color to get so you may have to continue to add the food coloring to get the bright deep red color. That is why we use a gel food color as it doesn’t water down the icing.)
-Spoon each of the icings into individual frosting bags with a #5 tips…. twist the open end of the bag to push the icing to the tip.
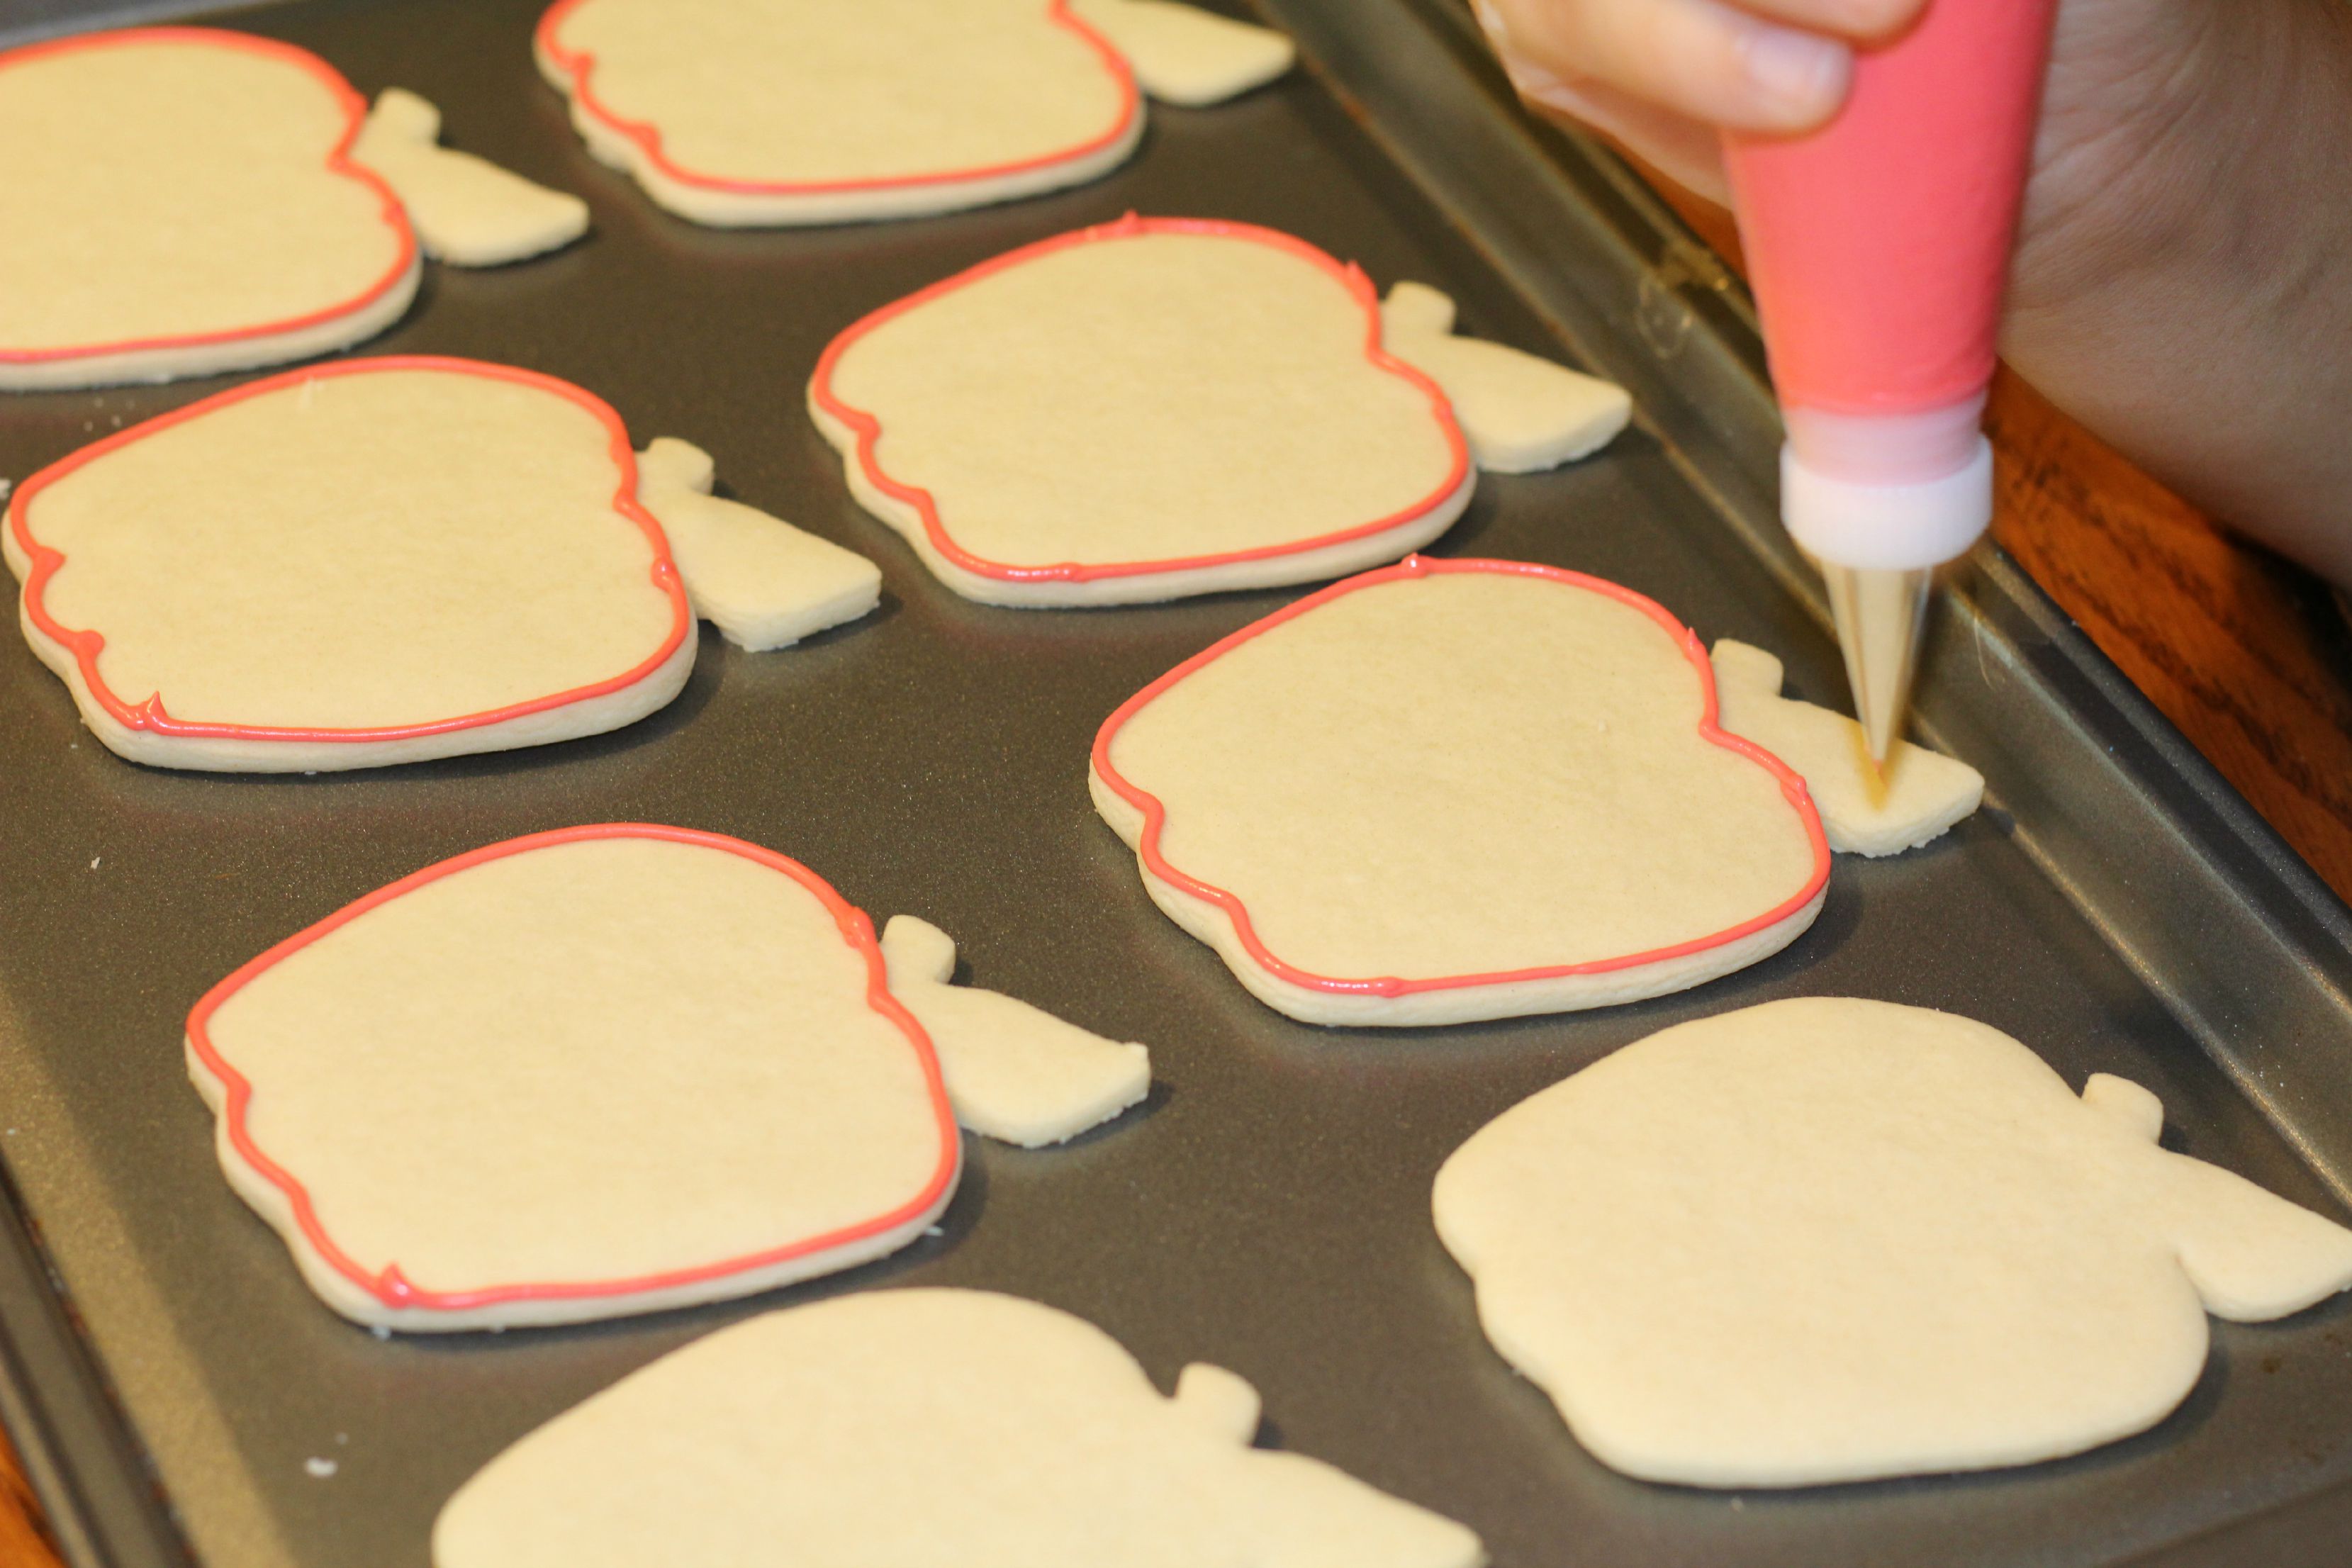
Whole Red Apple:
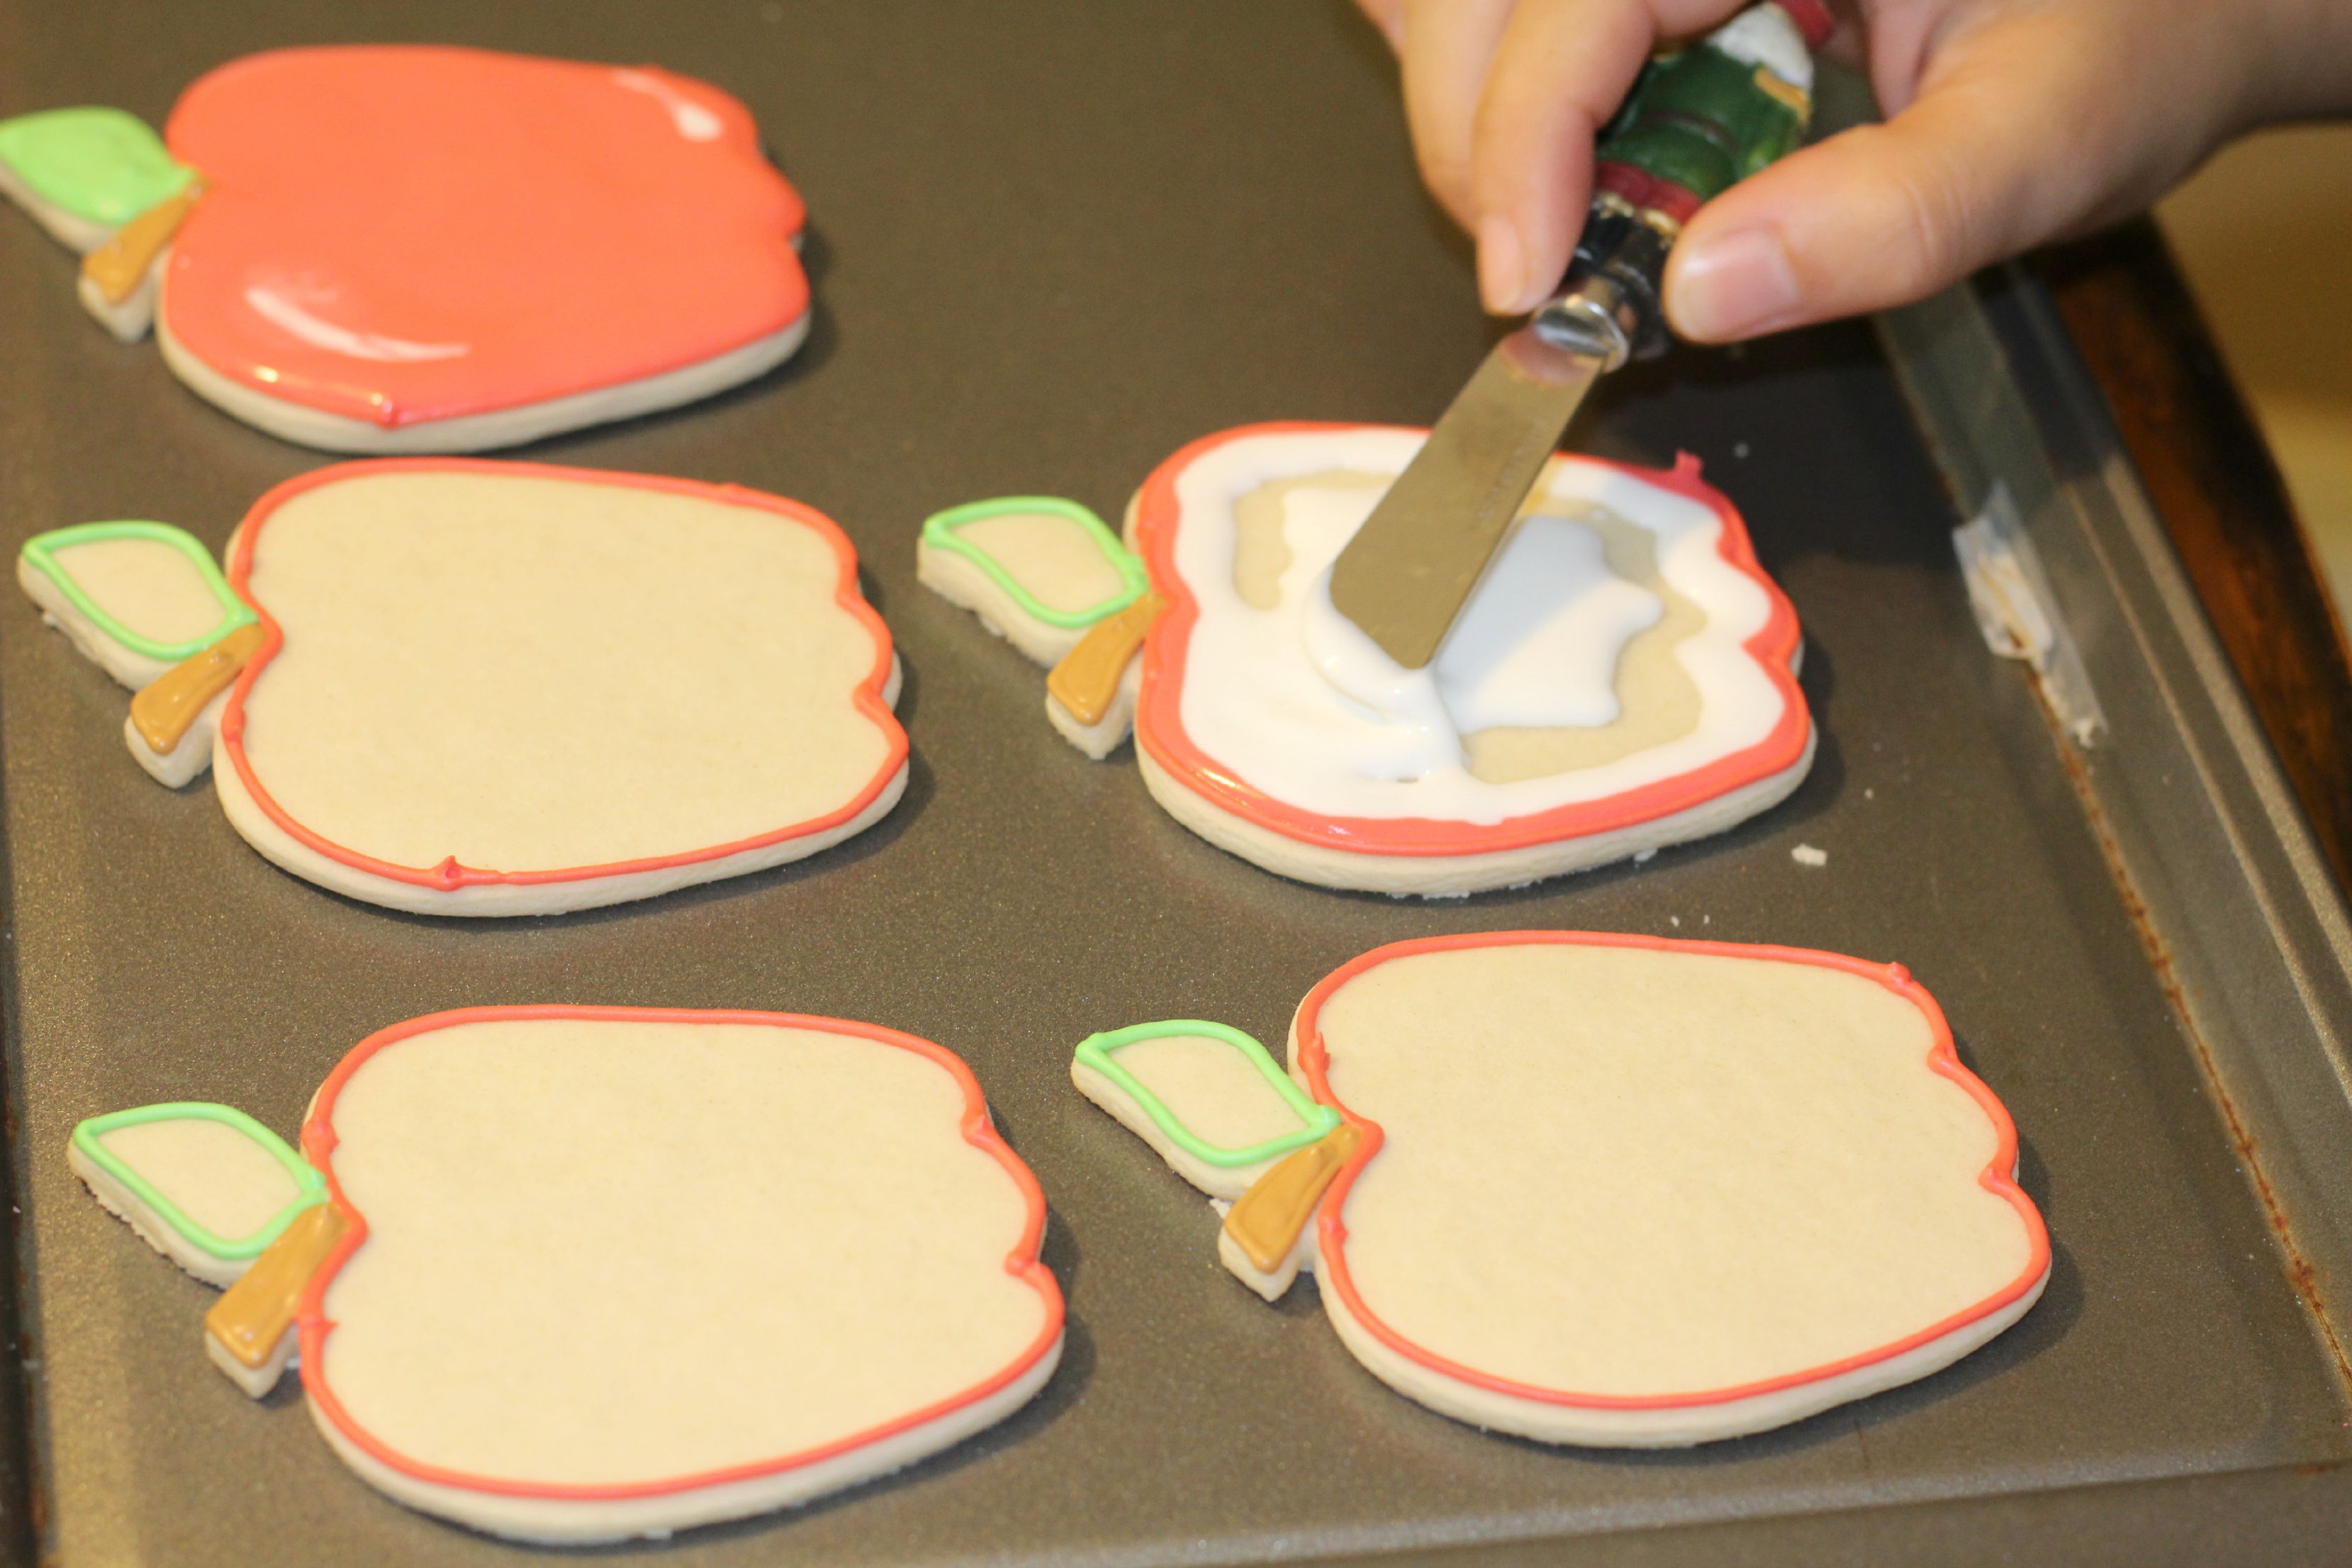
-First step for each of the completely red apple cookies – outline it in red except for the stem and leaf.
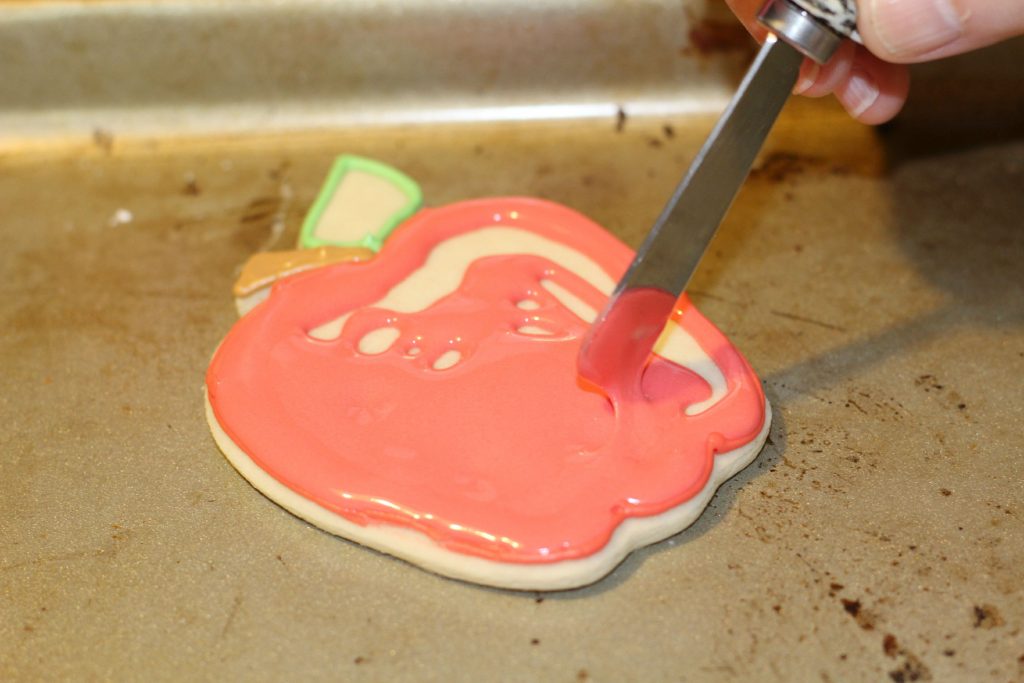
-Allow the red outline at least 30 seconds to dry before filling the body of the cookie in with the other red icing*. ( After outlining all of the apple cookies you can push the remaining icing into a bowl and add the 1 tsp of water and mix well to get the right consistency .Using a butter knife to spread it from the outlined part inwards to the center.
-Immediately, before the red icing dries, add a small drop of white icing and use a toothpick to drag the white icing up the side of the apple. (Following the example.)
-Outline the stem with brown icing on all of the same apple cookies, fill them in with the thinner icing.
-Outline the green leaf with the green icing on all of the same apple cookies, fill them in with the thinner icing.
-Set these aside and allow to completely dry about 4 hours.
Apple with white apple flesh and brown seeds:
-Outline the apple with the red icing leaving the stem and leaf untouched. Allow 30 seconds for the red outline to dry.
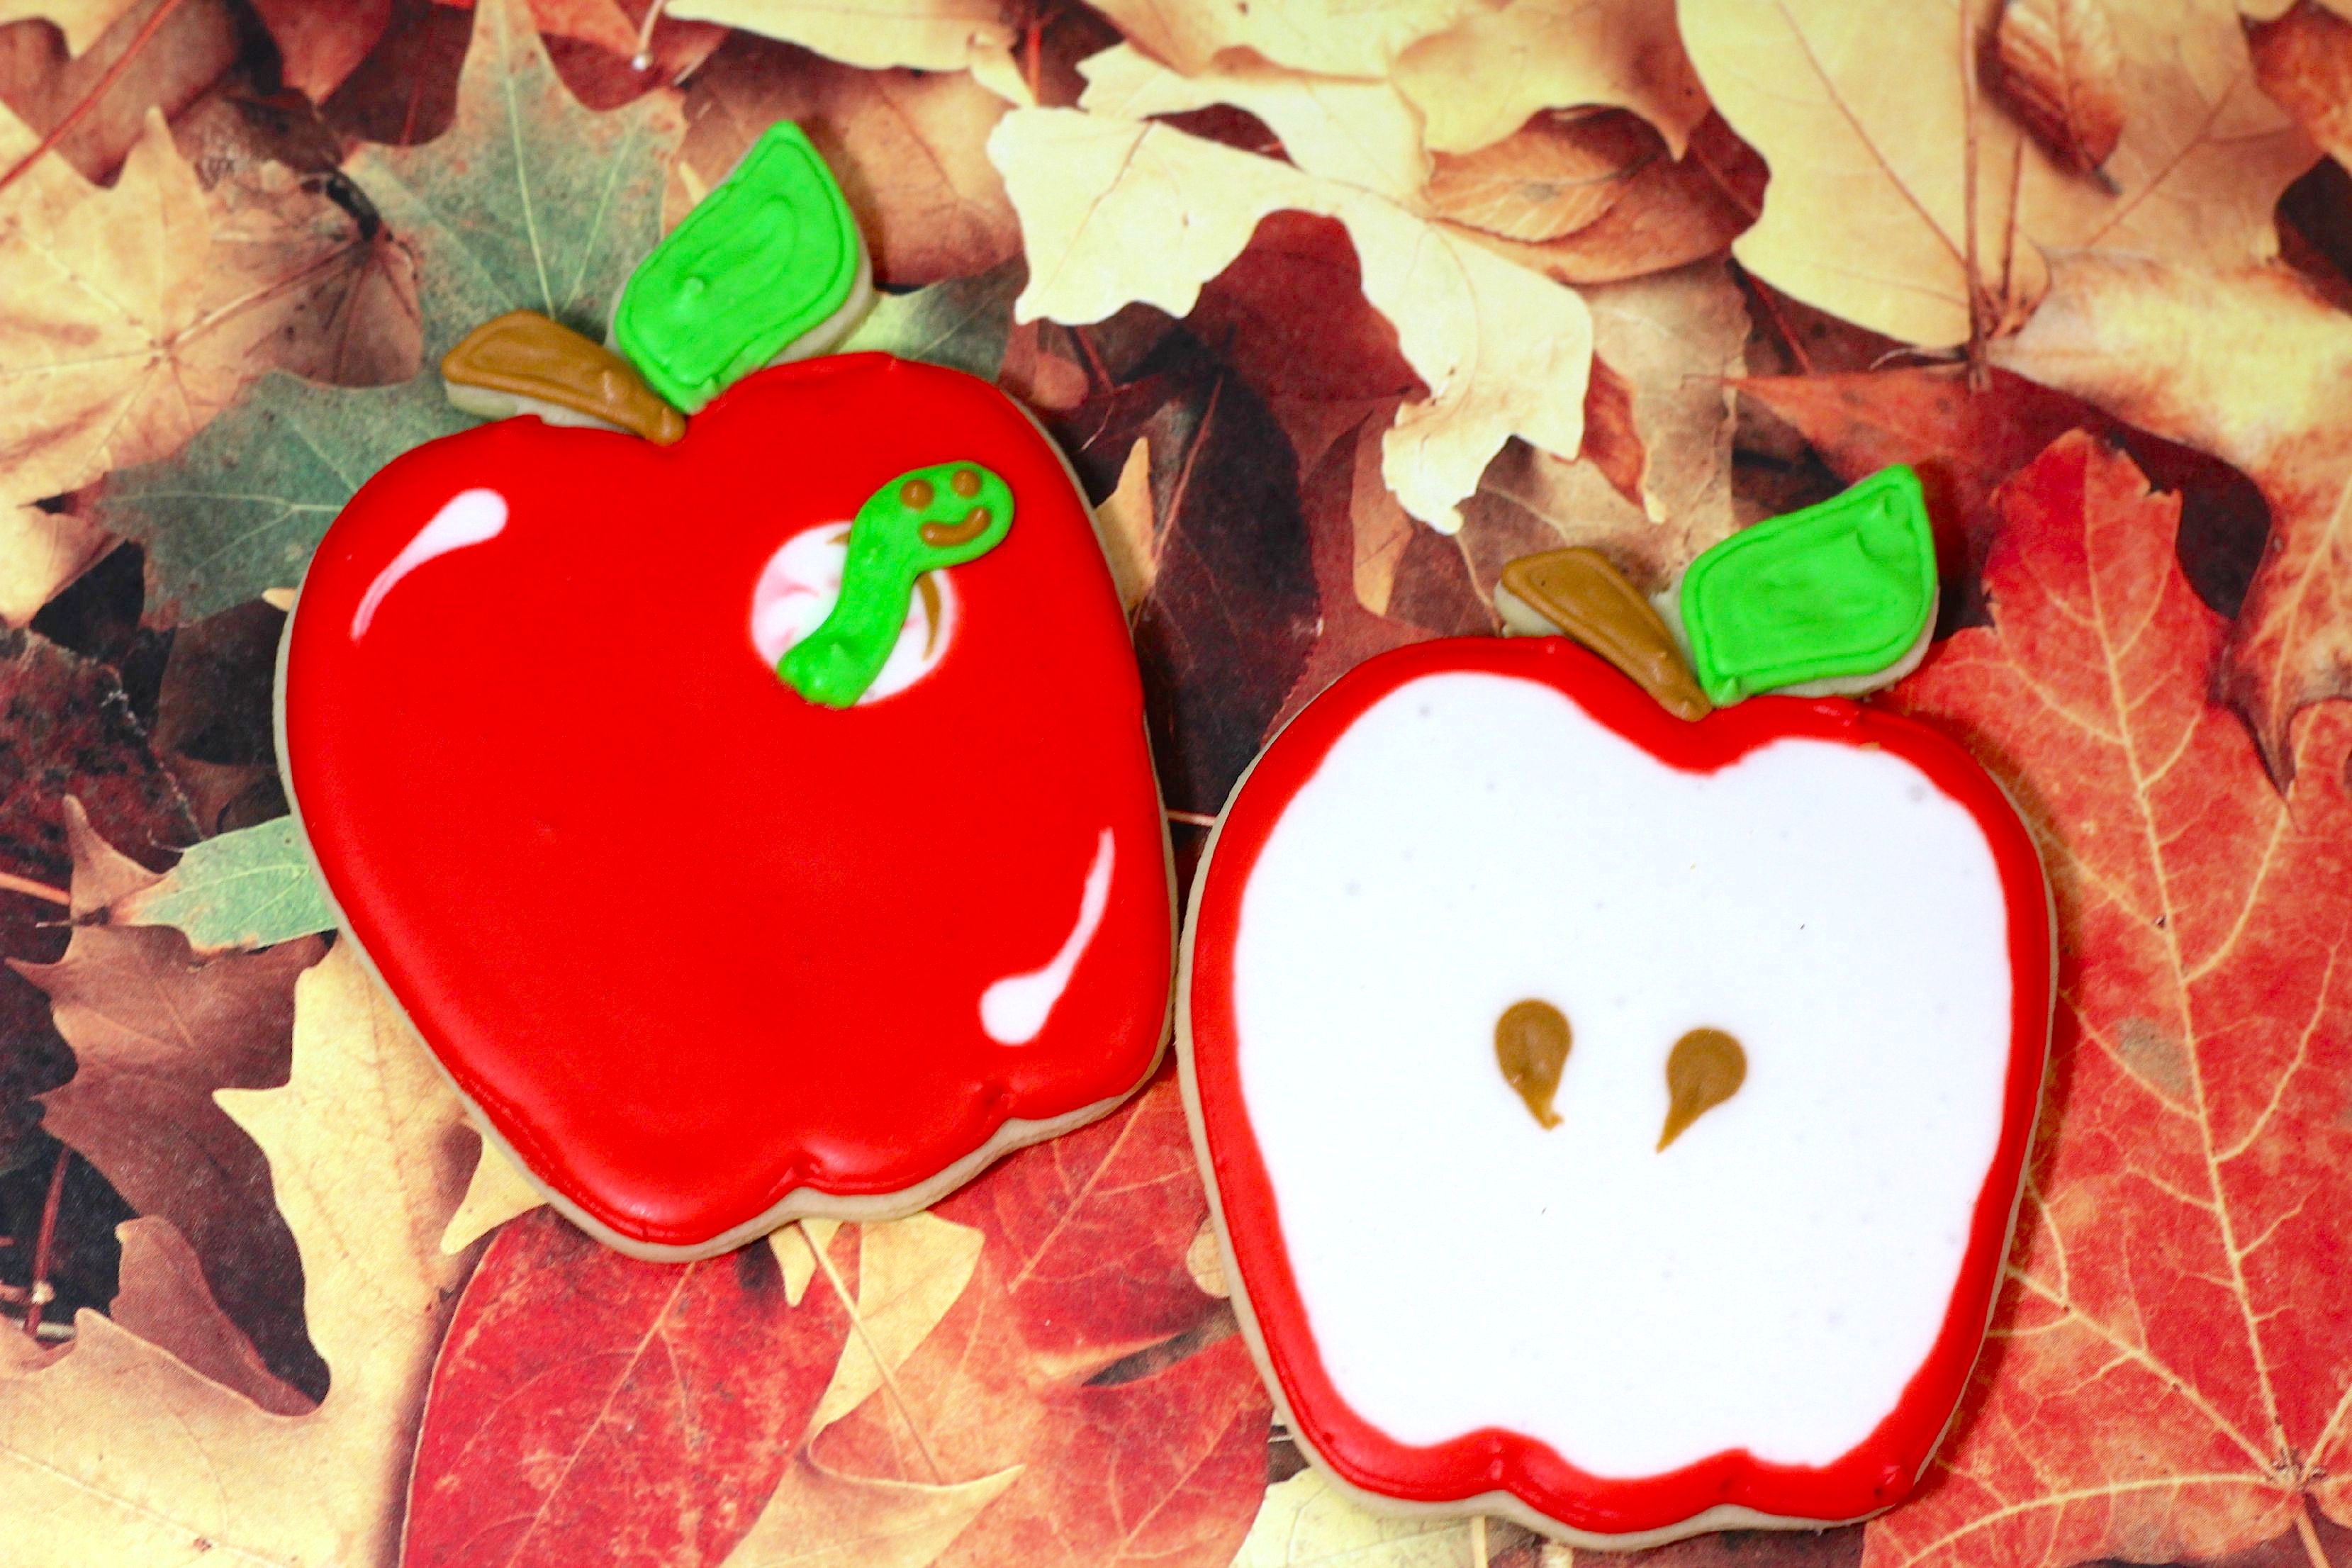
-Outline the apple flesh with white icing. Thin out the icing as per the instructions above. Using a knife spread the icing around the flesh of the redapple. Immediately, before the white icing dries, add two small drops of brown icing for the apple seeds. Drag a little of the brown icing down to make the dot look like an apple seed.
-Complete the stem and leaf as per the instructions for the whole red apple.
-Allow to dry for 4 hours.
Red Apple with Worm:
-Follow the instructions on the first apple including the stem, leaf, and white spots on the apple.
-Add one small white round about the size of a dime, immediately drawing a thin brown line in the circle about a third of the way around the circle. Hand outline a green worm and fill it in. Allow to dry for 30 seconds and all the two eyes and a smile or mouth.
-Allow 4 hours for cookie to completely dry.
There you have it! Now you’re ready with this back to school apple cookies recipe to make plenty of your own delicious apple themed cookies! Make a couple batches to stick in the teacher’s lounge, near the secretaries desk, or treats for your child’s classroom parties!
Check out our other back to school recipes below!
Composition Notebook Rice Krispy Cake
ABC Notebook Sugar Cookies
Apple Themed Cupcakes
School Themed Little Debbie Brownies