DIY Thanksgiving Grateful Home Decor Banner Tutorial
This post may contain affiliate links, view our disclosure policy for details.
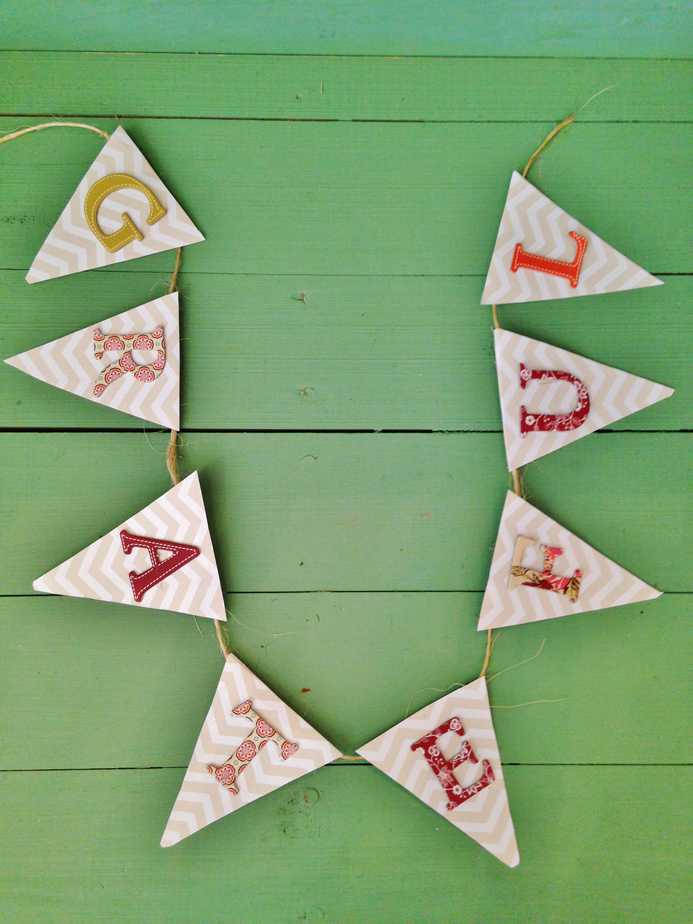
Banners are such a fun way to decorate your space whether at home or in your classroom. This DIY Thanksgiving themed “Grateful” Banner is no exception! This grateful banner is the perfect way to make your space ready for the Thanksgiving season, and not only is it easy to create but it’s inexpensive too. If you love the look of bunting banners you’ll enjoy making this!
Supplies Needed:
chip board letters
ribbon or twine
scrap book paper
glue
scissors
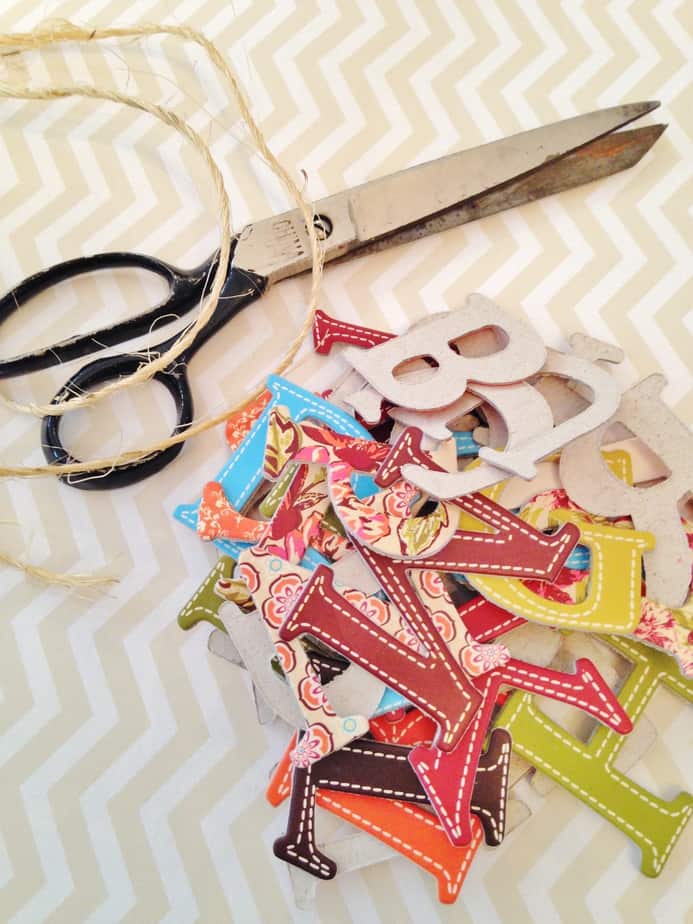
Everything you see here can be found at your local craft store. The chipboard letters we used are from Michael’s Craft store and run just $1.50 per bag. Our total cost for this banner was just a few dollars and we had plenty of supplies left over for future projects.
DIRECTIONS:
1. Begin by cutting out some small to medium sized triangles from your scrapbook paper. You will want them uniform and even so use your first triangle to model the rest.
2. Add some glue to the back of each triangle and press the ribbon onto it. Make sure to space the triangles out as you go allowing about a half inch between each one.
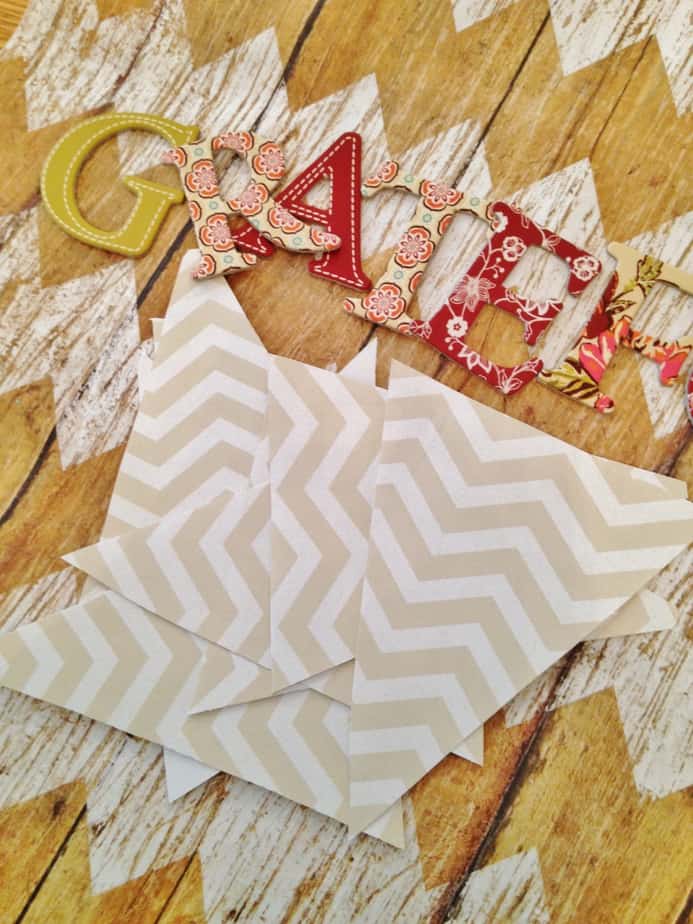
3. Once the triangles are in place and dry you can add your chipboard letters. Just add a dab of glue and press the letters onto the triangles.
4. Allow plenty of time for the letters to dry. Once it is dry your banner is ready to be displayed!
Banners look great displayed hanging anywhere! You can hang it across a fireplace mantel if you have one, across your dry erase board in the classroom, or across a doorway! All you need it a little tape or push pins to tack up the ends of the ribbon! Gather your supplies and give this easy and beautiful grateful banner a try! Thanksgiving will be here before you know it!