How to Verify your Pinterest Account on WordPress
This post may contain affiliate links, view our disclosure policy for details.
Recently Pinterest enable a verification process on their site so that you could verify your Pinterest account, but this option was not yet available to many of us bloggers. NOW it is!! And it’s simple to do! Below I have included screenshots of the process of how to verify your Pinterest account on WordPress.
1. First click “Settings”.
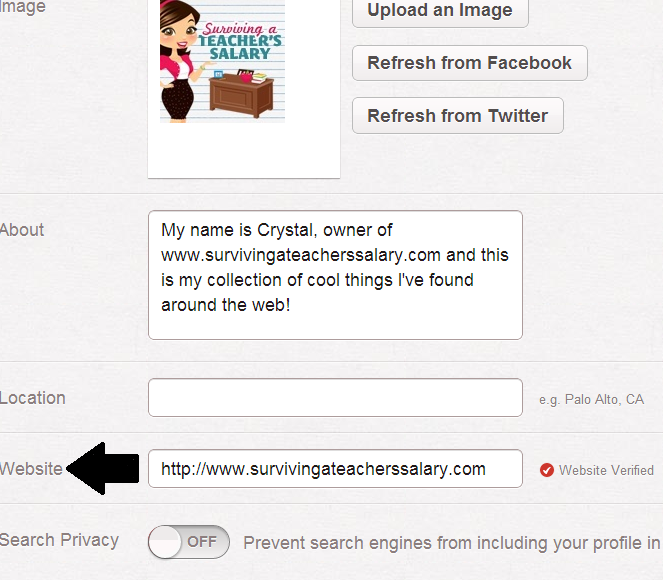
2. Scroll down to the bottom of the page where you see “Website”. You will see a “Verify” button to click. (below is a screenshot of what it will look like once it is verified)
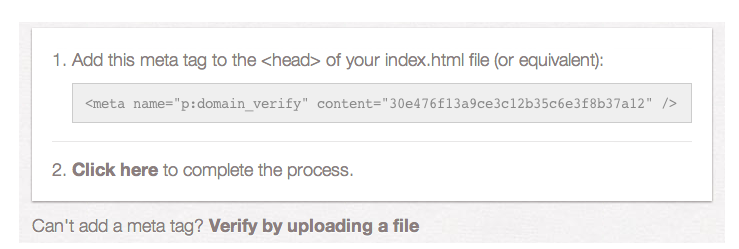
3. It will show you how to upload a file BUT now there is also a way to “Add a meta tag”. You’ll want to choose the “add a meta tag” option!
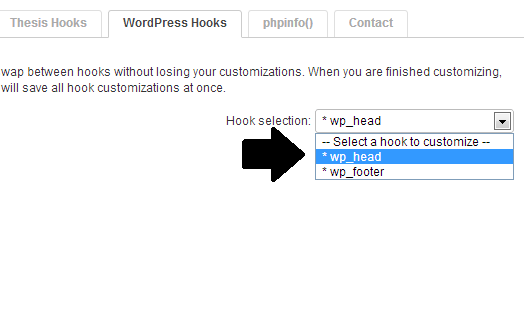
4. Copy the meta tag description on Pinterest and then head over to the WordPress Hooks part of your dashboard. (or if you’re techy enough you can add it between <head> and </head> in your template). Choose the *wp_head option and paste your meta tag anywhere in the box provided and save.
5. When you’ve added the meta tag onto your site just go back to your Pinterest account and click “VERIFY”. It will let you know if it’s verified correctly!
That’s it! Feel free to pin this or share it with others!


It worked for me but I don’t have a “hooks” section so I did it this way:
Dashboard>Appearance>Editor>Header (header.php)
Then I just added it wherever in that section and saved it. Went back to Pinterest and verified.
Just in case anybody else doesn’t have the “hooks” section either.
Thanks it worked!