

Paper Mache Penguin Project for Kids & Classrooms
This post may contain affiliate links, view our disclosure policy for details.
A special thanks to my son’s kindergarten teacher who did this project with their class!
Many of you know how to do paper mache and have done your own paper mache projects. There are two different recipes you can try when creating your own paper mache “gloop” depending on what you want the outcome to be! Don’t want a mess? Let your kids use white, black, and orange duct tape instead!
RECIPE #1 – Mix 75% white glue and 25% water. (more sticky, dries quicker, less stiff/hard when dried)
RECIPE #2 – Mix 1/2 tsp. salt, and equal parts water and flour. The ratio isn’t exact – just mix it together till it’s liquidy. Chunks are OK – just swipe them off of the newspaper. (messier, gloppy, takes longer to dry, much harder when dried)

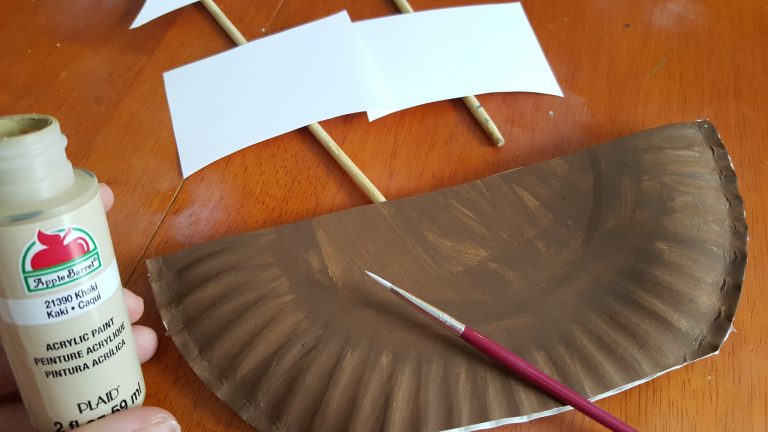
Blow up a balloon and tie it off. Then dip strips of newspaper into your paper mache mix and wrap it around the balloon! Let it dry. Make sure all of the balloon is covered except for the tip where you tie the balloon up!
After it has dried for about 2 days you can pop the balloon! Paint the entire “balloon” paper mache project black and let dry. Then paint a large white belly in the front! Glue on an orange paper nose and google eyes.

To make the feet sturdy enough for your penguin to stand use a heavy cardboard or foam board painted orange (or covered with construction paper). Voila! The cutest little penguin! Print our our (FREE!) Penguin themed Letter Template and gift tags too!
Want to create some more paper mache animals? Check out the books below!
Balloon keeps collapsing … what am I doing wrong?
Did you inflate the balloon and tie it off? It shouldn’t collapse unless you have a hole in it! Make sure to put 2 coats (or more!) of paper mache on and let it completely dry!