

How to Make an Indian Costume with a Paper Bag
This post may contain affiliate links, view our disclosure policy for details.
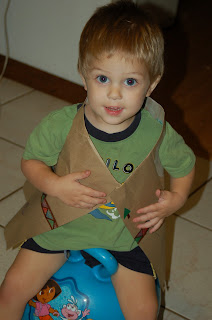
My little guy dressed up as a pilgrim last week for school and this week he is going to school dressed up as an Indian. (No, I’m not politically correct. We have Cherokee Indian in our immediate family line and so no, it does not offend me to hear the word “Indian” that we grew up saying!) Making an Indian headband is easy with construction paper and feathers, but making an Indian costume is a little bit trickier. BUT it doesn’t have to be expensive or even take a terribly long time!! I had my two year old help me make his costume.
What You’ll Need:
paper bag
scissors
tape
crayons, markers, paint or other art supplies to decorate with
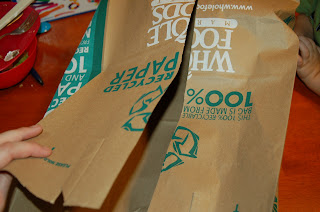
Open out your paper bag and cut straight down the middle of ONE side from the top of the bag to the bottom of the bag. I cut my bag where the two sides meet and are glued together.
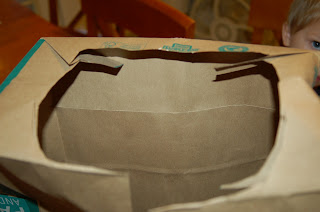
Once you’ve cut your line down the middle of the bag, and you’ve reached the bottom of the bag with your scissors, keep cutting so that a large hole is cut out of the bottom of the bag. This will be the hole for your child to stick his/her head through so make it large enough for their head! Try to leave some of the bottom uncut, however, because you don’t want it to slip off of their shoulders!

Next comes the fun part!! Let the kids decorate their paper bag costumes!! Since we were on a bit of a time crunch we didn’t have time to let paint dry. We used markers and crayons. You can also let your kids paint their costumes, use glitter, stickers, feathers, or even glue on pom poms or decorative craft foam strips!! Let them get creative and decorate however they want to! Here are a few suggestions I added to my son’s costume:

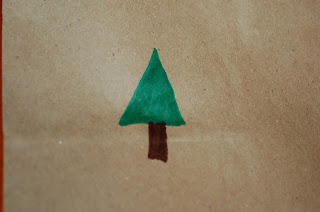
You can add a tree with a simple green triangle attached to a brown rectangle. Or make a lot of swirls like you see above.


You can also draw two parallel straight lines all the way across your costume then draw triangles inside. You can color them in patterns as desired! This is my favorite way to liven up an Indian costume! After my son and I decorated his costume we tried it on. Since he is SO tiny the paper bag costume was MUCH larger than he was so I had to improvise quite a bit!!
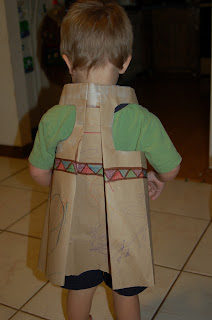
I had to fold the backside in a bit so that it wouldn’t fall off of him. Instead of just cutting the back out and taping it I decided to fold it so it made more of a cape look! Pretty cool huh? This took the longest since I had to make him keep trying it on!! If your kids are older you really shouldn’t have a problem with the size!

Another suggestion I have to make your child’s paper bag Indian costume sturdier is to place strips of tape around the armholes so they don’t rip as the child puts the costume on and takes it off. It adds some extra reinforcement and will make your costume last longer. If you are trying to make it aesthetically pleasing only tape on the inside of the costume where it won’t be seen.
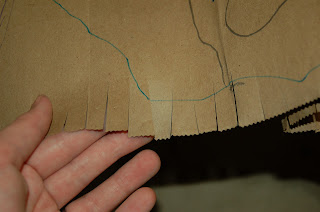
The very last finishing touch for our Indian costume was to cut small fringes into the bottom of the jacket.

Here is what our paper bag Indian costume looks like all laid out! It is simple and took less than 30 minutes to completely make and decorate but will provide hours of fun!!
This is such a great idea! How fun! I should try this with my Maggie!
You now have a new follower, Can you please Follow back?
http://christy1986p.blogspot.com/
Tweet with me on Twitter to.
http://twitter.com/#!/CHRISTY1986P
Become a fan on my Christina's voice Fan page.
http://www.facebook.com/#!/pages/Christinas-Voice/133218916750446
Thanks have a great day!
That is such a cute idea, love it!!
I love this idea! Fun and eco-friendly!